
Planting
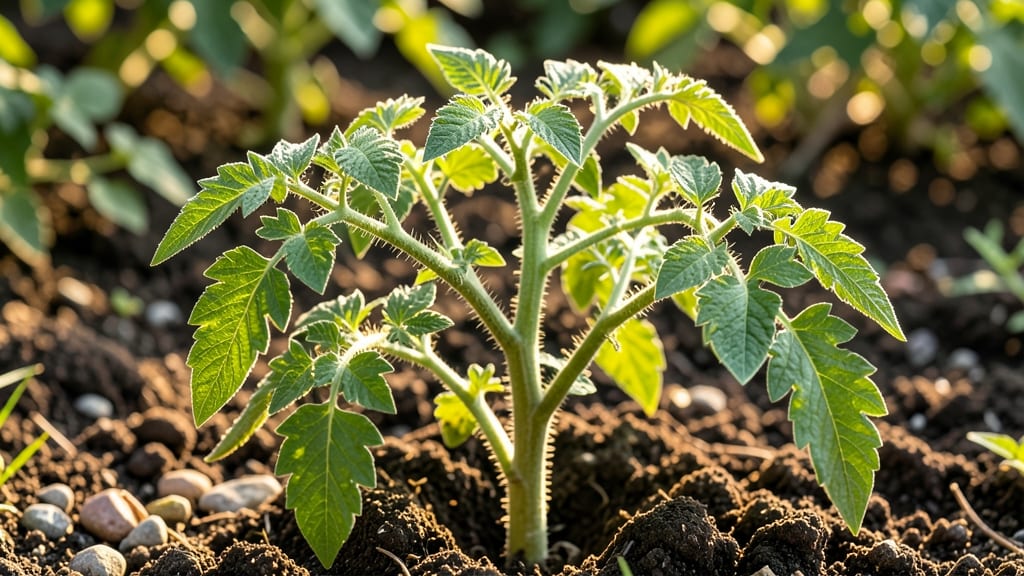
Your tomato plants just told you something important through the leaves you need to identify—and you might be missing it. 🌱 Healthy leaves are the early warning system for pests, diseases, and nutrient issues before they destroy your harvest.
I’ve spent years studying the subtle differences between a thriving leaf and one crying for help, and I’ll show you exactly what to look for.
Start with the color: vibrant green leaves mean business, while yellowing, browning, or spotting signals trouble. Check the texture—healthy leaves feel firm and slightly waxy, while pests like aphids leave sticky residue or holes.
Even the shape matters: curled edges often mean pests, while brown patches usually spell disease. A quick leaf inspection takes just 30 seconds but can save your entire plant.
What you’ll learn is how to tell early blight from late blight (one is preventable, the other isn’t), spot aphids before they swarm, and recognize nutrient deficiencies like nitrogen starvation.
With these visual cues, you’ll catch problems before they spread, giving your tomatoes the fighting chance they deserve. Prevention is easier than cure—and your future salads will thank you.
This works for any tomato variety, whether you’re growing in containers, raised beds, or the ground. The key is consistency: check leaves weekly, especially after rain or when pests are active.
Once you master this skill, your plants will stay lush, productive, and free of the most common disasters. Let’s get those leaves talking to you.
📚 In This Guide
- What you need
- Instructions
- Tips and common mistakes
- Wrapping up and next steps
What you need
- ● Tomato plant – A healthy or suspect plant (preferably in a garden, pot, or greenhouse).
- ○ Magnifying glass (10x–20x zoom) – For close-up inspection of leaf details (optional but highly recommended!).
- ● Notebook & pen – To jot down observations (or use your phone for photos!).
- ● Camera or smartphone – Capture leaf undersides, spots, or unusual patterns (natural light works best!).
- ● Gloves (nitrile or rubber) – Protects hands from sap, pests, or irritants (e.g., spider mites or aphids).
- ● Ruler or measuring tape – To track spot sizes or leaf deformities (inches or centimeters).
- ● Reference guide (printed or digital) – A tomato disease/pest chart (e.g., from University of California Agriculture or Purdue Extension).
- ● Handheld UV light (blacklight) – Reveals fungal spores or bacterial ooze (e.g., early blight or bacterial spot).
- ● Petri dish & swab – For collecting samples to test for pathogens (advanced gardeners only!).
- ● Spray bottle with water – To mist leaves and check for powdery mildew or downy mildew symptoms.
- ● Pruning shears (sterilized) – For safely removing infected leaves (soak in 1:9 bleach-water solution between uses).
How to examine tomato leaves for early signs of trouble
Here's how I inspect tomato plants weekly—it takes 10 minutes and saves hours of pest cleanup later.
🌿 Step 1: Check Leaf Shape and Color for Basic Health
Start at the bottom of the plant and work upward. Healthy tomato leaves should be deep green, slightly waxy, and firm to the touch. Look for any leaves that appear yellowed, spotted, or curled—they're often the first sign of trouble. I run my fingers along the leaf veins to check for unusual textures; rough or sticky surfaces can indicate spider mites or aphids before you even see them.
Pay special attention to the undersides of leaves. Many pests, like whiteflies or spider mites, hide there until the infestation is severe. Flip leaves gently and examine the undersides with a bright light if needed. If you notice any leaves with a dull, grayish cast, that's often a sign of early blight or powdery mildew.
🔍 Step 2: Look for Physical Damage and Pests
Inspect the edges of leaves for jagged tears or holes—this is classic evidence of caterpillars or slugs. I like to shake plants gently over a white tray or paper towel; any tiny black or brown specks that fall out are likely frass (insect droppings) from caterpillars or beetles. Look closely at the leaf stems too—chewed stems indicate cutworms or earwigs.
Check for webbing between leaves or along stems. Spider mites create fine, silky webs, while whiteflies leave a sticky residue. If you see tiny brown or black specks crawling on leaves, those are likely aphids or thrips. I always examine the growing tips and flower clusters too, as pests often target new growth first.
💧 Step 3: Examine for Water-Related Stress Signs
Yellowing between leaf veins while the veins stay green is classic iron deficiency or overwatering. I check the soil moisture by pressing my finger into the soil—if it's soggy, that's often why leaves are yellowing. Brown, crispy edges on leaves usually mean underwatering or too much salt buildup from fertilizer. In hot weather, I look for scorch marks on leaves that face the sun directly.
Wilting leaves that don't perk up when watered could indicate root rot or a fungal issue. I gently tug on a few leaves to check their attachment—if they pull away easily, the plant might be suffering from nutrient deficiency or disease. Always compare affected leaves to healthy ones on the same plant to spot differences more clearly.
✂️ Step 4: Remove and Isolate Problem Leaves
Once you've identified affected leaves, use clean, sharp pruning shears to remove them completely. Never tear leaves by hand—this can damage the plant further. I always disinfect my shears with rubbing alcohol between cuts to prevent spreading any potential diseases. Place removed leaves in a sealed plastic bag and dispose of them immediately in the trash, not the compost.
After removing affected leaves, I give the plant a light spray of water to rinse off any remaining pests or spores. For severe infestations, I might follow up with an organic insecticidal soap or neem oil spray, but I always test a small area first to ensure the plant won't react badly. The key is to act quickly—most tomato problems spread faster than they appear.
📝 Step 5: Document and Monitor Progress
I keep a simple notebook by my garden where I record what I find on each inspection. Note the date, which leaves were affected, and what you noticed. This helps track patterns over time—like whether problems appear after heavy rains or when certain flowers bloom. Take clear photos of any unusual symptoms; they're invaluable when consulting gardening resources later.
Schedule regular inspections every 5-7 days during growing season. Most tomato issues become visible before they affect the entire plant, so catching them early makes treatment much easier. I always check after rainstorms and when new leaves appear, as these are prime times for new problems to emerge.
Tips & tricks for identifying tomato plant issues early
Here's what nobody tells you—these tricks help catch tomato problems before they ruin your harvest.
Timing Secret: The 10-minute inspection is your best defense, but I've found that checking in the morning after dew has dried gives the clearest view of symptoms. Early light reveals subtle color changes and pests that might hide later in the day. If you're short on time, focus on the youngest leaves and flower clusters first—these show signs of trouble fastest.
Leaf Texture Tip: In Step 1, when checking leaf texture, press gently between your fingers. Healthy leaves should feel firm with a slight springiness. If leaves feel papery or brittle, that's often a sign of overwatering or fungal infection. I also check for a glossy sheen—sometimes that's just morning dew, but if it's sticky, you're likely dealing with aphids or whiteflies.
Pest Detection Hack: For Step 2, shake plants over a white tray or paper towel—this catches tiny frass (insect droppings) that you'd miss otherwise. I've caught caterpillar infestations this way before seeing any visible damage. Pro tip: Use a bright light to inspect leaf undersides, especially if you notice webbing or sticky residue. A magnifying glass helps spot tiny mites that might be starting an infestation.
Documentation Strategy: In Step 5, I've found that taking photos of affected leaves with your phone and comparing them to healthy leaves later can be incredibly helpful. Save them in a dedicated folder labeled by date—it creates a visual timeline that helps track how problems progress. I also jot down weather conditions during each inspection, as many tomato issues flare up after rain or extreme heat.
Pro Tips for Identify Tomato Plant Leaves
- Here's what nobody tells you—these tricks help catch tomato problems before they ruin your harvest.
- Timing Secret: The 10-minute inspection is your best defense, but I've found that checking in the morning after dew has dried gives the clearest view of symptoms.
- Leaf Texture Tip: In Step 1, when checking leaf texture, press gently between your fingers.
Frequently asked questions
Got questions about spotting tomato plant leaves—or what to do when things go wrong? You’re not alone! Here are answers to the most common concerns, so you can keep your garden thriving and your tomatoes healthy.
How do I tell if my tomato plant leaves are healthy vs. diseased?
Healthy tomato leaves are deep green, firm, and free of spots or discoloration. Look for yellowing (chlorosis) or brown/black spots as red flags. Check the undersides too—pests like aphids or spider mites love hiding there! If leaves curl, wilt, or develop strange patterns, it’s time to investigate further.
When is the best time to check my tomato leaves for pests or diseases?
Inspect your plants weekly, especially after watering or rain, when pests and pathogens are most active. Early morning is ideal—leaves are dry, and you’ll spot issues before they spread. Pay extra attention during hot, humid weather (fungal risks rise!) and after pruning (open wounds invite trouble).
What should I do if I find pests on my tomato leaves?
Act fast! Start by hosing off leaves with water to dislodge soft-bodied pests like aphids. For stubborn critters (e.g., hornworms), handpick them or use neem oil or insecticidal soap. Prune heavily infested leaves and dispose of them in the trash (not compost). Repeat treatments every 5–7 days until pests vanish.
Can I still save my tomato plant if the leaves are already damaged?
Often yes! If only a few leaves are affected, the plant may recover. Focus on removing diseased leaves (cut with clean shears) and improving airflow with pruning. Boost health with balanced fertilizer and water at the base (not overhead). If most leaves are gone or the stem is mushy, the plant may not recover—start fresh with new seedlings.
What’s the difference between tomato leaf spots caused by disease vs. sunburn?
Disease spots (e.g., early blight or septoria leaf spot) are brown/black with yellow halos and often appear on lower leaves. Sunburn spots are irregular, dry, and white/yellow, usually on leaves exposed to harsh afternoon sun. To prevent sunburn, use shade cloth or plant in partial shade during peak heat.
Wrapping up and next steps
Identifying tomato plant leaves doesn’t have to be a guessing game—now you’ve got the tools to spot early signs of pests and diseases like a pro! 🌱 With close observation and a little practice, you’ll keep your garden thriving and your tomatoes delicious. Ready to take the next step?
Start by documenting any changes in your plants—take photos, note patterns, and compare them to trusted resources. If you spot something concerning, act fast: isolate affected plants, remove damaged leaves, and treat with organic or chemical solutions as needed. Your vigilance today means a healthier harvest tomorrow!