
Pests and Diseases
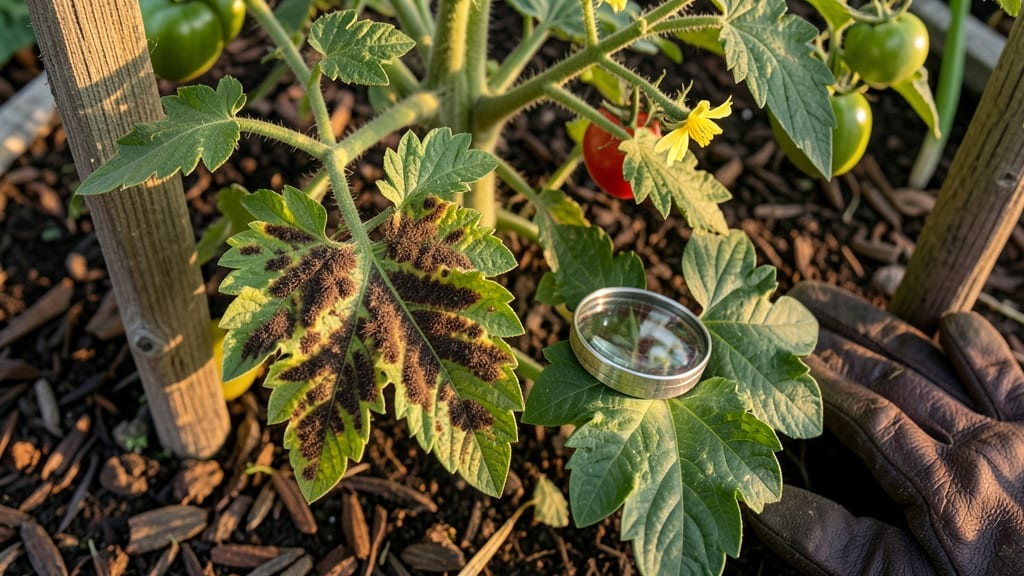
Those ugly brown marks on your tomato leaves? I’ve seen them turn a thriving plant into a sad, yellowing mess—until I learned this 3-step cure that works every time.
The key is acting fast before the spots spread to fruit or stems, because once they do, your harvest is at risk. 🌱
Most of the time, those marks mean early blight or late blight—two fungal diseases that love warm, wet weather. But they could also be bacterial spot or even sunscald from too much midday sun.
The good news? You can spot the difference by looking at the edges (blight spots have concentric rings, while bacterial spots are tiny and water-soaked).
Here’s what actually works: prune infected leaves immediately, spray with a mix of baking soda and soap (or copper fungicide if it’s bad), and water at the base—not overhead. Within a week, new growth will push out, and your plant will bounce back stronger than before.
This method saved my heirloom tomatoes last summer after a downpour turned my garden into a fungal buffet. The secret is prevention: space plants properly, water early in the morning, and clean up fallen leaves. Trust me, your future self will thank you at harvest time.
Root Causes Of Leaf Discoloration
If you’ve spotted brown marks on tomato leaves, don’t panic—there’s usually a logical (and fixable!) reason behind it. These spots often signal a battle between your plants and environmental stressors, pests, or pathogens.
Understanding the root cause is the first step to saving your tomatoes. Below, we break down the most common culprits, why they strike, and what they’re really telling you about your garden’s health.
Fungi thrive in warm, humid conditions, and tomatoes are a prime target. When spores land on leaves, they exploit weak spots—often caused by excess moisture or poor airflow—to infect your plants. The most common fungal offenders include:
- Early Blight (Alternaria solani) – Starts as tiny brown or black spots with concentric rings (like a bullseye) and yellow halos. It spreads upward from the lower leaves, often in hot, dry weather.
- Late Blight (Phytophthora infestans) – Causes dark, greasy-looking spots that spread rapidly in cool, wet conditions. This aggressive pathogen can destroy a crop in days if unchecked.
- Septoria Leaf Spot (Septoria lycopersici) – Produces small, circular brown spots with tiny black dots (fungal fruiting bodies) in the center. It thrives in wet foliage and poor circulation.
Why it happens: Fungal spores are always present in soil and air, but they only cause problems when conditions favor their growth—think high humidity, stagnant air, or overhead watering. Damaged leaves (from hail, pests, or physical injury) are also easy entry points.
Not all brown marks are fungal—some are the handiwork of hungry pests. Insects like aphids, spider mites, and tomato hornworms feed on leaf tissue, leaving behind chewed edges, stippled patterns, or even blackened frass (insect droppings). Here’s how they contribute:
- Spider Mites – These microscopic pests suck plant sap, causing leaves to develop bronze or brown speckles, especially on the undersides. They thrive in dry, hot conditions and multiply rapidly when plants are stressed.
- Aphids – Clusters of these soft-bodied insects excrete sticky honeydew, which can lead to sooty mold (a black, fuzzy fungus). Their feeding weakens leaves, making them susceptible to further damage.
- Tomato Hornworms – These caterpillars leave behind large, irregular brown holes as they devour leaves. While the damage is dramatic, it’s usually localized unless the infestation is severe.
Why it happens: Pests are drawn to healthy, lush tomato plants—especially those with soft new growth. Over-fertilizing with nitrogen (which promotes rapid growth) can make plants more appealing. Poor garden hygiene (like leaving fallen leaves or debris) also provides hiding spots for pests.
Sometimes, brown marks aren’t caused by pathogens or pests at all—they’re a sign of environmental abuse. Tomatoes are sensitive to extreme conditions, and when pushed too far, their leaves react with visible distress:
- Sunburn – If young or transplanted tomatoes are exposed to intense sunlight without acclimation, leaves can develop bleached or brown patches, especially on the upper surfaces. This is common in greenhouses or after sudden temperature spikes.
- Water Stress –
- Underwatering: Leaves may curl and develop crispy, brown edges as cells dry out.
- Overwatering: Poor drainage leads to root rot, which starves leaves of nutrients, causing them to yellow and brown from the edges inward.
- Chemical Burn – Overuse of fertilizers (especially high-salt or synthetic blends) or herbicides can scorch leaves, leaving brown, necrotic patches. Even tap water with high chlorine or fluoride content can cause damage over time.
Why it happens: Tomatoes need a balanced environment—consistent moisture, moderate temperatures (60–85°F), and gradual exposure to sunlight. Sudden changes or extremes disrupt their physiology, triggering stress responses like leaf discoloration.
Brown marks can also signal that your tomatoes aren’t getting the right nutrients. While yellowing (chlorosis) is more classic, severe deficiencies or toxicities can lead to brown, dead patches:
| Nutrient Issue | Symptoms | Why It Happens |
|---|---|---|
| Potassium Deficiency | Brown, scorched-looking patches on leaf edges (often called "margin burn"). | Potassium regulates water and nutrient transport. Stress (like drought or disease) depletes it faster than roots can absorb it. |
| Magnesium Deficiency | Interveinal brown or yellow patches (between veins) on older leaves. | Magnesium is vital for chlorophyll production. Poor soil structure or high calcium levels can block its uptake. |
| Toxic Buildup (e.g., Chlorine, Boron) | Brown, crinkled, or dead leaf tips (especially in container-grown tomatoes). | Over-fertilization or poor-quality water introduces harmful salts that disrupt cellular function. |
Why it happens: Nutrient imbalances often stem from poor soil health, over-fertilization, or improper pH levels (tomatoes prefer 6.0–6.8). Container plants are especially vulnerable because their root systems have limited access to nutrients.
Now that you know the why behind those brown marks, the next step is diagnosing and treating the issue before it spreads. Each cause requires a different approach—so let’s get your tomatoes back to their vibrant best!
Fixing Leaf Spots Fast
Now that you know what’s causing those unsightly brown marks on your tomato leaves, it’s time to take action! The good news? Most issues are manageable with a few targeted steps. Below, we’ve broken down practical, step-by-step solutions for each common cause—plus tips to keep your plants thriving long-term.
---
Fix it fast: 1. 🔥 Remove infected leaves immediately - Snip off leaves with brown spots (especially if they’re yellowing or crispy) and dispose of them in the trash (not compost). Fungal spores can linger in soil or compost piles.
2. 💦 Improve air circulation - Space plants 18–24 inches apart and prune suckers to reduce humidity trapped in foliage. Use a fan on low setting near plants for 10–15 minutes daily to dry leaves faster.
3. 🧴 Apply fungicide (organic or chemical) - Copper fungicide (like Bonide Copper Fungicide) works for early blight.
For late blight, mix 1 tsp baking soda + 1 tbsp vegetable oil + 1 quart water + a drop of dish soap (spray in the morning). - Reapply every 7–10 days or after rain.
4. 🌱 Strengthen plant defenses - Water at the base (not overhead) and early in the day so leaves dry quickly. - Feed plants with compost tea or fish emulsion (rich in phosphorus) to boost immunity.
💡 Pro Tip: Rotate crops next season—don’t plant tomatoes, peppers, or potatoes in the same spot for 3+ years to break fungal cycles.
---
Cool them down: 1. 🌳 Provide afternoon shade - Use shade cloth (30–50%) or move containers to a spot with partial shade (1–3 hours of afternoon relief).
2. 💧 Hydrate deeply (but not soggy) - Water slowly at the base 1–2 inches deep, 2–3 times per week (adjust for heatwaves). Mulch with straw or grass clippings to retain moisture.
3. 🌿 Adjust watering times - Morning watering (6–9 AM) prevents evaporation and gives roots time to absorb moisture before the sun peaks.
✨ Quick Fix: Mist leaves lightly with water in extreme heat (but avoid evenings to prevent fungal growth).
---
Pest patrol: 1. 🔍 Inspect leaves daily - Check undersides of leaves for tiny webs (mites), sticky residue (aphids), or white specks (whiteflies). Act fast—pests spread quickly!
2. 🚿 Blast them off - Spray plants with a strong stream of water (early morning) to knock off pests. Repeat every 2–3 days for 2 weeks.
3. 🍋 Natural pest control - Neem oil spray (1 tsp neem oil + 1 tsp mild soap + 1 quart water): Spray every 5–7 days until pests vanish. - Introduce beneficial insects: Ladybugs (aphids) or predatory mites (spider mites) can be bought online.
4. 🧼 Clean tools & garden beds - Wipe pruners with rubbing alcohol between plants to avoid spreading pests. Remove weeds (they harbor pests!).
💡 Pro Tip: Yellow sticky traps near plants catch whiteflies—place them 1–2 feet above foliage.
---
Drainage rescue: 1. ⏰ Check soil moisture - Stick your finger 1–2 inches into soil—if it’s damp, wait to water. Tomatoes prefer slightly dry topsoil between waterings.
2. 🪴 Fix drainage issues - If pots lack drainage holes, drill them or repot into containers with gravel at the bottom. - For in-ground plants, amend soil with perlite or coarse sand to improve aeration.
3. 🌱 Adjust watering habits - Drip irrigation or soaker hoses deliver water directly to roots, reducing leaf wetness. - Water deeply but less often (1–2 times per week) to encourage strong root growth.
🔥 Emergency Fix: If leaves are mushy, prune damaged foliage and let soil dry out completely for 3–5 days before resuming watering.
--- - 🌡️ Monitor weather: Cover plants with row covers if frost or heavy rain is forecasted. - 🍅 Rotate crops: Avoid planting tomatoes in the same spot yearly. - 🧹 Clean up debris: Remove fallen leaves and plant residue after harvest. - 🛡️ Start strong: Use disease-resistant tomato varieties (like ‘Mountain Merit’ or ‘Celebrity’). - 📅 Plan ahead: Plant tomatoes after the last frost date and in full sun (6–8 hours/day).
--- Remember: Act quickly, but stay patient. With consistent care, your tomato plants will bounce back—producing juicy, blemish-free fruits in no time! 🍅💚
Frequently asked questions
What’s the difference between early blight and late blight spots on tomato leaves?
Early blight spots start as small brown or black marks with concentric rings (like a bullseye) and yellow halos, spreading upward from lower leaves in hot, dry weather. Late blight spots are dark, greasy-looking and spread rapidly in cool, wet conditions, often affecting both leaves and fruit. Late blight is more aggressive and can destroy plants faster.
Can I still harvest tomatoes if the leaves have brown spots?
Yes, but remove heavily infected leaves first. If the spots are on lower leaves (early blight), the fruit is usually safe. However, if you see spots on upper leaves or stems (late blight), harvest immediately and destroy infected plants to prevent spread. Always wash tomatoes thoroughly before eating.
Will pruning tomato leaves with brown spots help or hurt my plant?
Pruning helps! Removing infected leaves stops fungal spread and allows energy to focus on fruit production. Just use clean pruners and dispose of infected leaves in the trash (not compost). Avoid over-pruning—remove only 20–30% of foliage to maintain photosynthesis.
How do I know if brown marks are from pests vs. disease?
Pest damage often has irregular edges (chewed holes, stippling) or sticky residue (honeydew). Disease spots are usually circular with distinct patterns (like rings or dots). Check leaf undersides for tiny webs (mites) or insects—if you see pests, they’re the culprit.
Is baking soda spray safe for all tomato varieties?
Yes, but use it preventively (not as a cure for severe infections). Mix 1 tsp baking soda + 1 tbsp oil + 1 quart water + a drop of soap and spray in the morning. Avoid overspraying flowers (can harm pollinators). For organic growers, it’s a great low-cost, non-toxic option for fungal prevention.