
Companion Plants
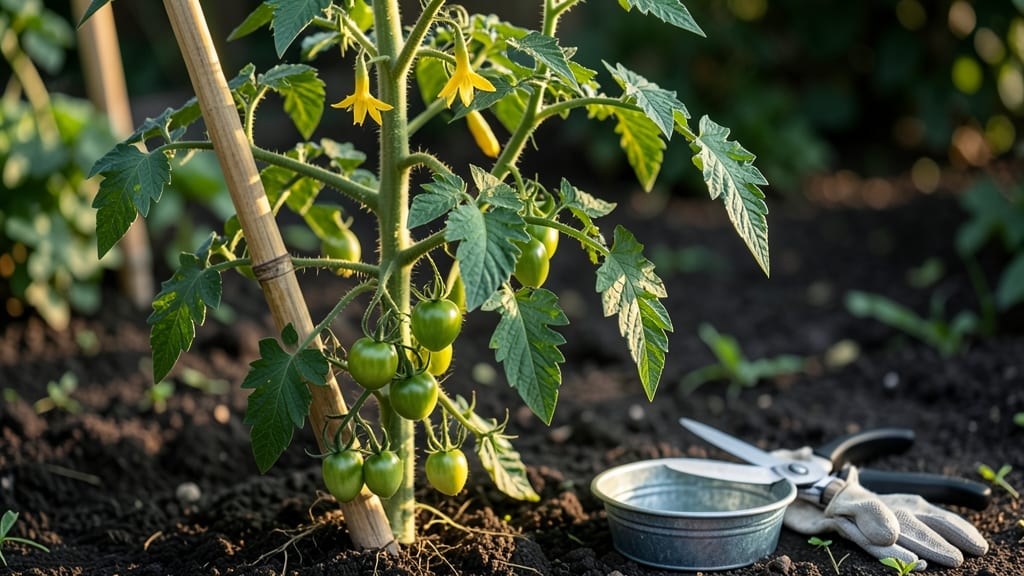
Topping tomato plants isn't about cutting off the top—it's about redirecting energy for stronger stems and bigger harvests. ✂️ I learned the hard way that skipping this step leads to weak, sprawling plants that struggle to support fruit.
The right technique transforms rickety vines into sturdy producers that keep yielding until frost. For indeterminate varieties (like heirlooms), you'll top once when plants hit 4-5 feet, removing the top set of leaves and the growing tip.
Determinate types (like bush tomatoes) rarely need topping, but a light prune can improve airflow. The goal is to balance growth with fruit production—too much pruning delays harvests, while too little leaves plants flopping over. After topping, focus on support systems—cages, stakes, or trellises—to guide growth upward.
Pinch off suckers (those little shoots in leaf axils) regularly to maintain plant strength. Within weeks, you'll see thicker stems and heavier clusters of tomatoes forming at the plant's base rather than stretching upward.
This method works for both backyard gardens and containers, though container-grown plants need extra care to recover from pruning. The key is timing—do it in morning hours to reduce stress on the plant, and always use clean, sharp pruners to prevent disease entry.
📚 In This Guide
- What you need
- Instructions
- Tips and common mistakes
- Wrapping up and next steps
What you need
- ● Sharp pruning shears or bypass pruners – Disease-free, sterilized, and with a 4-6 inch blade (1 pair). ⚠️ Avoid dull tools—they crush stems!
- ● Clean, disinfected gloves – Nitrile or rubber gloves (1 pair) to protect against thorns and bacteria.
- ● Disinfectant solution – 1 part bleach to 9 parts water (or 70% isopropyl alcohol) to sterilize tools between cuts.
- ● Garden twine or soft plant ties – 3-4mm wide, biodegradable twine (1-2 rolls, depending on plant size).
- ● Support stakes or cages – 5-6 ft tall bamboo stakes, metal cages, or wooden trellises (1 per plant for indeterminate varieties).
- ● Potting soil or compost – Well-draining, organic-rich mix (1-2 gallons per plant for repairs).
- ● Horticultural spray (copper fungicide) – For post-pruning protection against blight.
- ● Plant growth regulator (e.g., seaweed extract) – To encourage bushier growth after topping.
- ● Labeling tags – To track pruning dates and methods for each plant.
- ● Knee pad or stool – For comfort if plants are tall or ground access is tricky.
How to top tomato plants for maximum yield
This is the trick I use every season to keep plants healthy and productive—no fancy tools needed.
✂️ Step 1: Identify the Main Stem and Suckers
Tomato plants grow indeterminately, meaning they keep producing new shoots called suckers in the leaf axils. These are the small shoots growing between the main stem and branches. Use your fingers to gently feel for them—they’re about the size of a pencil eraser when ready to remove.
I always start topping when the plant reaches about 4-5 feet tall or when you see the first flower clusters forming. The goal is to direct the plant’s energy toward fruit production rather than leafy growth. Never remove more than one-third of the plant at once—this prevents shock and encourages strong recovery.
✂️ Step 2: Remove Suckers Correctly
Pinch or cut suckers off with clean pruning shears or your fingers—never tear them. I like to twist them off quickly to avoid leaving stubs that can rot. If using shears, make a clean cut just above the leaf axil where the sucker meets the main stem. This prevents disease from entering the plant through jagged cuts.
Don’t worry about leaving a tiny bit of stem—what matters is removing the growing point. You’ll know you’re doing it right when the sucker comes off easily without resistance. If it feels tough to pull, wait a few days and try again—the sucker will be easier to remove as it matures.
☀️ Step 3: Prune for Airflow and Sunlight
After removing suckers, focus on the main stem and branches. Trim any leaves that are touching the ground or blocking airflow—this reduces disease risk and improves sunlight penetration. I always start from the bottom and work my way up, removing leaves that are yellowing or diseased first.
Leave only the strongest, healthiest leaves on the plant. Aim for open, airy growth—this helps prevent fungal issues like blight. If your plant is crowded, thin out branches to leave 1-2 main stems per plant, depending on the variety. This ensures the remaining stems get enough energy to produce fruit.
🌱 Step 4: Monitor and Repeat Weekly
Topping isn’t a one-time job—it’s an ongoing process. Check your plants once a week and remove any new suckers that appear. I set a reminder on my phone so I don’t forget, especially during busy harvest seasons. The key is consistency; neglecting topping for even a few weeks can lead to overgrowth and reduced fruit production.
Watch for new growth at the leaf axils—these are your clues that suckers are forming. The earlier you remove them, the easier the process becomes. If you’re unsure whether a shoot is a sucker or a new branch, wait a day or two. Suckers grow upward at an angle, while new branches grow outward from the main stem.
💧 Step 5: Support and Fertilize After Pruning
After topping, give your plants a light drink of water to help them recover. I avoid heavy watering right after pruning because it can stress the plant. Instead, water deeply 24 hours later to let the cuts heal slightly. This also prevents soil-borne diseases from entering through fresh pruning wounds.
Feed your plants with a balanced fertilizer (like 10-10-10) or a tomato-specific formula after pruning to replenish nutrients. I like to add a handful of compost around the base of the plant to boost microbial activity in the soil. This helps the plant recover faster and directs energy toward fruit production rather than leaf growth.
Tips & tricks for perfect tomato plant topping
Real talk: I've seen gardeners give up on tomato topping because it feels like too much work—until they realize how much bigger their harvests become. These simple tricks make the process effortless and maximize your yield without stress.
Timing Secret: Start topping when your plants hit 4-5 feet tall or when you spot the first flower clusters. This is when the plant naturally shifts energy from leaf growth to fruit production. I always check for suckers once a week—set a phone reminder because consistency is everything. Waiting too long lets suckers grow into full branches that compete for nutrients, reducing your tomato count.
Pruning Technique: When removing suckers in Step 2, use your thumb and forefinger to pinch them off cleanly at the base. This is faster than cutting and prevents leaving stubs that can rot. For stubborn suckers, wait a day or two—they'll be easier to remove when they're slightly more mature. I've found that twisting them off quickly (rather than pulling) gives the cleanest break and minimizes damage to the main stem.
Airflow Strategy: After topping, focus on creating an open, airy plant structure in Step 3. Remove any leaves touching the ground or shading the fruit—this prevents fungal diseases like blight. I aim to leave only the top third of leaves on indeterminate varieties, which directs sunlight and air to where it matters most: the fruit clusters. This simple adjustment can nearly double your harvest in humid climates.
Recovery Boost: The 24-hour watering rule after pruning is non-negotiable. Heavy watering right after topping stresses the plant by opening wounds when it's vulnerable. Instead, let the cuts heal slightly before giving a deep drink. I also add a handful of compost around the base to replenish nutrients lost during pruning—this helps the plant bounce back faster and redirect energy to fruit production.
Pro Tips for Topping Tomato Plants
- Real talk: I've seen gardeners give up on tomato topping because it feels like too much work—until they realize how m...
- Timing Secret: Start topping when your plants hit 4-5 feet tall or when you spot the first flower clusters. This is w...
- Pruning Technique: When removing suckers in Step 2, use your thumb and forefinger to pinch them off cleanly at the ba...
Frequently asked questions
Got questions about topping tomato plants?
You’re not alone! Here are answers to the most common concerns—from timing to troubleshooting—so you can prune like a pro and enjoy that juicy harvest.
When is the best time to top tomato plants?
Top tomato plants when they reach 3–5 feet tall (for indeterminate varieties) or after the first flower cluster forms (for determinate types). Aim for late spring or early summer when plants are actively growing. Avoid topping too early—you want established vines to support fruit!
What happens if I don’t top my tomato plants?
Indeterminate tomatoes (like Roma or Cherry) will grow taller and bushier, risking disease (like blight) and weaker fruit production. Determinate types (like Bush Early Girl) don’t need topping—they naturally stop growing. Without pruning, indeterminate plants may flop or produce smaller yields. Think of topping as a way to redirect energy to fruit!
Can I use scissors or should I pinch the stems by hand?
Both work! Hand-pinching (removing stems between fingers) is gentler and prevents disease spread. Scissors are fine for thicker stems, but sterilize them with rubbing alcohol first to avoid bacterial infections. Pro tip: Pinch just above a leaf node (where new growth sprouts) for healthier regrowth.
My tomato plant looks sad after topping—what went wrong?
Don’t panic! Wilting or yellowing can happen if you removed too much foliage at once. Give the plant 1–2 weeks to recover in partial shade and water deeply. If leaves turn brown or mushy, check for overwatering or disease. A light balanced fertilizer (like 10-10-10) can help it bounce back.
Are there alternatives to topping tomato plants?
Yes! For indeterminate tomatoes, try:
- Suckering: Remove side shoots (suckers) from the main stem to improve airflow.
- Pruning lower leaves: Trim leaves touching the soil to reduce disease risk.
- Cage or stake support: Use trellises to guide growth upward naturally.
Wrapping up and next steps
Topping tomato plants might sound intimidating, but with the right techniques—like pinching, pruning, or even the "Florida Weave" method—you’ll be well on your way to a thriving, high-yield harvest. 🌱 Whether you’re a seasoned gardener or just starting out, these proven methods ensure healthier plants, better air circulation, and juicier tomatoes.
Now that you’re armed with the know-how, grab your pruners and get growing! Your next step? Try one of these techniques on your next batch of tomato plants and watch your garden flourish.