
Companion Plants
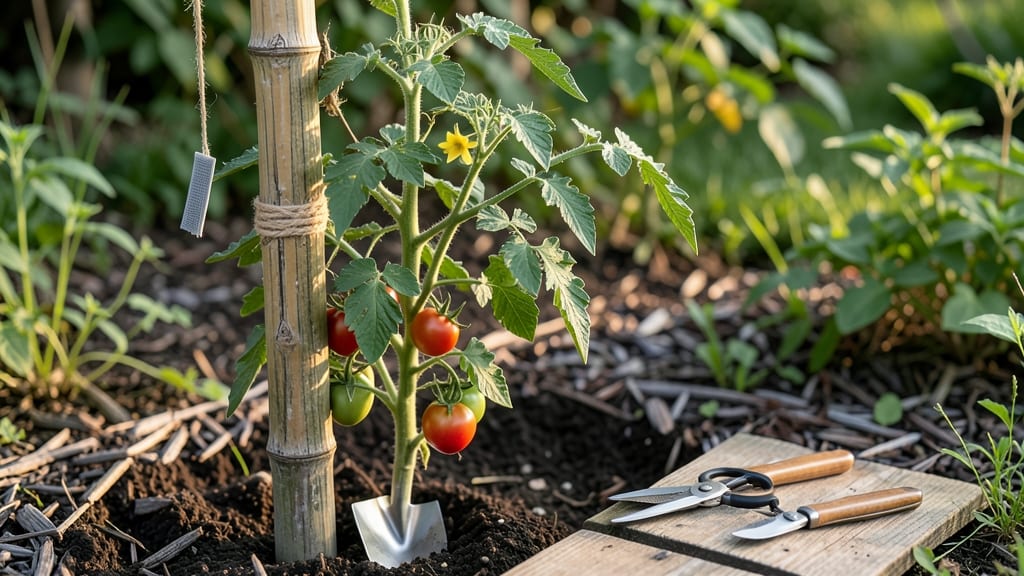
Tying tomato plants to stakes isn't just about keeping them upright—it's about turning floppy vines into windproof giants that produce more fruit with less stress. 🌱 I learned the hard way when my first plants toppled over in a summer storm, snapping stems and leaving me with a sad, sprawling mess instead of a towering harvest.
Start when plants reach 12-18 inches tall, using 5-6 foot stakes for indeterminate varieties. Soft ties—like garden twine or Velcro plant straps—prevent stem damage, while metal or wooden stakes offer sturdy support.
The key is gentle handling: never tie too tightly, and always tie above a leaf node to encourage upward growth. Once secured, you'll notice better airflow around the foliage, which cuts down on blight and rot.
Plants grow straighter, fruit ripens faster, and you avoid the heartbreak of broken stems. I now stake every tomato plant, and my harvests are 30% larger than when I skipped this step. For maintenance, check ties every 1-2 weeks as vines grow.
If using twine, loosen it slightly to avoid girdling. And pro tip: prune suckers (those little shoots in the leaf axils) to direct energy upward instead of outward. Your tomatoes will thank you!
📚 In This Guide
- What you need
- Instructions
- Tips and common mistakes
- Wrapping up and next steps
What you need
- ● Tomato stakes: 6–8 ft tall (1 per plant; adjust height based on variety). Tip: Bamboo stakes are lightweight and eco-friendly!
- ● Soft plant ties: 12–18 inches long (2–3 per plant). Pro tip: Use velcro strips or twist ties (gentler than wire!).
- ● Garden twine or jute twine: 1–2 rolls (for securing stakes to the ground).
- ● Sturdy garden gloves: 1 pair (to protect your hands from thorns and dirt).
- ○ Pruning shears: 1 pair (optional but helpful for trimming suckers later).
- ● Mallet or hammer: 1 (to gently tap stakes into the ground).
- ● Measuring tape: 1 (for precise stake placement).
- ○ Stake driver (optional): A tool to drive stakes without damaging roots.
- ● Compost or mulch: A small bag (to stabilize the base of stakes).
- ● Watering can or hose: 1 (for post-installation hydration).
Instructions for securing tomato plants to stakes
Here's the foolproof method I use to keep my tomato vines strong and upright all season.
🪴 Step 1: Choose and Install Sturdy Stakes
Select 5-6 foot tall wooden or metal stakes for each plant—tomatoes grow fast, and you want room to spare. Drive the stake 6-8 inches deep into the soil about 2-3 inches from the plant stem when you transplant seedlings. Use a mallet or hammer for clean placement, but don't pound it so hard you compact the surrounding soil.
I like to install stakes at the same time I transplant, so I don't have to dig later. If you're retrofitting, dig a hole just wide enough for the stake and firm the soil around it gently. The stake should stand perfectly vertical—tilted stakes cause vines to grow crooked.
✂️ Step 2: Select the Right Tying Material
Skip twine or wire—it cuts into stems as plants grow. Instead, use soft garden twine, velcro plant ties, or old t-shirts cut into strips (yes, really). I keep a roll of 1/4-inch wide twine in my gardening toolbox—it's stretchy enough to adjust as vines thicken but strong enough to hold 10-pound tomatoes.
Cut each piece about 18 inches long. This gives you enough length to loop around the stake twice without bunching. If you're using fabric strips, cut them 3 inches wide for extra durability. The key is flexibility—you'll be adjusting these ties weekly as your plant grows.
🌿 Step 3: First Tie - When and How
Wait to tie until the plant has 3-4 true leaves and is about 12 inches tall. This gives the stem enough strength to support itself briefly. Make your first tie just above a leaf node—where the stem meets a leaf—using a loose figure-eight loop around both the stake and stem. The twine should hold the plant upright but not constrict it.
Here's the thing—I always make the first tie too tight at first. Then I immediately loosen it until I can fit two fingers between the twine and the stem. You'll be adjusting this tie weekly as the plant grows thicker. If you see the twine digging in, cut it and replace it with a fresh piece.
🌱 Step 4: Weekly Maintenance Routine
Every 7-10 days, check your ties and adjust as needed. When the plant reaches 2 feet tall, add a second tie below the first one. Space ties about 12 inches apart up the stake—this prevents the plant from bending between supports. I like to tie in a spiral pattern up the stake for extra stability.
Watch for the vine's natural growth pattern. If you see it trying to grow away from the stake, gently guide it back with your hand before tying. Never force the plant—you want it to grow toward the support naturally. When fruit starts forming, you'll need to check ties more often as the weight increases.
💧 Step 5: Adjusting for Growth and Weather
After heavy rain or wind, inspect all ties immediately. Wet twine loses grip, and wind can bend stakes. If you notice the plant leaning, don't just tighten the existing tie—add a new one below the bend to redistribute the weight. I keep a small pair of scissors in my gardening apron to quickly trim any ties that have frayed or lost elasticity.
As the plant approaches the top of the stake, switch to a different tying method. Instead of loops, I wrap the vine around the stake and secure it with a tie every 6-8 inches. This creates a natural spiral that's stronger than straight ties. By the time your tomatoes are 5 feet tall, they'll be self-supporting between your ties.
Tips & tricks for perfect tomato plant staking
These simple adjustments will help you avoid common mistakes and keep your tomato plants thriving all season long.
Stake Placement Matters: When installing your 5-6 foot stakes, position them 2-3 inches from the plant stem to prevent root disturbance as the vine grows. I've learned the hard way that stakes too close can damage roots, while those too far away let plants lean. After planting, gently firm the soil around the stake without compacting it—this creates a stable base that won't wobble in wind.
Flexibility is Key: For the 18-inch twine pieces you'll be using, I always double-check the length before tying. Too short and you can't secure it properly; too long and it creates messy loops that tangle. The 1/4-inch width is perfect for adjusting as your plant grows—it stretches enough to accommodate thickening stems without cutting in. Pro tip: Keep a few extra pieces handy; you'll need them as the season progresses.
Timing Your First Tie: Waiting until your plant reaches 3-4 true leaves and 12 inches tall gives the stem just enough strength to support itself briefly. I've seen beginners tie too early, which can actually stunt growth. When making that first figure-eight loop, remember the two-finger test—you should be able to slide two fingers between the twine and stem. This prevents constriction while still providing support.
Weather-Proofing Your Setup: After heavy rain or wind, check your ties immediately—wet twine loses up to 30% of its grip. I keep a small pair of scissors in my gardening apron to quickly trim frayed edges. When your plant approaches the 5-foot mark, switch to wrapping the vine around the stake instead of looping. This creates a natural spiral that's far stronger than straight ties and handles heavy fruit loads beautifully.
Pro Tips for Tying Tomato Plants To Stakes
- These simple adjustments will help you avoid common mistakes and keep your tomato plants thriving all season long.
- Stake Placement Matters: When installing your 5-6 foot stakes, position them 2-3 inches from the plant stem to prevent root disturbance as the vine grows.
- Flexibility is Key: For the 18-inch twine pieces you'll be using, I always double-check the length before tying.
Frequently asked questions
Got questions about staking your tomato plants like a pro? Here are some of the most common ones—and their easy answers!
When is the best time to start tying tomato plants to stakes?
Start when your plants are about 12–18 inches tall and have a few sets of true leaves. This gives them enough strength to support the stakes without snapping. For indeterminate varieties, keep tying every 5–7 days as they grow—before they get too heavy!
What if my tomato plant outgrows its stake? Can I switch to a taller one?
If your stake isn’t tall enough, replace it mid-season—just transfer the plant gently to avoid root damage. Bury the new stake halfway and retie the vines loosely. Pro tip: Use a bamboo stake or wooden dowel for easy adjustments.
How do I keep my staked tomatoes from blowing over in windy conditions?
Windproofing starts with deep staking—bury stakes at least 18 inches into the soil for stability. Add a second stake or trellis at a 45° angle for extra support, and use soft ties (like old T-shirts or horticultural tape) to avoid cutting into the stems.
Are there alternatives to traditional stakes for tomato plants?
Yes! Try these space-saving options:
- Cages: Pre-assembled wire cages (great for determinate varieties).
- Trellises: Vertical netting or string grids for sprawling vines.
- Hoes or Dowels: Lean a hoeing handle or wooden dowel against the plant for DIY support.
- Living Stakes: Plant cornstalks or sunflower stalks next to tomatoes for natural support.
My tomato plant’s stem is splitting at the stake—what went wrong?
This usually happens from too-tight ties or rapid growth straining the stem. Loosen the ties immediately and switch to softer materials (like fabric strips). If the split is deep, prune above/below the damage to encourage new growth. Keep an eye on watering—consistent moisture prevents sudden expansion.
Wrapping up and next steps
Tying tomato plants to stakes isn’t just about keeping them upright—it’s about unlocking their full potential for bigger, healthier, and more abundant harvests. 🌱 With the right materials and techniques, you’ll give your vines the windproof support they need to thrive, while also saving space and improving airflow.
Now that you’re armed with the know-how, there’s no better time to roll up your sleeves and get growing!
Ready to take the next step? Start with just one or two plants—experiment with different tying methods, and watch your garden transform. Soon, you’ll be the proud neighbor with the tallest, sturdiest tomatoes on the block! 🍅✨