
Plants
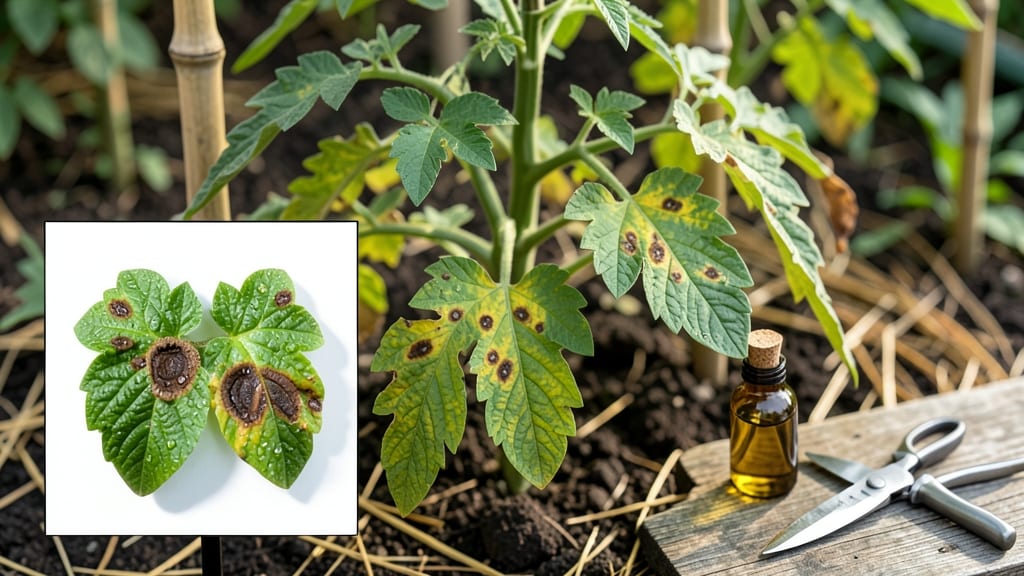
Brown spots on tomato leaves mean your plants are fighting a silent battle—and you can turn it around. 🌱 I’ve seen leaf spot disease go from a few brown specks to a full-blown crisis in just two weeks, but the right steps stop it dead.
This isn’t just about saving leaves; it’s about keeping your tomatoes healthy and productive all season.
The culprits are usually fungal infections like early or late blight, but overwatering, poor airflow, or even sunscald can mimic the damage. The key is acting fast—prune infected leaves, adjust watering, and add copper spray or neem oil to break the cycle.
Most gardeners I’ve talked to wish they’d caught it earlier, but even late intervention works if you’re consistent.
By the end of this, your plants will bounce back with stronger growth and fewer spots. You’ll spot the difference in 7-10 days with proper care, and your tomatoes will thank you at harvest time. The secret? Prevention starts now—let’s get those leaves fighting back.
Works for home gardens, containers, or raised beds—no matter how bad it looks, this method saves the season. Here’s exactly what to do next.
Root Causes of Leaf Discoloration
Brown spots on tomato leaves aren’t just an aesthetic issue—they’re a sign your plants are under attack from a mix of environmental stressors, pathogens, and even poor growing practices. Understanding the why behind these spots is the first step to saving your harvest.
Below, we break down the most common culprits with science-backed explanations and actionable clues to identify them.
Fungal diseases like Alternaria solani (early blight) and Septoria lycopersici (septoria leaf spot) thrive in warm, humid conditions and are the #1 reason for brown spots on tomato leaves. Here’s how they strike:
- Symptoms: Small, circular brown spots with concentric rings (early blight) or tiny dark specks with yellow halos (septoria). Spots often develop edges first and spread inward.
- Why it happens:
- Spores love moisture: Fungal spores splash onto leaves from soil or infected debris during watering or rain. High humidity (above 75%) gives them the perfect breeding ground.
- Poor airflow: Crowded plants or dense foliage trap moisture, creating a fungal paradise. Fungus can’t spread if leaves dry quickly.
- Old leaves = weak defense: As tomato plants age, their leaves lose resistance, making them easy targets for fungal invaders.
- 🔍 Pro Tip: Check the underside of leaves—fungal spores often appear as fuzzy or powdery growth there.
Unlike fungi, bacteria cause water-soaked spots that turn brown and ooze when wet. Xanthomonas perforans and Pseudomonas syringae are the usual suspects, and they spread fast in wet conditions.
- Symptoms:
- Small, greasy-looking spots that enlarge and develop yellow borders.
- Spots may merge and cause leaf holes (hence the name "bacterial spot").
- Often appears on lower leaves first.
- Why it happens:
- Water splashing: Overhead irrigation or rain drives bacteria from soil or infected plants into leaf wounds (like from pruning or hail).
- Warm, wet weather: Bacteria thrive in temps between 77–86°F (25–30°C) with high humidity.
- Contaminated tools: Pruners or stakes can carry bacteria from plant to plant.
- 💡 Key Difference: Unlike fungal spots, bacterial spots don’t have rings and often ooze when touched.
Not all brown spots are from pathogens—sometimes, your tomatoes are overreacting to their environment. Sun scorch and nutrient imbalances can mimic disease symptoms.
- Sun Scorch:
- Symptoms: Dry, crispy brown edges on leaves, often on the side exposed to direct sun. Young leaves are most vulnerable.
- Why it happens:
- Too much sun too soon: Transplanting tomatoes into hot, sunny spots without acclimating them causes oxidative stress.
- Water stress: Drought or uneven watering makes leaves lose turgor, increasing sun damage risk.
- Nutrient Burn (Over-Fertilization):
- Symptoms: Brown, curled edges on leaves, often with yellowing between veins (a sign of excess salt/nitrogen).
- Why it happens:
- Salt buildup: Over-fertilizing (especially with synthetic fertilizers) raises soil salinity, burning leaf tissue.
- Imbalanced pH: Soil pH below 5.5 or above 7.0 locks out nutrients like magnesium, causing interveinal chlorosis (brown/yellow patches between veins).
- 🌡️ Quick Test: If spots are dry, brittle, and on sun-exposed leaves, it’s likely environmental—not fungal.
Tiny pests like spider mites and aphids don’t cause brown spots directly, but their feeding leaves behind a trail of destruction that weakens leaves, making them susceptible to secondary infections.
- Symptoms:
- Spider mites: Stippling (tiny white/yellow dots) on leaves, often with fine webbing underneath.
- Aphids: Sticky residue (honeydew) on leaves, followed by sooty mold (black fungal growth).
- Why it happens:
- Drought stress: Spider mites thrive in dry, hot conditions and multiply when plants are water-stressed.
- New growth attractant: Aphids swarm to tender new leaves, sapping sap and leaving leaves vulnerable to fungal infections.
- 🕷️ Tell-Tale Sign: Hold a white sheet under leaves—tiny moving dots (mites) or slow-crawling insects (aphids) confirm the culprit.
Next Steps: Now that you know the why, the fix depends on the cause. Stay tuned for our 5-step action plan to rescue your tomato plants—starting with prevention and targeted treatments!
Fixing brown spots on tomato leaves
Brown spots on your tomato plants can feel like a real setback, but don’t worry—most issues have simple, effective fixes. Below are targeted solutions based on the most common causes, along with prevention tips to keep your plants thriving. Let’s get those leaves looking healthy again!
If your tomato leaves have concentric rings, dark brown spots with yellow halos, or black spots with gray centers, you’re likely dealing with a fungal infection. These spread quickly but can be managed with a mix of removal, fungicides, and prevention.
🔥 Step 1: Prune Infected Leaves Immediately
- Remove all spotted leaves—don’t compost them!
Toss them in the trash (not your garden waste bin) to prevent reinfection. - Use clean, sharp pruners (sterilize with rubbing alcohol between cuts) to avoid spreading spores. - Start with the oldest leaves (bottom ones) since fungal diseases often begin there.
🍳 Step 2: Apply a Fungicide (Organic or Chemical)
- Copper fungicide (like Bordeaux mixture or copper soap) is a great organic option—spray it every 7–10 days until new growth appears.
- Neem oil (1 tsp per quart of water + a drop of dish soap) is another natural fungicide. Spray in the evening to avoid harming bees.
- For severe cases, use a chemical fungicide like chlorothalonil (follow label instructions carefully).
👨🍳 Step 3: Improve Air Circulation & Reduce Moisture
- Space plants 18–24 inches apart to allow airflow—fungi thrive in damp, crowded conditions.
- Water at the base (not overhead) and early in the day so leaves dry quickly.
- Mulch with straw or grass clippings (not wet mulch) to keep soil dry.
⏰ Step 4: Rotate Crops & Clean Up Debris
- Don’t plant tomatoes or nightshades (peppers, eggplants) in the same spot next year—fungi linger in soil.
- Remove all plant debris (including fallen leaves) from the garden after harvest.
💡 Pro Tip: If you notice spots early in the season, try a preventative spray of neem oil every 2 weeks to keep fungi at bay.
Bacterial leaf spot causes tiny, greasy-looking spots that turn brown and may ooze. Unlike fungi, bacteria can’t be cured, but you can slow its spread.
🔪 Step 1: Remove & Destroy Infected Plants
- Pull up severely infected plants (especially if spots are on fruit) and burn or trash them—bacteria spread through water and tools.
- Disinfect pruners and hands with a 10% bleach solution (1 part bleach to 9 parts water) between cuts.
🌧️ Step 2: Adjust Watering Practices
- Water deeply but infrequently—shallow, frequent watering encourages bacterial growth.
- Avoid overhead watering—use drip irrigation or soaker hoses instead.
- Water in the morning so leaves dry by evening.
🎯 Step 3: Use Copper-Based Bactericides (If Needed)
- Copper fungicides (like copper hydroxide) can suppress bacterial spread—spray every 5–7 days.
- Avoid chemical bactericides (like copper sulfate) on edible plants unless absolutely necessary.
✨ Prevention Tip: Plant disease-resistant tomato varieties (like ‘Celebrity’ or ‘Mountain Merit’) to reduce risk.
If brown spots appear only on sun-exposed leaves or are dry and crispy, your plants may be suffering from sunburn, heat stress, or nutrient issues.
💡 Step 1: Provide Shade Cloth (For Sun Scorch)
- Use shade cloth (30–50%) on hot afternoons if your tomatoes are in a hot, dry climate.
- Mulch heavily with straw to keep roots cool.
📊 Step 2: Check Soil & Fertilizer
- Test your soil—brown spots can signal nitrogen deficiency (yellowing between veins) or potassium deficiency (brown leaf edges).
- Add compost or a balanced fertilizer (like 10-10-10) if soil is poor.
- Avoid over-fertilizing—too much salt can burn roots and cause stress.
🌱 Step 3: Ensure Proper Watering
- Water deeply 1–2 inches per week (more in extreme heat).
- Check soil moisture—stick your finger in the dirt; if it’s dry 2 inches down, water.
🔥 Quick Fix: Mist leaves lightly in extreme heat (early morning only) to prevent sun scorch.
- Choose disease-resistant varieties (look for labels like “VFN” for virus, fungus, and nematode resistance).
- Rotate crops—don’t plant tomatoes in the same spot for 3+ years.
- Plant in well-draining soil—fungi and bacteria love soggy conditions.
- Monitor plants weekly—catch spots early for easier treatment.
Final Thought: Most brown spot issues are preventable with good garden hygiene and proactive care. Once you spot the problem, act fast—your tomatoes will thank you with juicy, blemish-free fruit! 🍅🌿
Frequently asked questions
Can I still harvest tomatoes if the leaves have brown spots?
Yes, but only if the spots are on leaves—not the fruit. Remove any affected leaves immediately to stop disease spread, but healthy tomatoes can still be harvested. If spots appear on the fruit itself (like dark lesions), remove those tomatoes immediately to prevent further contamination.
How do I tell if my tomato spots are fungal vs. bacterial?
Check for these clues: fungal spots often have concentric rings and fuzzy growth on leaf undersides, while bacterial spots are greasy-looking, ooze when touched, and lack rings. Fungal spots also develop yellow halos, while bacterial spots appear suddenly and spread fast in wet conditions.
Will pruning infected leaves make my tomato plant weaker?
Not if done correctly! Removing only the most infected leaves (especially older ones) actually helps the plant focus energy on new growth. Just avoid pruning more than 20% of the foliage at once, and always use sterilized tools to prevent spreading disease.
How often should I spray neem oil for prevention?
Every 10–14 days during warm, humid weather is ideal for prevention. Mix 1 teaspoon neem oil + 1 drop dish soap per quart of water, and spray in the evening. Stop spraying 2 weeks before harvest to avoid any residue on fruit.
Can I save my tomato plants if they're already heavily infected?
It depends! For fungal issues, aggressive pruning + copper spray can still work. For bacterial infections, you may need to remove the entire plant to prevent spread. Start prevention next season with resistant varieties and better airflow—your future harvests will thank you!