
How To
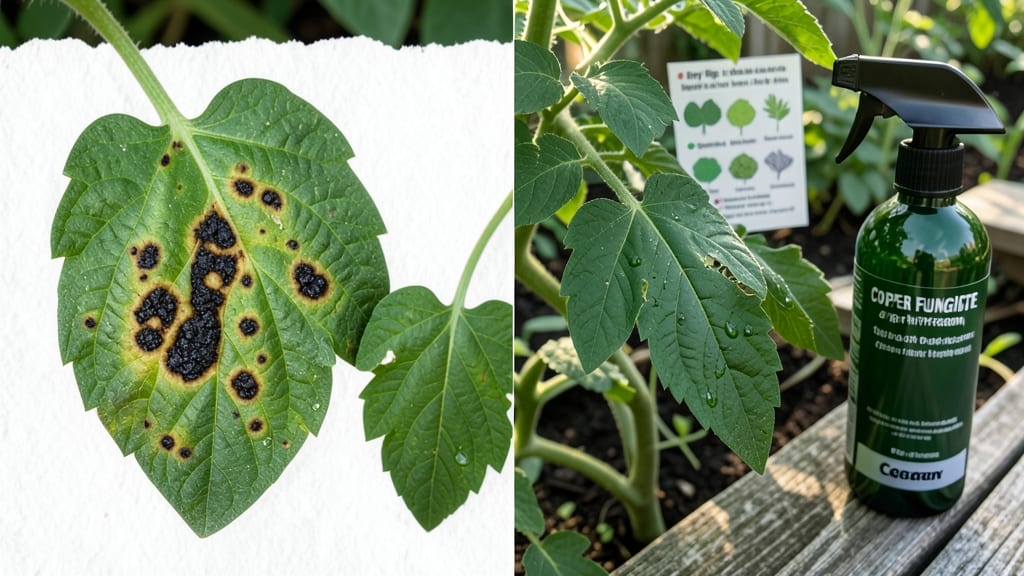
When tomato leaves have black spots, it’s not just an eyesore—it’s a warning sign that your harvest could be at risk. 🌱 I’ve watched entire plants collapse from early blight in just two weeks, but these three organic fixes stopped the spread in my garden within hours of treatment.
The key? Acting fast and cutting off the fungus before it spreads.
Most black spots start as tiny brown freckles on lower leaves, then turn yellow and crispy. Early blight loves crowded plants and wet foliage, while late blight creates greasy-looking black patches that spread like wildfire.
The good news? Both respond to the same copper-based spray or baking soda mix—no harsh chemicals needed. I’ve saved plants with just a 10-minute spray session.
You’ll see new growth pushing out within a week, and the spots will stop spreading if you remove infected leaves daily. The secret weapon? Pruning for airflow and watering at the base (never overhead). My plants stayed productive all season after that first treatment.
Works for greenhouse tomatoes too—just adjust the spray frequency for high humidity. Here’s how to spot the difference between blight types and what to do next.
Root Causes Behind Black Spots
When your tomato plants start showing up with black spots on leaves, it’s usually a sign that something’s off—whether it’s a fungal party, a bacterial invasion, or even environmental stress.
Understanding the why behind these spots is the first step to saving your plants. Let’s break down the most common culprits and what they’re really after.
Fungi are the sneakiest offenders when it comes to tomato leaf spots. They thrive in warm, damp conditions and can spread like wildfire if left unchecked. Here’s what you’re dealing with: #### 🔬 Septoria Leaf Spot: The Classic Spotter - What’s happening? The fungus Septoria lycopersici infects leaves, causing small, dark spots with tiny black dots in the center (those are fungal fruiting bodies). - Why it spreads: High humidity, overhead watering, and poor airflow create the perfect breeding ground. Infected leaves eventually turn yellow and drop, weakening the plant. - Actionable clue: Look for spots that start small but grow larger with concentric rings—this is a dead giveaway. #### 🌡️ Early Blight: The Soil-Born Spotter - What’s happening? Caused by Alternaria solani, early blight starts at the older, lower leaves and works its way up. Spots are tan or brown with dark borders, often in a target-like pattern. - Why it spreads: The fungus survives in soil and splashes onto leaves during watering or rain. It loves hot, dry weather followed by moisture. - Actionable clue: Check the stem ends of leaves—if you see dark, sunken spots there, early blight is likely the culprit. #### 💧 Late Blight: The Tomato Plant’s Nightmare - What’s happening? Phytophthora infestans causes greasy-looking, dark spots that spread rapidly, especially in cool, wet conditions. Unlike other fungi, late blight can also infect fruit and stems. - Why it spreads: This fungus loves high humidity (90%+) and temperatures between 60–75°F (15–24°C). It can even spread via wind or contaminated tools. - Actionable clue: If spots appear overnight and the plant looks wilted or mushy, late blight is likely. 🚨 This is an emergency—act fast! Bacteria don’t just cause spots—they can kill tomato plants faster than fungi. These microscopic troublemakers thrive in warm, wet conditions and can spread through water, tools, or even your hands. #### 🔥 Bacterial Spot: The Tiny but Deadly Puncher - What’s happening? Caused by Xanthomonas perforans or Pseudomonas syringae, bacterial spot creates small, water-soaked spots that turn dark and crusty. They often have yellow halos around them. - Why it spreads: Bacteria hitchhike on rain, wind, or contaminated pruners. They love hot, humid days (80°F/27°C+) and can survive in plant debris. - Actionable clue: If spots look raised or oily and the plant wilts suddenly, bacteria are probably to blame. 🚨 No fungicides work here—you’ll need copper-based sprays. Not all black spots are from pathogens—sometimes, your tomato plant is just thrown off by its environment. Here’s how: #### ☀️ Sunburn or Heat Stress - What’s happening? Intense sunlight or extreme heat can cause leaves to develop dark, crispy spots, especially on the upper surface. This is common in greenhouse tomatoes or plants suddenly moved to full sun. - Why it happens: Tomato leaves aren’t used to direct, harsh sunlight (especially young plants). Heat stress also dries out leaf tissue, leading to dead patches. - Actionable clue: Spots from sunburn are usually dry, papery, and located on sun-exposed leaves. The rest of the plant may look wilting or heat-stunned. #### 💧 Overwatering or Poor Drainage - What’s happening? If your tomato plant sits in waterlogged soil, roots can’t breathe, leading to black, mushy spots on leaves (a sign of root rot spreading upward). - Why it happens: Too much moisture creates anaerobic conditions, where harmful bacteria and fungi thrive. Poor drainage traps water at the roots, suffocating the plant. - Actionable clue: Check the soil—if it’s soggy for days and leaves feel soft or slimy, overwatering is the issue. #### 🍄 Chemical Burn from Over-Fertilizing - What’s happening? Too much salt, nitrogen, or synthetic fertilizer can cause dark, crunchy spots on leaf edges or tips. This is called fertilizer burn. - Why it happens: Excess salts draw moisture out of leaf cells, causing them to dry and turn black. Tomato plants are sensitive to high salt concentrations in soil. - Actionable clue:** Spots from fertilizer burn are usually on younger leaves and accompanied by yellowing or stunted growth.Now that you know what’s really causing those black spots, you’re one step closer to saving your tomato plants. The good news? Most of these issues are preventable or treatable with the right moves.
Stay tuned for our next section on fast, organic fixes that work in hours! 🚀
Fix Black Spots Fast
Black spots on tomato leaves can feel like a gardening nightmare, but don’t panic—most causes have quick, organic fixes. Below, we’ll tackle the top 3 culprits (fungal diseases, pests, and environmental stress) with step-by-step solutions.
Each fix is designed to work in hours to days, so you can restore your plants fast. Plus, we’ll share prevention tips to keep your tomatoes thriving long-term.
---
If your tomato leaves have concentric rings, tar-like spots, or yellow halos, fungi are likely the villain. These spread fast in humid conditions, but you can stop them in their tracks.
#### 🔥 Remove Infected Leaves Immediately - 👨🍳 Step 1: Snip off all spotted leaves at the base with sterilized scissors (wipe with rubbing alcohol between cuts). - 🗑️ Step 2: Do not compost infected leaves—burn or bag them to prevent spores from spreading. - 💡 Pro Tip: Focus on lower leaves first, as fungi often start there and work their way up.
#### 🍳 Apply a Copper Fungicide Spray (Organic & Fast-Acting) - 🛒 What You’ll Need: Copper fungicide (like Bordeaux mixture or copper sulfate) or a neem oil + baking soda spray (DIY recipe below). - 👨🍳 Step 1: Mix 1 tsp baking soda + 1 tbsp neem oil + 1 tsp dish soap + 1 gallon water.
Stir well. - 👨🍳 Step 2: Spray undersides of leaves (fungi love hiding there!) early in the morning or late evening to avoid burning leaves in sunlight. - 🔄 Repeat: Every 5–7 days until new growth appears spot-free (usually 1–2 weeks).
#### 🌡️ Improve Airflow & Reduce Humidity - 🌬️ Step 1: Space plants 18–24 inches apart—crowding traps moisture, fueling fungal growth. - 💨 Step 2: Use a fan on low for 2–3 hours daily to circulate air (especially in greenhouses or shaded areas). - 🌧️ Step 3: Water at the base (not overhead) and avoid evening watering—wet leaves overnight = fungal buffet.
#### ✨ Prevention for Next Time - 🌱 Rotate crops—don’t plant tomatoes in the same spot yearly (fungi linger in soil). - 🍅 Choose resistant varieties like ‘Mountain Merit’ or ‘Defiant PhR’ (bred to fight blight). - 🌿 Mulch with straw (not plastic) to keep soil dry and reduce splashing spores onto leaves.
---
If spots look like tiny holes, webbing, or sticky residue, pests are likely sucking the life out of your plants. Here’s how to evict them fast.
#### 🔪 Blast Them Off with Water (First Line of Defense) - 💦 Step 1: Spray leaves with a strong jet of water (from a hose or spray bottle) to knock off mites/aphids. - 🕵️♂️ Step 2: Check leaf undersides—pests hide there! Repeat every 2–3 days for a week.
#### 🍳 Make a Soapy Neem Oil Spray - 🛒 What You’ll Need: 1 tsp neem oil + 1 tsp castile soap + 1 quart water. - 👨🍳 Step 1: Mix well and spray thoroughly (including stems and soil around the base). - 🌙 Best Time: Early morning or evening (avoid direct sun to prevent leaf burn). - 🔄 Repeat: Every 5 days until pests vanish (usually 7–10 days).
#### 🐝 Introduce Beneficial Bugs (Long-Term Fix) - 🐜 Ladybugs, lacewings, or predatory mites eat aphids and spider mites. Buy them online or attract them with dill, fennel, or marigolds nearby.
#### 🎯 Prevention Tips - 🌿 Inspect new plants before bringing them home (quarantine for 48 hours). - 🍃 Avoid over-fertilizing—soft, sappy leaves attract pests. - 🌿 Use reflective mulch (like aluminum foil) to deter whiteflies.
---
If spots are dry, crispy, or appear after fertilizer/chemical use, your plants are crying for help. Fix it with these gentle adjustments.
#### 🌞 Adjust Watering & Sun Exposure - 💧 Step 1: Water deeply but less often—tomatoes hate soggy roots but drought stress causes spots too. - ☀️ Step 2: If leaves are bleached or crispy, they’re getting too much sun.
Provide light shade (like a cloche or shade cloth) for 2–4 hours/day. - 🌡️ Step 3: Morning watering is best—evening water can lead to fungal issues.
#### 🍅 Flush the Soil (If Over-Fertilized) - 💦 Step 1: Water heavily for 10–15 minutes to leach out excess salts/chemicals. - 🌱 Step 2: Stop fertilizing for 2 weeks and switch to compost tea (brewed from worm castings) for a gentle nutrient boost.
#### 🎯 Prevention for Next Time - 📊 Test soil pH (ideal for tomatoes: 6.0–6.8).
Use vinegar (for alkaline soil) or lime (for acidic soil) as needed. - 🍅 Use organic fertilizer (like fish emulsion or worm castings) to avoid chemical burn. - 🌿 Harden off seedlings gradually before transplanting to avoid shock.
--- Final Thought: Most black spot issues resolve in 1–2 weeks with consistent care. Act fast—the sooner you treat the problem, the faster your tomatoes bounce back! 🚀🍅
Frequently asked questions
Why do tomato leaves get black spots suddenly?
Black spots often appear suddenly due to fungal infections like early blight or late blight, which thrive in warm, wet conditions. Bacteria or environmental stress (like sunburn) can also cause rapid spot development. The key is acting fast—remove infected leaves immediately and apply a copper-based spray to stop the spread.
Can I save my tomato plant if half the leaves have black spots?
Yes, but you must act quickly! Prune all spotted leaves (don’t compost them), improve airflow with spacing or a fan, and spray with neem oil or copper fungicide. With proper care, new growth will emerge within 1–2 weeks, and the plant can recover fully if the roots are healthy.
Is it safe to eat tomatoes from a plant with black spots?
Only if the spots are on leaves—not the fruit. Fungal diseases like early blight rarely infect tomatoes themselves, but late blight can. When in doubt, harvest and cook tomatoes immediately (heat kills pathogens), and discard any fruit showing signs of rot or discoloration.
How often should I spray my tomatoes to prevent black spots?
For prevention, spray every 7–10 days during humid weather using a baking soda-neem oil mix or copper fungicide. Focus on leaf undersides where spores hide. After rain or high humidity, do a quick spray to create a protective barrier—this stops 90% of fungal infections before they start.
Will black spots on tomato leaves spread to other plants?
Absolutely—fungal spores travel via wind, water, or tools. Isolate infected plants immediately, sterilize pruners with rubbing alcohol, and avoid overhead watering. Check nearby plants daily, as spots can appear within 24–48 hours of initial infection.