
Planting
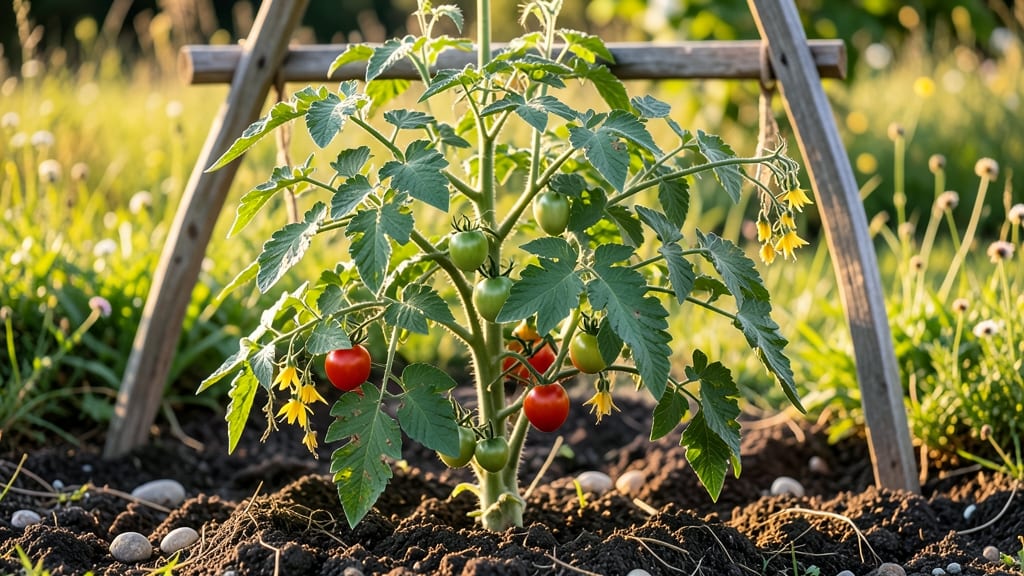
Your tomato plant leaves pictures tell a story—one that can save your harvest before it even starts. 🌱 Healthy leaves mean juicy fruit; yellowing or spotted ones? That’s your plant screaming for help.
This guide shows you exactly what to look for, from early signs of trouble to full-blown crises, so you can act before pests or diseases ruin your season.
I’ve spent years watching tomato leaves transform from glossy green to sad, spotted messes—and learned that early identification is everything. A single leaf with brown edges might just need more water, while curled leaves with tiny webs could mean spider mites.
The key is catching problems when they’re still small, before they spread across your entire plant.
By the end of this, you’ll recognize the subtle differences between a healthy leaf and one under attack. No more guessing whether those brown spots are fungus or just sunburn.
The pictures show you the exact patterns to watch for, so you can treat issues fast and keep your tomatoes thriving all season long.
Whether you’re a first-time gardener or a seasoned pro, these visual cues will help you troubleshoot like a pro. The sooner you spot the problem, the easier it is to fix—so let’s get those leaves looking their best before harvest time arrives.
Root Causes Of Leaf Trouble
Understanding why tomato plant leaves develop issues is the first step toward saving your harvest. 🌱🍅 Most problems stem from environmental stressors, pests, or diseases—each leaving distinct visual clues. Below, we break down the key culprits behind leaf damage, explained in simple, actionable terms.
Tomato plants thrive in well-draining soil, but soggy roots create a perfect storm for problems. When soil stays too wet, roots suffocate, starving leaves of oxygen and nutrients.
This triggers: - Yellowing leaves (chlorosis) starting at the bottom of the plant. - Wilting despite moist soil—roots can’t absorb water efficiently. - Fungal infections like Phytophthora or Pythium, which rot roots and spread upward.
Why it happens:
- Compacted or clay-heavy soil traps water.
- Overzealous watering (e.g., daily drenching) without drying periods.
- Lack of mulch leads to evaporation imbalance, keeping soil damp longer than ideal.
💡 Pro Tip: Stick your finger 2 inches into the soil—if it’s wet, wait. Use raised beds or container pots with drainage holes to prevent waterlogging.
Tomato leaves curl, crisp, or droop when they’re thirsty or battling scorching heat. Unlike overwatering, underwatering causes:
- Brown, dry edges (like "scorch marks") on leaves.
- Premature wilting (leaves feel papery or brittle).
- Blossom-end rot (a separate but related issue) due to calcium uptake failure.
Why it happens:
- Inconsistent watering (e.g., skipping days in heatwaves).
- Shallow root systems in young plants or containers that dry out fast.
- High temperatures (>90°F) increase water loss through transpiration.
✨ Fix It: Water deeply 1–2 times per week (early morning) and mulch heavily to retain moisture. Use shade cloth in extreme heat.
Tomato leaves scream for help when they’re starved of essential nutrients.
Each deficiency has a signature look: - Yellow leaves with green veins → Nitrogen deficiency (oldest leaves first). - Purple stems/leaves → Phosphorus shortage (slows flowering/fruiting). - Brown spots between veins → Magnesium (potassium) deficiency. - New leaves yellowing → Iron or zinc deficiency (common in alkaline soil).
Why it happens:
- Poor soil testing before planting (pH imbalances block nutrient uptake).
- Over-fruiting without replenishing soil (tomatoes are heavy feeders!).
- Improper fertilization (e.g., too much nitrogen, too little potassium).
🔥 Solution: Test soil pH (aim for 6.0–6.8) and side-dress with compost or a balanced 10-10-10 fertilizer mid-season.
Pests chew, suck, or burrow into leaves, leaving unmistakable damage:
- Holes or notches → Caterpillars (tomato hornworms) or slugs.
- Sticky residue + wilting → Aphids or whiteflies (they excrete honeydew).
- Yellowing veins + webbing → Spider mites (thrive in dry heat).
- Black sooty mold → Scale insects (feast on sap, leaving a fungal layer).
Why it happens:
- Lack of beneficial insects (ladybugs, lacewings) to keep pests in check.
- Overhead watering (encourages slugs and fungal pests).
- Weak plants (stress attracts pests like a buffet).
👨🍳 Prevention: Handpick pests early, use neem oil, or introduce predatory nematodes for soil-dwelling bugs.
Fungi and bacteria love humidity and injured plants.
Spot these red flags: - White powdery spots → Powdery mildew (thrives in shady, damp conditions). - Dark, greasy lesions → Early blight or Septoria leaf spot (common in wet climates). - Water-soaked spots that rot → Bacterial spot (spreads via rain/splashing). - Yellow halos around brown spots → Tomato mosaic virus (spread by aphids).
Why it happens:
- Poor airflow (crowded plants or overwatering).
- Contaminated tools/soil (reusing infected compost or pruners).
- Stress from transplant shock (weakened plants can’t fight pathogens).
🌡️ Treatment: Remove infected leaves immediately, space plants for airflow, and rotate crops yearly to break disease cycles.
Even sun, wind, or chemical exposure can harm leaves:
- Sunburn (white/yellow patches) → Sudden heat + wind (common in greenhouses).
- Bleached or curled leaves → Herbicide drift (from nearby lawn treatments).
- Stunted growth + small leaves → Cold drafts or late frost damage.
Why it happens:
- Rapid temperature swings (e.g., moving plants from shade to full sun).
- Chemical residue (herbicides, pesticides) lingering in soil or air.
- Physical damage (hail, strong winds) tearing leaves.
🎯 Fix: Acclimate plants gradually to sun/wind, test soil for chemicals, and protect young plants with row covers.
Fixing Tomato Leaf Problems Fast
When your tomato plant’s leaves start showing signs of distress—whether it’s holes, spots, yellowing, or curling—acting quickly can save your harvest. Below are practical, step-by-step solutions for the most common issues, along with prevention tips to keep your plants thriving. 🌱💪
Cause: Too much water, poor drainage, or lack of essential nutrients (like nitrogen or magnesium). Fix:
- 🔥 Step 1: Adjust Watering Habits
- Water deeply once or twice a week (depending on climate) instead of daily shallow watering. Let the top 1-2 inches of soil dry out between waterings.
- ⏰ Best Time: Water in the early morning to reduce evaporation and fungal risks.
- 🍳 Step 2: Improve Soil Drainage
- Mix compost or perlite into heavy clay soil to enhance aeration.
- If using containers, ensure pots have drainage holes and elevate them slightly.
- 👨🍳 Step 3: Feed with Balanced Fertilizer
- Use a balanced fertilizer (10-10-10 or 5-5-5) every 4-6 weeks during the growing season.
- For magnesium deficiency (yellow edges), apply Epsom salt (1 tbsp per gallon of water) as a foliar spray or soil drench.
💡 Prevention Tip:
- Test your soil every season to monitor pH (ideal: 6.0–6.8) and nutrient levels. A simple DIY test kit works great!
Cause: Hornworms, aphids, or spider mites munching on foliage. Fix:
- 🔪 Step 1: Handpick Large Pests
- Hornworms? 🐛 Grab them by the head (wear gloves!) and drop them in soapy water.
- Aphids? 🐜 Blast them off with a strong spray of water from a hose.
- 🌡️ Step 2: Use Natural Repellents
- Neem oil spray (1 tsp neem oil + 1 tsp mild soap + 1 quart water) – spray leaves thoroughly every 5–7 days.
- Diatomaceous earth (food-grade) – Sprinkle lightly around the base of plants (reapply after rain).
- 🎯 Step 3: Introduce Beneficial Insects
- Ladybugs 🐞 eat aphids, and parasitic wasps 🕷️ target hornworms. Buy them online or from garden centers.
💡 Prevention Tip:
- Plant companion crops like basil, marigolds, or nasturtiums to repel pests naturally!
Cause: Early blight, late blight, or powdery mildew from humidity, poor airflow, or wet foliage. Fix:
- 🍳 Step 1: Prune for Airflow
- Remove lower leaves touching the soil and crowded branches to improve circulation.
- ✂️ Sanitize pruners with rubbing alcohol between cuts to prevent spreading spores.
- 🌡️ Step 2: Apply Fungicidal Sprays
- Baking soda spray (1 tsp baking soda + 1 quart water + a drop of dish soap) – Spray every 7–10 days.
- Copper fungicide (follow label instructions) for severe cases like late blight.
- 🔥 Step 3: Adjust Growing Conditions
- Water at the base (avoid wetting leaves) and space plants 18–24 inches apart.
- Morning sunlight + afternoon shade in hot climates reduces stress.
💡 Prevention Tip:
- Rotate crops yearly—never plant tomatoes in the same spot two years in a row to break fungus cycles!
Cause: Heat stress, wind damage, or viral infections (like tomato mosaic virus). Fix:
- 🌡️ Step 1: Provide Shade & Windbreaks
- Use row covers or shade cloth (30–50%) during extreme heat (above 90°F/32°C).
- Stake or cage plants to prevent wind from tearing leaves.
- 💪 Step 2: Check for Viruses (No Cure, but Manage Symptoms)
- Remove infected plants immediately (burn or bag them—do not compost).
- Disinfect tools and avoid touching healthy plants after handling sick ones.
- 🥗 Step 3: Boost Plant Health
- Mulch with straw or grass clippings to retain moisture and cool roots.
- Fertilize lightly with fish emulsion or compost tea to strengthen immunity.
💡 Prevention Tip:
- Buy certified disease-free seedlings and avoid touching plants when they’re wet (reduces virus spread).
Final Pro Tip: 🌟 When in doubt, isolate the problem plant to prevent cross-contamination. A little early action can mean the difference between a bountiful harvest and a sad, leafy disappointment! 🍅🚀
Frequently asked questions
What do healthy tomato leaves look like?
Healthy tomato leaves are deep green, smooth-edged, and firm to the touch. They should be glossy on top with a slightly lighter underside and grow in a zigzag pattern along the stem. Young leaves are smaller and more rounded, while mature leaves are 5–7 inches long with 5–9 leaflets per compound leaf.
How can I tell if my tomato plant has a pest problem?
Look for tiny webs (spider mites), holes in leaves (hornworms), or sticky residue (aphids/whiteflies). Check the undersides of leaves where pests hide. Early signs include yellowing spots or curling edges. Act fast—handpick large pests or spray with neem oil to prevent spread.
Why are my tomato leaves turning yellow?
Yellowing leaves often signal overwatering (bottom leaves first) or nutrient deficiency (like nitrogen). Check soil moisture—if it’s soggy, reduce watering. For yellow edges, it could be magnesium deficiency (try Epsom salt sprayoverwatering or poor drainage.
Can I save a tomato plant with brown spots?
It depends! If spots are dry and brown (early blight), prune infected leaves and improve airflow. For greasy, spreading spots (late blight), remove the plant immediately to prevent spread. Use copper fungicide if caught early. Brown edges from underwatering can be fixed by adjusting watering habits.
How often should I check my tomato leaves for problems?
Inspect leaves every 3–5 days during the growing season. Focus on new growth and undersides where pests hide. Early detection is key—catching issues before they spread saves your harvest. Keep a plant journal to track changes and compare with healthy leaf pictures.