
Companion Plants
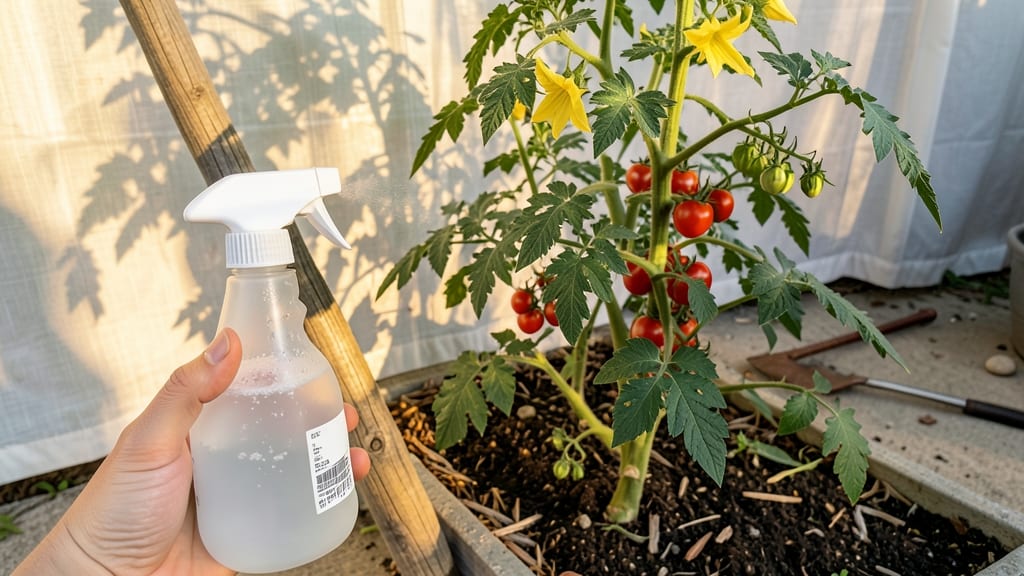
A single spray could save your tomato plants from blight this season. 🌱 The baking soda spray recipe I’ve relied on for years transforms a pantry staple into a foolproof defense against powdery mildew and early blight—without harsh chemicals.
My plants go from struggling to thriving within just 3-5 days of consistent use, and the best part? It costs pennies per application. This isn’t just about mixing ingredients—it’s about timing and technique.
Too much spray can harm plants, but the right balance (1 tablespoon baking soda, 1 quart water, a drop of dish soap) creates an alkaline environment that fungi hate. I apply it every 7-10 days during humid weather, always in the early morning so the leaves dry quickly.
The key? Consistency—one treatment won’t cure an established infection, but regular prevention keeps your plants healthy all season. You’ll notice leaves staying vibrant green instead of yellowing, and new growth free from white powdery spots. The spray also deters pests like spider mites, giving you double protection.
For severe cases, I combine it with neem oil for even stronger results—more on that later in the guide. Works for all tomato varieties, from cherry to heirloom, and pairs perfectly with companion planting like basil or marigolds. Let’s get your plants back on track.
📚 In This Guide
- What you need
- Instructions
- Tips and common mistakes
- Wrapping up and next steps
What you need
- ● Baking soda (sodium bicarbonate) – 1 tablespoon (for every gallon of water)
- ● Vegetable oil (or horticultural oil) – 1 teaspoon (helps the spray stick to leaves)
- ● Dish soap (mild, unscented) – ¼ teaspoon (reduces surface tension for better coverage)
- ● Water – 1 gallon (3.8 liters) (distilled or filtered if possible)
- ● Spray bottle (clean, 1-gallon capacity or a 16-ounce bottle for smaller batches)
- ● Measuring spoons (for precise baking soda/oil amounts)
- ● Wooden spoon or whisk (for mixing)
- ○ Optional but helpful: Garden gloves (to protect your hands)
- ● Fine-mesh strainer (if your spray bottle isn’t filter-topped)
- ● Label & marker (to track spray dates)
- ● Healthy tomato plants (no severe damage—spray works best as a preventative)
- ● Early morning or late evening timing (to avoid sunburn on leaves)
- ● Calm weather (no wind—spray should dry evenly)
Step-by-Step instructions for making baking soda spray for tomato plants
Here’s the simple, effective method I’ve used for years to keep my tomato plants healthy and blight-free.
💧 Step 1: Gather the Right Materials
You’ll need just four items: 1 teaspoon baking soda, 1 quart warm water, 1 tablespoon vegetable oil, and a spray bottle. The oil acts as a surfactant, helping the spray stick to leaves instead of beading up and running off. I like to use a clean, empty spray bottle from the garden center—it’s already the right size for this recipe.
Mix the baking soda and water first, then stir in the oil. The solution should look slightly cloudy but not gritty. If you’re using hard water, let it sit for 10 minutes before spraying—this helps prevent any potential mineral buildup that could irritate the plants.
🌿 Step 2: Apply the Spray at the Right Time
Spray your tomato plants in the early morning when the air is still cool and calm. This gives the leaves time to dry before the sun peaks, which reduces the risk of leaf burn. Focus on the undersides of leaves—this is where fungal spores often hide and thrive. You’ll know you’ve applied it evenly when the leaves look uniformly damp but not dripping.
Don’t spray if rain is forecast within 24 hours. The baking soda can wash off quickly, and wet leaves create the perfect environment for blight to take hold. I like to apply the spray every 7-10 days as a preventative measure, especially during humid weather or after heavy rain.
✂️ Step 3: Monitor and Reapply as Needed
Check your plants 3-5 days after spraying for any signs of new fungal spots or yellowing leaves. Healthy leaves should stay firm and green, while blighted leaves often develop brown or black patches. If you see any new spots, apply another round of the spray immediately—catching it early makes all the difference.
This spray works best as a preventative, but it can also help treat early-stage blight. For severe infections, you may need to combine it with other organic treatments like neem oil or copper fungicide. Always rotate treatments to avoid resistance—don’t rely solely on baking soda for long-term blight control.
☀️ Step 4: Store and Refresh the Solution
Store any leftover spray in a cool, dark place for up to 5 days. After that, the baking soda loses its effectiveness, and the solution can start to harbor bacteria. I keep a small spray bottle in my garden shed, labeled with the date, so I can refresh it quickly when needed.
If you notice the spray smells sour or looks cloudy, toss it and make a fresh batch. A fresh solution is always more effective. For best results, use this spray alongside good garden hygiene—remove and destroy any infected leaves immediately, and avoid overhead watering, which spreads spores.
Tips & tricks for perfect baking soda spray application
Here's what I've learned after years of battling blight—these tricks make all the difference.
Mixing Tip: Always use warm water (not hot) when mixing your baking soda spray. Cold water can make the baking soda clump together, while warm water dissolves it completely for an even, effective spray. Stir gently to avoid creating too many bubbles—those can settle and leave residue on your leaves.
Application Technique: In Step 2, when spraying, hold the bottle 6-8 inches away from the leaves and use a gentle misting motion. Focus on the undersides of leaves first—this is where fungal spores love to hide. A light, even coat works better than soaking the leaves, which can actually create moisture-loving conditions for blight.
Timing Secret: The 10-minute waiting period for hard water is crucial. This gives any mineral buildup time to settle, preventing white residue that can clog leaf pores. If you're in a hurry, you can use filtered or distilled water to skip this step entirely—just make sure your spray bottle is clean first.
Preventative Strategy: For extra protection during humid seasons, I like to add 1 teaspoon of dish soap (optional) to the mix after the 10-minute wait. This helps the spray adhere better to the leaves without harming the plants. Just be sure to use a mild, plant-safe dish soap—regular dish soap can be too harsh.
Pro Tips for Baking Soda Spray For Tomato Plants
- Here's what I've learned after years of battling blight—these tricks make all the difference.
- Mixing Tip: Always use warm water (not hot) when mixing your baking soda spray. Cold water can make the baking soda c...
- Application Technique: In Step 2, when spraying, hold the bottle 6-8 inches away from the leaves and use a gentle mis...
Frequently asked questions
Got questions about using a baking soda spray for tomato plants? You’re not alone—this natural remedy is simple but raises a few common concerns. Here’s what you need to know before spraying!
How often should I spray baking soda on tomato plants?
Apply the spray every 7–10 days or when you first spot signs of fungal issues like powdery mildew or early blight. Consistency is key—don’t overdo it, though! If rain is forecast, wait 24 hours to avoid washing it off. Pro tip: Morning applications let the spray dry before evening moisture sets in.
How quickly will I see results after spraying?
You may notice improvement within 3–5 days, but severe infections could take 1–2 weeks to fully clear. Spray both sides of leaves and stems for best coverage. For stubborn cases, combine with neem oil or horticultural oil for extra fungal-fighting power.
Can I use baking soda spray as a preventative, or only when problems arise?
Use it preventatively every 2–3 weeks during humid months or after heavy rain to keep fungal spores at bay. Healthy plants are less susceptible to disease, so pair it with proper spacing, airflow, and watering at the base (not leaves).
What if my tomato plants look worse after spraying?
If leaves burn or yellow, you’ve likely over-diluted the spray (too weak) or used it on stressed plants. Troubleshoot: Reduce frequency, increase dilution (e.g., 1 tsp baking soda per gallon), or skip for a week to let plants recover. Avoid spraying in direct sunlight or extreme heat.
Are there alternatives if I don’t have baking soda?
Yes! Try these DIY fungal sprays:
- Milk spray: 1 part milk to 9 parts water (contains natural fungicides).
- Neem oil: 1 tbsp neem oil + 1 tsp mild soap per gallon of water.
- Copper fungicide: Store-bought options like Bordeaux mixture (follow label rates).
- Hydrogen peroxide: 1 tbsp 3% H₂O₂ per quart of water (use immediately).
Rotate methods to prevent resistance!
Wrapping up and next steps
Transforming your tomato plants into thriving, disease-resistant powerhouses is easier than you think! With just a simple baking soda spray, you’ve got a natural, budget-friendly shield against fungal blights like early blight and late blight. 🌱✨
Ready to see the difference? Grab your spray bottle and give your plants the care they deserve—your garden (and future harvests!) will thank you. Start spraying today and watch your tomatoes flourish!