
Companion Plants
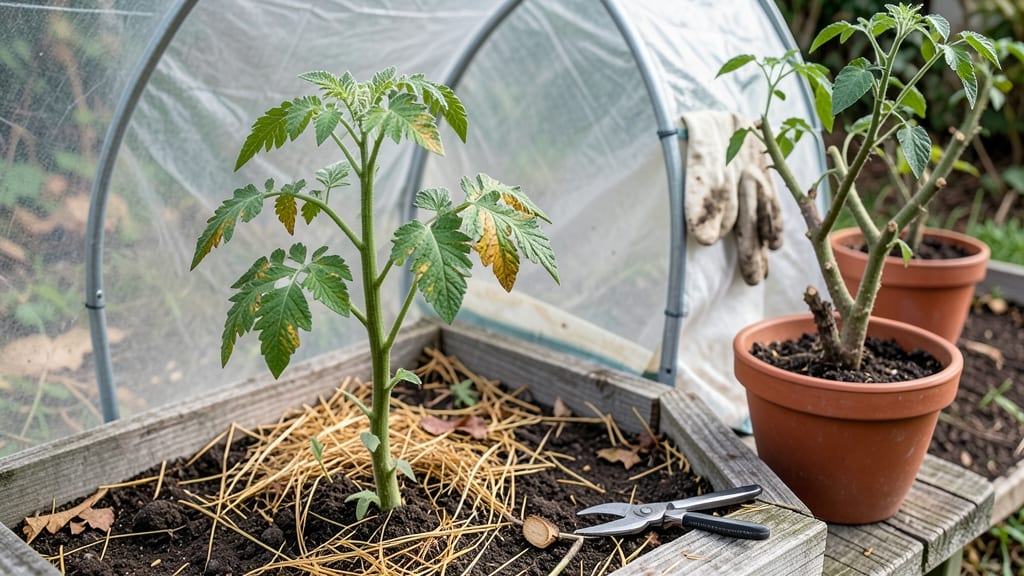
Overwintering tomato plants saves you from starting over every spring—and yes, it actually works. 🌱 I’ve brought mine through winters with just a few key adjustments, and they come back stronger than ever.
The secret isn’t fancy equipment but understanding when to prune, how much light they need, and what pests to watch for.
You’ll need a sunny indoor spot (or grow lights), containers with drainage, and a way to control humidity. My plants spend November through February near a south-facing window, where they get 12+ hours of light daily.
Without this, they stretch and weaken—something I learned the hard way after a leggy, sad winter.
By spring, you’ll have stocky, bushy plants ready to hit the garden early. They’ll fruit sooner than store-bought transplants and often produce more because they’re already established. The first flush of flowers in May is worth every extra step.
This method works best in zones 5-9, but even colder climates can adapt with extra light and heat. The key is starting the transition indoors before the first frost—don’t wait until the leaves yellow. Let’s get those tomatoes through winter!
📚 In This Guide
- What you need
- Instructions
- Tips and common mistakes
- Wrapping up and next steps
What you need
- ● Tomato plants: Healthy, disease-free plants (2–3 per overwintering container if grafting or growing multiple varieties).
- ● Containers: 5–7 gallon pots (or larger) with drainage holes. Plastic or fabric grow bags work well.
- ● Potting mix: High-quality, well-draining soil mix (avoid garden soil—it compacts and retains too much moisture).
- ● Cold frames or hoop houses: Low tunnels (4–6 ft tall) with clear plastic or greenhouse film to trap heat.
- ● Insulation: Straw, burlap sacks, or frost blankets (for added protection during hard freezes).
- ● Thermometer: Soil and air thermometer (to monitor temps—ideal range: 40–60°F).
- ● Pruners: Sharp, clean bypass pruners (sterilize with rubbing alcohol).
- ● Mulch: Organic mulch (straw, leaves, or wood chips) to regulate soil temperature.
- ● Watering can or hose: With a gentle spray nozzle (avoid overwatering).
- ● Fertilizer: Balanced, slow-release fertilizer (5-10-5) or compost tea (reduce nitrogen in winter).
- ● Grafting supplies (if grafting varieties for cold hardiness).
- ● LED grow lights (for supplemental light during short winter days).
- ● Heating mat (for extreme cold snaps—set to 50–55°F).
- ● Ventilation kit (for cold frames to prevent overheating).
- ● Humidity dome or plastic wrap (to protect young shoots from dry indoor air if starting indoors).
Step-by-step instructions for overwintering tomato plants
Here’s how to save your tomato plants through winter and get them ready for another productive season.
🌱 Step 1: Prune and Prepare Plants for Storage
Start by pruning your tomato plants down to about 12 inches tall, leaving only the main stem and a few lower branches. This reduces their size and makes them easier to store. Remove any yellow or diseased leaves—these can spread rot during overwintering. I like to trim with clean, sharp scissors to avoid tearing the stems.
Next, rinse the plants gently with water to remove any soil or debris. This helps prevent pests and diseases from hiding in the foliage. Let them dry completely before moving to the next step. If you notice any signs of pests like aphids or spider mites, treat the plants with neem oil before storage to keep them from spreading.
⏰ Step 2: Harden Off and Acclimate Gradually
About 2 weeks before bringing plants indoors, start reducing their watering to help them prepare for dormancy. This gradual adjustment prevents shock. Place them in a shaded area for a few hours each day to mimic cooler conditions. You’ll notice the leaves may yellow slightly—this is normal and part of the hardening-off process.
During this time, avoid fertilizing. The goal is to slow growth and prepare the plants for their winter rest. If possible, keep them in a spot with mild temperatures (50-60°F) to ease the transition. This step is crucial—rushing it can stress the plants and reduce their chances of surviving the winter.
🪴 Step 3: Store Plants in a Cool, Dry Environment
Once hardened off, place the pruned plants in a cool, dry location like a garage, basement, or even a refrigerator (if no other option). Wrap the pots in plastic bags with small holes for airflow to maintain humidity, but avoid sealing them completely—this can lead to mold. Store them in a way that allows air to circulate around the plants to prevent rot.
Check on them monthly to ensure no pests or mold have taken hold. If you notice any issues, adjust the storage conditions immediately. The ideal temperature for overwintering tomatoes is 35-45°F. If your storage area gets too warm, the plants may start growing again, which can exhaust their energy reserves.
☀️ Step 4: Monitor and Prepare for Spring Planting
In late winter, start checking your stored plants for signs of life. You’ll know they’re ready to come out of dormancy when you see new growth or buds forming. This usually happens around 6-8 weeks before your last frost date. Gradually reintroduce them to light by placing them in a sunny window or under grow lights for a few hours each day.
Once new growth appears, repot the plants if needed and begin fertilizing lightly with a balanced fertilizer. This helps them recover and prepares them for the growing season ahead. Keep an eye out for any signs of stress, like wilting or yellowing leaves, and adjust their care as needed. With proper overwintering, you’ll have strong, healthy plants ready to produce another great harvest.
Tips & tricks for perfect overwintering tomato plants
Here's what nobody tells you about saving your tomato plants for another harvest—these tricks make all the difference.
Pruning Precision: When you trim your plants down to 12 inches, focus on removing only the top growth while keeping the main stem intact. This helps maintain the plant's structural integrity during storage. I've found that leaving a few lower branches provides just enough energy reserves for spring regrowth. Use clean, sharp scissors to make clean cuts—this prevents tearing that can introduce diseases during dormancy.
Neem Oil Timing: If you notice pests during the pruning step, apply neem oil at least 48 hours before storage. This gives the oil time to work while preventing any potential chemical residue from lingering in your storage area. I like to spray in the evening when temperatures are cooler—this helps the oil adhere better to plant surfaces. The mild temperatures (50-60°F) during hardening off create perfect conditions for the neem oil to be effective.
Storage Environment: The 35-45°F temperature range is critical, but airflow is just as important. I've had the best success using a small fan on low speed near the storage area to maintain gentle circulation. This prevents mold buildup while maintaining the right humidity levels. If using plastic bags, poke holes large enough to fit a pencil—this allows airflow without letting in drafts that could shock the plants.
Spring Transition: When you see new growth 6-8 weeks before your last frost date, gradually increase light exposure by 1-2 hours per day. Sudden exposure can cause sunburn on tender new leaves. I start with morning sun and gradually move to full sun exposure over a week. This mimics natural spring conditions and helps the plants adjust without stress.
Pro Tips for Overwintering Tomato Plants
- Here's what nobody tells you about saving your tomato plants for another harvest—these tricks make all the difference.
- Pruning Precision: When you trim your plants down to 12 inches, focus on removing only the top growth while keeping the main stem intact.
- Neem Oil Timing: If you notice pests during the pruning step, apply neem oil at least 48 hours before storage.
Frequently asked questions
Got questions about keeping your tomato plants alive through the winter? You're not alone! Here are some of the most common concerns—and straightforward answers—to help you overwinter with confidence.
Can I overwinter tomato plants in pots or do they need to be in the ground?
Both work, but pots offer more control! If overwintering in containers, use 10+ gallon pots with drainage holes and move them to a sheltered spot (like a garage or cold frame) before frost. In-ground plants can survive if mulched heavily (12+ inches) and protected with row covers or low tunnels. Just avoid soggy soil—drainage is key!
When is the best time to start overwintering tomato plants?
Begin 2–4 weeks before your first hard frost (usually late fall). For containers, prune plants back by ⅓ and reduce watering. In-ground plants should be mulched before temperatures drop below 40°F. Wait too long, and frost damage or disease risk skyrockets—act early!
How cold can tomato plants tolerate during overwintering?
Most tomatoes survive 20–25°F with protection, but prolonged exposure below 15°F risks death. Use row covers, frost cloth, or mini greenhouses for extra insulation. If temps plunge unexpectedly, move potted plants to a garage or basement (above freezing) until warmth returns.
Will overwintered tomato plants produce fruit next year?
Yes! With proper care, overwintered tomatoes often rebound stronger and yield even bigger harvests the following season. Prune aggressively in early spring to encourage new growth, and fertilize lightly (balanced 10-10-10) once temperatures rise above 50°F consistently.
What pests or diseases should I watch for during overwintering?
Keep an eye out for aphids, spider mites, and fungal diseases (like blight) in sheltered plants. Preventative sprays (neem oil or insecticidal soap) in late fall can help. For in-ground plants, remove old mulch in spring and replace with fresh to reduce pathogen buildup.
Still unsure? Drop your overwintering scenario in the comments—we’re happy to help troubleshoot!
Wrapping up and next steps
Overwintering your tomato plants is a rewarding way to extend their life and jumpstart next year’s harvest with a head start! 🌱 The key lies in protecting them from frost, pruning wisely, and choosing the right method—whether it’s indoors, in a greenhouse, or under mulch.
With the right prep, you’ll be enjoying homegrown tomatoes earlier and more abundantly than ever.
Ready to give it a try? Start by selecting your healthiest plants and gathering supplies this fall. Then, follow the steps to overwinter them with confidence—your future self (and taste buds!) will thank you. Happy gardening! 🌿