
Companion Plants
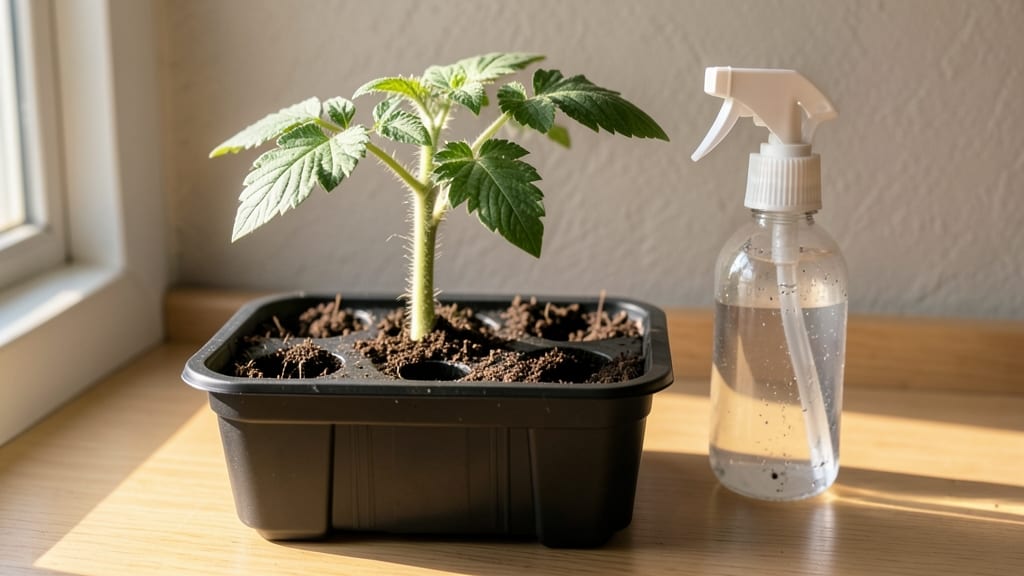
Starting tomato plants indoors lets you beat the nursery crowd and grow varieties you won't find anywhere else—like heirlooms with names like 'Brandywine' or 'Black Krim'. 🌱 The key is timing: begin 6-8 weeks before your last frost, when daylight stretches just enough to coax those first stubborn sprouts.
I learned this the hard way after my first batch of seedlings stretched like overcaffeinated teenagers, desperate for light but getting none.
You only need three things to start: a seed tray (or even recycled containers), sterile seed-starting mix, and a way to provide 12-16 hours of light daily. Skip the fancy setups—even a sunny windowsill works if you rotate trays daily.
My first attempt used a basic grow light on a timer, and within 7-10 days, those tiny green hooks broke through the soil. The secret isn’t expensive gear; it’s consistency.
By week 4, you’ll see stocky seedlings with true leaves (not the first two seed leaves) ready to handle gentle fertilizer. They’ll outpace store-bought plants by weeks, giving you a head start on the season.
The payoff? Heavier fruit, earlier harvests, and the pride of growing something from a speck of seed to a vine heavy with tomatoes.
This method works for any tomato variety—cherries, slicers, or paste types—and adapts to small spaces. Whether you’re a first-timer or a seasoned grower tweaking your routine, the early start makes all the difference. Let’s get those seeds sprouting!
📚 In This Guide
- What you need
- Instructions
- Tips and common mistakes
- Wrapping up and next steps
What you need
- ● Tomato seeds: Choose disease-resistant varieties like Early Girl, Beefsteak, or Cherry Roma (20-30 seeds per batch).
- ● Seed trays or starter pots: 2-4" deep, with drainage holes (1-2 trays or 12-24 small pots).
- ● Seed-starting mix: Lightweight, sterile, and peat-based (avoid garden soil—it’s too dense!).
- ● Grow lights or sunny windowsill: 12-16 hours of light daily (LED grow lights are ideal).
- ● Spray bottle: For gentle watering (avoid over-saturating seeds).
- ● Plastic wrap or humidity dome: To retain moisture while seeds germinate.
- ○ Heat mat (optional but helpful): Keeps soil warm (70-85°F) for faster germination.
- ● Fertilizer: Balanced liquid fertilizer (5-10-5 or 10-10-10) for seedlings (dilute to half-strength).
- ● Plant labels: To track varieties and planting dates.
- ● Fungicide (like hydrogen peroxide or copper spray): Prevents damping-off disease.
- ● Growing containers with saucers: For catching excess water and protecting surfaces.
- ● Timer for grow lights: Automates light cycles (12-16 hours/day).
Step-by-step instructions for starting tomato plants indoors
Here's how to get those lush tomato vines off to a flying start—no guesswork, just reliable results.
🌱 Step 1: Prepare Seed-Starting Containers and Mix
Use 2-3 inch deep seed-starting trays with drainage holes—plastic or biodegradable pots both work. I like biodegradable ones because they eliminate transplant shock later. Fill each cell with sterile seed-starting mix (never garden soil—it's too dense and may harbor diseases). Moisten the mix until it holds together when gently squeezed but doesn't drip.
Press the mix down lightly to remove air pockets, but don't compact it. You want a balance—roots need air but shouldn't struggle to push through. Tap the tray gently on the table once to settle everything evenly. This ensures your seedlings won't develop air gaps that stunt growth.
🌱 Step 2: Sow Seeds at the Right Depth and Cover Lightly
Plant 2 seeds per cell at a depth of about ¼ inch—roughly the width of the seed itself. Sowing too deep delays germination because the seedling has to work harder to reach the light. Cover the seeds with a thin layer of additional mix, just enough to hide them completely.
Mist the surface with a spray bottle until the mix is evenly damp but not soggy. A heavy watering can will dislodge seeds or bury them too deep. I label each tray with the variety and date—after a week, identical seedlings can look confusing. This step is critical: too much water now invites damping-off, while too little leaves seeds dry and lifeless.
💧 Step 3: Provide Warmth and Humidity for Germination
Cover the tray with a clear plastic dome or plastic wrap to retain warmth and moisture. Tomatoes germinate best at 75-85°F, so place the tray on a seedling heat mat if possible. Without one, a sunny windowsill or warm spot above the fridge works. Expect sprouts in 5-10 days—patience here pays off.
Check daily but resist watering until you see condensation on the underside of the dome. Once 50% of seeds have sprouted, remove the dome immediately. Trapped humidity around new seedlings invites fungal diseases like damping-off, which can collapse stems overnight. This is the moment that matters: balance moisture without suffocating the tiny plants.
☀️ Step 4: Move to Bright Light Immediately After Germination
The instant seedlings break through the soil, they need 14-16 hours of light daily. A south-facing window rarely provides enough intensity, so I use a full-spectrum LED grow light positioned 2-4 inches above the plants. Raise it as they grow to maintain that gap—you'll see leggy growth if it's too far away.
Strong seedlings have thick stems, deep green color, and compact spacing between leaves. If stems grow thin and pale with leaves spaced far apart, your light is too weak or distant. Rotate the tray a quarter turn daily so plants grow straight instead of leaning toward the light. This ensures even growth and prevents weak stems that snap under tomato vines' weight later.
⏰ Step 5: Harden Off Before Transplanting Outdoors
Two weeks before your last frost date, start hardening off seedlings by placing them outside in a sheltered, shaded spot for 1-2 hours the first day. Gradually increase outdoor time by 1 hour daily over 10-14 days, slowly introducing more sun and wind. This prepares them for the garden without shock.
Skipping this step burns leaves, breaks stems, and stresses plants severely. On the final day, leave them out all day if temperatures stay above 50°F. Transplant on an overcast afternoon to reduce transplant shock, and water deeply at the base. Your seedlings are now ready to thrive in the garden—just like the burst of vines you've been waiting for.
Tips & tricks for starting tomato plants indoors
These game-changing insights will help you avoid the most common pitfalls and give your tomato seedlings the strongest possible start. I've learned these the hard way—trust me, your future vines will thank you.
Seedling Heat Mat Hack: If you don't have a seedling heat mat, try placing your tray on top of your refrigerator during germination. The heat rising from the coils creates an ideal 75-85°F environment without requiring special equipment. Just make sure the tray isn't touching the coils directly—use a towel as insulation. This mimics the warmth of a heat mat perfectly.
Lighting Strategy for Small Spaces: When using grow lights, position them so they're just skimming the tallest seedlings. The 2-4 inch distance is ideal, but if you're working with limited space, you can start closer (1-2 inches) for the first week when seedlings are tiny. Just remember to raise it as they grow—leggy seedlings are a sign the light was too far away too soon.
Damping-Off Prevention: The moment you see condensation on the underside of your dome (around 50% germination), remove it immediately—even if only a few seeds have sprouted. I've lost entire trays because I waited too long. After removing the dome, mist the seedlings with a spray bottle containing a 1:9 ratio of hydrogen peroxide to water instead of plain water. The peroxide acts as a natural fungicide against damping-off.
Transplanting Timing: For the final hardening-off day, I always check the weather forecast. If temperatures are forecasted to drop below 50°F overnight, I bring the seedlings back in and delay transplanting by a day. A cold snap can shock even hardened-off plants. The extra day of preparation makes all the difference when you're finally moving them to the garden.
Pro Tips for Starting Tomato Plants Indoors
- These game-changing insights will help you avoid the most common pitfalls and give your tomato seedlings the strongest possible start.
- Seedling Heat Mat Hack: If you don't have a seedling heat mat, try placing your tray on top of your refrigerator during germination.
- Lighting Strategy for Small Spaces: When using grow lights, position them so they're just skimming the tallest seedlings.
Frequently asked questions
Got questions about starting tomato plants indoors?
Here are answers to the most common ones—so you can grow like a pro!
When is the best time to start tomato seeds indoors?
Start seeds 6–8 weeks before your last frost date (e.g., mid-March for most U.S. zones). This gives seedlings enough time to grow strong before transplanting. Check your frost date and adjust timing for early or late seasons. Pro tip: Use a seed-starting chart for your region!
What if I miss the ideal starting window?
Don’t panic! If you’re late, opt for transplanting young seedlings from a nursery (6–8 inches tall) instead. Just harden them off first by gradually exposing them to outdoor conditions for 1–2 weeks. For a last-minute fix, try fast-maturing varieties like ‘Early Girl’ or ‘Stupice.’
Why are my tomato seedlings leggy or weak?
Leggy seedlings usually mean too little light or overcrowding. Move them to a sunny windowsill or under grow lights (14–16 hours/day). Thin seedlings to 2 inches apart, and use a balanced fertilizer (5-5-5) to boost strength. Avoid overwatering—keep soil evenly moist, not soggy!
Do tomato seeds need warmth to germinate?
Yes! Tomato seeds germinate best in 70–85°F soil. Use a seedling heat mat (or place pots on top of your fridge) until sprouts appear (5–14 days). Once germinated, keep them at 65–75°F during the day and 55–60°F at night for optimal growth.
Can I reuse containers or soil from last year?
It’s not recommended—old soil may harbor diseases like damping off or pests. Sterilize containers with a 10% bleach solution or boiling water, and use fresh, sterile seed-starting mix (avoid garden soil). For containers, opt for biodegradable pots or clean plastic/cardboard egg cartons to reduce transplant shock.
Wrapping up and next steps
Starting tomato plants indoors is a rewarding way to jumpstart your gardening season—giving you a head start on lush, productive vines!
With just a little patience and the right setup, you’ll be transplanting sturdy seedlings in no time. Now that you’re equipped with the know-how, why not gather your supplies and begin your journey? Next, explore when and how to transplant those thriving seedlings outdoors for a bountiful harvest. 🌱✨