
Vegetables
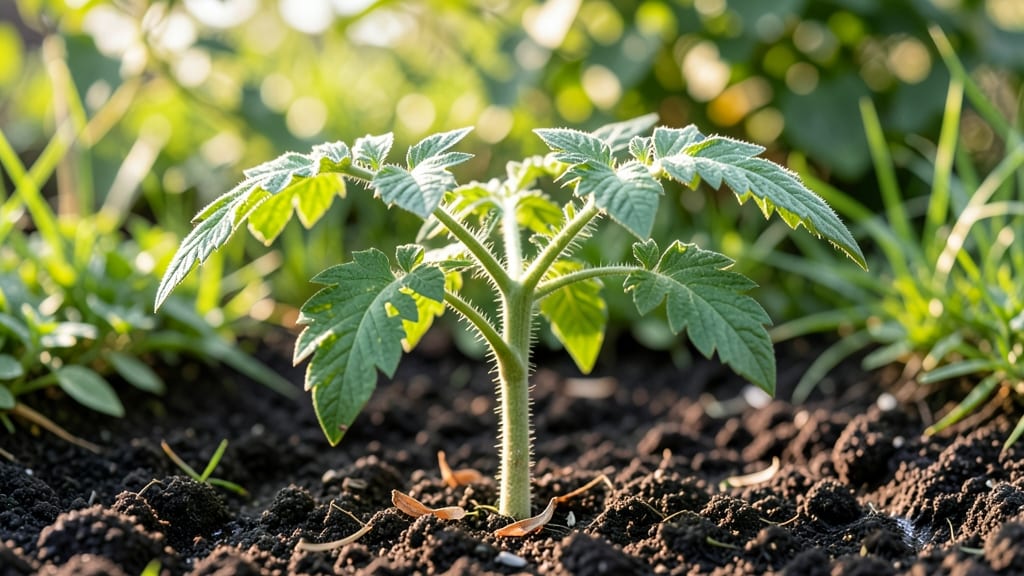
Your tomato seedlings are popping through the soil in just one week—now the real work begins. 🌱 Fast germination is exciting, but these tiny sprouts need precise care to grow into strong, healthy plants ready for transplanting. Skipping this stage means weak stems, leggy growth, or even total failure.
Light is your #1 priority: place seedlings under grow lights (12-16 hours daily) or in the sunniest window, but avoid scorching. Water gently from below to prevent damping-off—a fungal disease that turns seedlings to mush overnight.
Keep soil consistently moist but never soggy, and maintain temperatures between 65-75°F for optimal growth.
By the end of week 2, you’ll see true leaves (not the first seed leaves) and sturdy stems—signs your seedlings are ready for transplanting. The key is consistency: no overwatering, no cold drafts, and no letting them stretch toward weak light.
These small habits prevent common pitfalls and set you up for a bountiful harvest.
Even with perfect care, issues pop up—yellowing leaves, mold, or stunted growth. Most problems stem from overwatering or poor air circulation. The fix? Adjust your routine and keep an eye out for early signs. With these tricks, your seedlings will grow fast, strong, and ready for the garden.
📚 In This Guide
- What you need
- Instructions
- Tips and common mistakes
- Wrapping up and next steps
What you need
- ● Tomato seeds: 10-20 seeds (choose a fast-maturing variety like 'Early Girl' or 'Cherry Tomato').
- ● Seed-starting mix: 1-2 cups of sterile, seedling-specific potting mix (avoid garden soil—it’s too dense!).
- ● Containers: 2-4 small pots (2-3 inches deep) or a seed tray with cells (1-2 seeds per cell).
- ● Water: Room-temperature, filtered water (chlorine-free for sensitive seeds).
- ● Plastic wrap or humidity dome: 1 sheet or dome to retain moisture.
- ● Grow lights or sunny windowsill: A warm, bright spot (65-75°F) or a LED grow light (12-16 hours/day).
- ● Spray bottle: For gentle watering (avoid over-saturating seeds!).
- ● Plant labels: 2-4 labels to track seed varieties.
- ○ Heat mat (optional): 1 small mat (70-80°F) to speed germination.
- ○ Fertilizer (optional): A diluted liquid seedling fertilizer (half-strength) after sprouts appear.
Step-by-Step instructions for fast-germination tomato seedlings
Here's how to coax tomato seeds to sprout in just 7 days—no waiting months for stubborn germination.
🌱 Step 1: Prep Seeds for Maximum Germination Speed
Start by soaking tomato seeds in lukewarm water for 12 hours—this softens the outer coating and kickstarts metabolic activity. I use a shallow dish with a damp paper towel to prevent seeds from floating away. After soaking, gently blot them dry with another paper towel to remove excess moisture without damaging the seed.
The reason we soak first is that tomato seeds have a tough outer shell that slows germination. A 12-hour soak in water at 75-80°F ensures they're ready to burst through the soil within days. Don't skip this—it cuts germination time nearly in half. Place the damp seeds in a sealed plastic bag overnight to maintain warmth and humidity.
💧 Step 2: Plant in Warm, Moist Soil with a Heat Boost
Fill your seed-starting containers with sterile seed-starting mix (never garden soil—it's too dense and may carry pathogens). Moisten it until it's damp but not soggy, then press down lightly to remove air pockets. I like to work the mix until it holds together when squeezed but doesn't drip water—this ensures even moisture without waterlogging.
Plant the pre-soaked seeds ¼ inch deep, spacing them 1 inch apart in each cell. Cover them lightly with additional mix, then water gently from the bottom to avoid displacing seeds. The key to fast germination is heat—place the tray on a seedling heat mat set to 75-85°F. This warmth mimics outdoor spring conditions and triggers rapid sprouting.
☀️ Step 3: Maintain Humidity and Light for Bursting Growth
Cover the tray with a clear humidity dome or plastic wrap to trap warmth and moisture. Check daily but resist the urge to water—condensation inside the dome provides everything the seeds need. You'll see the first sprouts in 3-5 days if conditions are perfect. Remove the dome immediately once 50% of seeds have sprouted to prevent damping-off disease.
As soon as the first true leaves appear (not the initial cotyledons), move seedlings under grow lights for 14-16 hours daily. A south-facing window won't provide enough intensity—tomato seedlings need bright, direct light to prevent leggy growth. Position the lights 2-4 inches above the plants and adjust as they grow. Leggy seedlings (thin, pale stems) mean your light is too far away.
⏰ Step 4: Monitor and Adjust for Peak Speed
Watch for first true leaves—these look different from the initial seed leaves (cotyledons) and signal the plant's real growth phase. At this point, reduce bottom-watering to top-watering (but avoid soaking the leaves). You'll know moisture is right when the soil surface looks slightly damp but not glistening. Overwatering now will suffocate roots and slow growth.
If germination stalls after 5 days, gently mist the soil surface with room-temperature water and check the heat mat—it may have dropped below 70°F. Tomatoes germinate fastest in warm, stable conditions. Once all seeds have sprouted, thin to one strong seedling per cell by snipping weaker stems at the base with clean scissors. This prevents competition and ensures robust growth.
Tips & tricks for perfect tomato seedling sprouting
Here's what nobody tells you about getting those first green shoots in record time.
Soaking Secrets: For the 12-hour soak in Step 1, use a shallow dish with a damp paper towel to prevent seeds from floating away. I've learned that adding a drop of dish soap to the soaking water prevents surface tension issues—seeds stay submerged without clumping. The goal is to hydrate the seed coat evenly, not drown it. After soaking, blot seeds gently between two paper towels to remove excess moisture without damaging the delicate seed structure. This step is non-negotiable for breaking dormancy in just 7 days.
Heat Mat Hack: The 75-85°F range in Step 2 is critical, but here's the thing: most seedling heat mats run at 80°F by default. If your kitchen runs cooler, place the tray on top of your fridge (not inside) to maintain consistent warmth. I've seen germination times stretch to 10 days when heat fluctuates below 70°F—those few degrees make a huge difference. Pro tip: Use a small thermometer to monitor the soil temperature directly, not just the mat's surface reading.
Light Positioning: When you move seedlings under grow lights in Step 3, position them just 2-3 inches away initially. As they grow, you'll need to raise the lights gradually to maintain that 2-4 inch distance. The key is to keep the light intensity high enough to prevent leggy growth—those thin, pale stems are a dead giveaway your seedlings aren't getting enough light. I adjust my lights every 3-4 days as the seedlings stretch toward them.
Thinning Strategy: In Step 4, when thinning to one strong seedling per cell, I recommend using clean scissors to snip at the base rather than pulling. This prevents disturbing the roots of your remaining seedlings. The goal is to minimize stress on the plants you're keeping—every little disruption can set back your 7-day timeline. Plus, it's more precise than trying to pull weak seedlings by hand.
Pro Tips for 1 Week Tomato Seedlings
- Here's what nobody tells you about getting those first green shoots in record time.
- Soaking Secrets: For the 12-hour soak in Step 1, use a shallow dish with a damp paper towel to prevent seeds from flo...
- Heat Mat Hack: The 75-85°F range in Step 2 is critical, but here's the thing: most seedling heat mats run at 80°F by ...
Frequently asked questions
Got questions about your 1-week tomato seedlings? You’re not alone! Here are answers to the most common concerns to keep your little plants thriving.
How do I know if my tomato seeds have germinated in just 1 week?
Check for tiny white roots or a curled sprout peeking out of the soil—this means germination! If nothing appears, wait a few more days (some seeds take 7–14 days). Avoid overwatering, as soggy soil can suffocate seeds. Pro tip: Use a clear container to monitor progress without disturbing the soil.
What if my seedlings sprout unevenly after 1 week?
Uneven sprouting is normal! Keep the soil consistently moist (not soggy) and place seedlings in bright, indirect light (like a sunny windowsill). If some seeds lag, try a warm spot (70–85°F) to encourage faster growth. Once sprouted, thin to the strongest seedling per pot to avoid competition.
Can I transplant 1-week-old tomato seedlings outside yet?
No!
Wait until seedlings are 2–3 inches tall with 2–3 true leaves (not just seed leaves). Harden them off first by placing them outside for 1–2 hours daily over 5–7 days. Transplanting too early stresses delicate roots. Timing tip: Aim for after last frost (check your local frost dates!).
What do I do if my 1-week seedlings look leggy or weak?
Leggy seedlings need more light! Move them closer to a grow light (12–16 hours/day) or a south-facing window. If roots are exposed, bury them deeper (up to the first true leaves) to stabilize growth. Avoid overcrowding—thin or repot if needed. Watch for: Yellow leaves (overwatering) or stunted growth (underwatering).
Are there faster alternatives to growing tomato seedlings in 1 week?
For instant gratification, try transplanting nursery seedlings (already 4–6 weeks old) instead of starting from seed. If you’re set on seeds, use pre-soaked seeds (soak overnight in warm water) or a heat mat (speeds germination by 2–3 days). Just remember: Patience pays off!
Wrapping up and next steps
Growing 1-week tomato seedlings is totally doable with the right tricks—patience, warmth, and a little love! 🌱 By following these fast-germination tips, you’ll soon see those tiny sprouts breaking through the soil, ready to thrive. Now’s the time to celebrate your progress and keep nurturing those seedlings—soon, you’ll be harvesting juicy tomatoes!
Your next step? Transplant carefully once they’ve grown a few inches tall, ensuring they get plenty of sunlight and space. Happy gardening—your future tomato harvest is just around the corner! 🍅✨