
How To
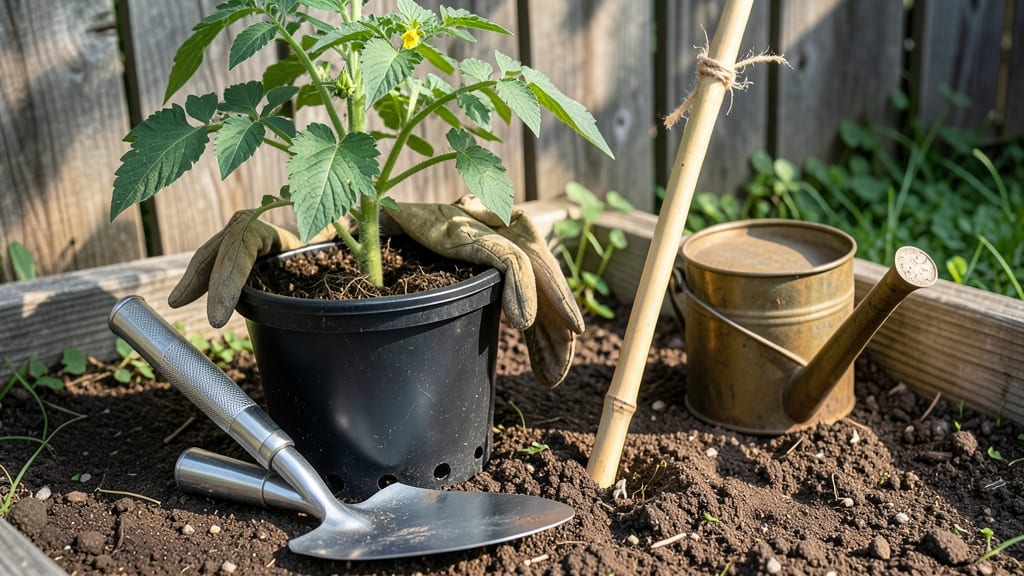
Transplanting tomato plants the right way means the difference between vibrant, productive vines and sad, stunted growth. 🌱 I’ve moved dozens of tomato seedlings—some thrived, others struggled—and the secret lies in timing, soil prep, and gentle handling.
Skip the guesswork with this foolproof method that works for both nursery starts and home-grown seedlings.
Start by hardening off plants for 5-7 days before transplanting, then dig holes twice as wide as the root ball and just deep enough to bury the stem up to the first leaves. Water deeply before and after moving, and stake or cage plants immediately to prevent flopping.
The key? Minimize root disturbance and keep soil consistently moist for the first two weeks—this is what keeps plants thriving after the shock.
📚 In This Guide
- What you need
- Instructions
- Tips and common mistakes
- Wrapping up and next steps
What you need
- ● Healthy tomato seedlings or young plants (4–6 weeks old, with 2–3 true leaves 🌿)
- ● Transplanting container or pot (5–10 gallons per plant, with drainage holes ⛓️)
- ● High-quality potting mix (lightweight, well-draining, and rich in organic matter 🌱)
- ● Garden trowel or transplanting spade (for digging and moving plants gently 🔨)
- ● Watering can or hose with a gentle spray nozzle (to avoid disturbing the soil 💦)
- ● Fertilizer (balanced 10-10-10 or organic options like compost or worm castings 🌿)
- ● Mulch (straw, shredded leaves, or wood chips to retain moisture and suppress weeds 🍂)
- ● Support structure (cage, stake, or trellis for indeterminate varieties 🪵)
- ● Root stimulator (to encourage faster root growth after transplanting 🌱)
- ● Pruning shears (for trimming damaged or overgrown foliage before transplanting ✂️)
- ● Epsom salt (for magnesium boost, especially for yellowing leaves 🧂)
- ● Plant tags or markers (to label varieties if growing multiple types 📝)
- ● Garden gloves (to protect your hands from thorns or soil 🧤)
Step-by-step instructions for transplanting tomato plants
This method minimizes shock and promotes vigorous growth—exactly what you want from your tomato transplants.
🌱 Step 1: Prepare the Transplant Site for Optimal Growth
Choose a location with full sun exposure (6-8 hours daily) and well-draining soil. Tomatoes thrive in slightly acidic to neutral soil with a pH between 6.0-6.8. Work in a 2-3 inch layer of compost into the top 6-8 inches of soil to improve fertility and drainage. If your soil is heavy clay, mix in 1-2 inches of coarse sand to prevent compaction around the roots.
Dig a hole slightly larger than the root ball of your tomato plant—about twice as wide and just as deep. Loosen the sides of the hole with a garden fork to encourage root spread. This preparation gives roots immediate access to nutrients and moisture, reducing transplant shock. Avoid working the soil when it's wet; compacted soil around roots is one of the fastest ways to stunt growth.
💧 Step 2: Acclimate the Plant Before Transplanting
Hardening off your tomato seedlings is critical—skip this step and you risk leaf scorch and stem damage. Begin 7-10 days before transplanting by placing the plants outside in a shaded area for 1-2 hours the first day. Gradually increase exposure by 1 hour daily, moving them to morning sun by day 3 and full sun by day 5. Watch for wilting or yellowing leaves—these are signs the adjustment is too rapid.
On the final day before transplanting, water the seedlings deeply in the morning. This ensures roots are hydrated and the soil ball stays intact when you remove the plant. The goal is to mimic outdoor conditions so the plant doesn’t experience culture shock when you move it to its permanent home. If your seedlings are root-bound, gently tease apart the roots with your fingers to encourage outward growth.
☀️ Step 3: Transplant with Care to Preserve Root Integrity
Remove the tomato plant from its container and gently loosen the root ball if it’s tightly compacted. Hold the plant by its leaves—not the stem—to avoid damaging the delicate tissue. Place it in the prepared hole so the top of the root ball sits level with the surrounding soil (never deeper, as this can cause rot). The stem should be buried up to 1/3 of its height—this encourages strong root development along the buried portion.
Backfill the hole with soil, pressing gently but firmly to eliminate air pockets. Water immediately with 1 gallon of water to settle the soil and encourage root contact. Avoid heavy watering at this stage—it can dislodge the plant. Instead, use a watering wand to gently saturate the soil around the base. Mulch with 2-3 inches of organic mulch (like straw or shredded leaves) to retain moisture and suppress weeds.
✂️ Step 4: Post-Transplant Care for Rapid Recovery
Keep the soil consistently moist for the first 2 weeks—this is when roots establish themselves. Water deeply every 2-3 days until the top 1-2 inches of soil feel damp (use your finger to check). Avoid overhead watering, which can spread disease. Instead, water at the base in the morning to allow foliage to dry quickly. This reduces fungal risks like early blight, a common issue with newly transplanted tomatoes.
Apply a balanced fertilizer (10-10-10 or 5-10-10) at half strength 7-10 days after transplanting to support new growth. Prune any damaged leaves or stems immediately—they act as entry points for pathogens. Watch for new leaves forming at the top within 7-10 days; this is your signal that the plant is recovering well. If leaves yellow or wilt, it may indicate overwatering or poor drainage—adjust your care routine accordingly.
Tips & tricks for perfect tomato plant transplanting
These essential strategies will help you avoid common pitfalls and ensure your tomato plants thrive after transplanting.
Soil Preparation Matters: Before digging that hole twice as wide as the root ball, take a moment to test your soil's drainage. Fill a jar with soil and water, then observe how quickly the water drains. If it takes more than 10 minutes, your soil is too compacted—amend with additional compost or sand as directed. Proper drainage prevents root rot, which can kill newly transplanted tomatoes within days. The 6-8 inches of compost incorporation isn't just about nutrients; it also improves soil structure for better root penetration.
Hardening Off Technique: The 7-10 day hardening off period is non-negotiable for successful transplanting. I've seen gardeners skip this and end up with plants that bolt or develop sun scorch. Start with just 1-2 hours of shade on day one, then gradually increase exposure. Pay close attention to the plants' response—wilting or yellowing leaves mean you're moving too quickly. Remember, the goal is to mimic outdoor conditions, not shock the plant with sudden full sun exposure.
Root Ball Handling: When removing the plant from its container, resist the urge to squeeze the root ball—this can cause irreparable damage. Instead, gently loosen the sides with your fingers or a fork if it's tightly compacted. The key is to preserve that intact root structure while encouraging outward growth. After placing the plant in its new home, water immediately with 1 gallon to settle the soil around the roots. This step is crucial for eliminating air pockets that could prevent proper root contact with the soil.
Post-Transplant Monitoring: During those critical first 2 weeks, check soil moisture by inserting your finger 1-2 inches deep every 2-3 days. The soil should feel consistently damp, not soggy. Overwatering is a common mistake that leads to root suffocation. Also, watch for new leaf growth at the top within 7-10 days—this is your confirmation that the plant is recovering well. If you notice yellowing leaves, it could indicate overwatering or poor drainage, both of which can be corrected immediately.
Pro Tips for Transplant A Tomato Plant
- These essential strategies will help you avoid common pitfalls and ensure your tomato plants thrive after transplanting.
- Soil Preparation Matters: Before digging that hole twice as wide as the root ball, take a moment to test your soil's ...
- Hardening Off Technique: The 7-10 day hardening off period is non-negotiable for successful transplanting. I've seen ...
Frequently asked questions
Got questions about transplanting tomato plants? You’re not alone! Here are answers to the most common concerns to help you grow strong, productive vines with confidence.
When is the best time to transplant tomato seedlings?
Transplant your tomato seedlings after the last frost when soil temps reach at least 55–60°F (13–16°C). For most regions, this is 2–4 weeks after starting seeds indoors (typically mid-spring). Harden off seedlings first by exposing them to outdoor conditions gradually over 7–10 days to avoid shock.
How long does it take for tomato plants to recover after transplanting?
Tomato plants usually recover in 7–14 days, but stress symptoms like wilting or yellowing leaves may appear first. Keep soil consistently moist (not soggy) and provide afternoon shade for a few days. Avoid fertilizing immediately—wait until new growth appears to reduce further stress.
Can I transplant tomato plants in containers or only in the ground?
Tomatoes thrive in containers 5+ gallons with drainage holes. Use a lightweight potting mix and place pots in full sun. Just ensure containers are sturdy (tomatoes can weigh 10+ lbs when laden with fruit) and provide support like cages or stakes. Dwarf varieties are ideal for containers.
What should I do if my tomato plant looks wilted or dying after transplanting?
Wilted leaves often signal transplant shock. First, check the soil—underwatering or root damage are common culprits. Water deeply at the base (not overhead) and mulch to retain moisture. If leaves turn yellow (chlorosis), your plant may need chelated iron or a soil pH adjustment (aim for 6.0–6.8). Avoid pruning stressed plants until they recover.
How do I protect tomato seedlings from temperature swings after transplanting?
Use row covers or cloches to shield seedlings from cold snaps or hot afternoon sun. For extreme heat, provide dappled shade (like a sheer fabric) for the first week. Avoid transplanting during peak heat (above 90°F/32°C)—opt for early morning or overcast days instead. Monitor soil temps with a thermometer if possible.
Still unsure? Drop your question in the comments—we’re happy to help your tomatoes grow like pros!
Wrapping up and next steps
Transplanting tomato plants might seem intimidating at first, but with the right preparation and care, you’ll be rewarded with healthy, productive vines that thrive in their new home. Remember: gentle handling, proper spacing, and a little patience go a long way—your tomatoes will thank you with juicy, flavorful fruits! 🍅✨
Now that you’re ready to take the next step, why not mark your calendar for future transplanting tasks? Whether it’s peppers, herbs, or flowers, the same principles apply—confidence grows with practice. Happy gardening!