
Vegetables
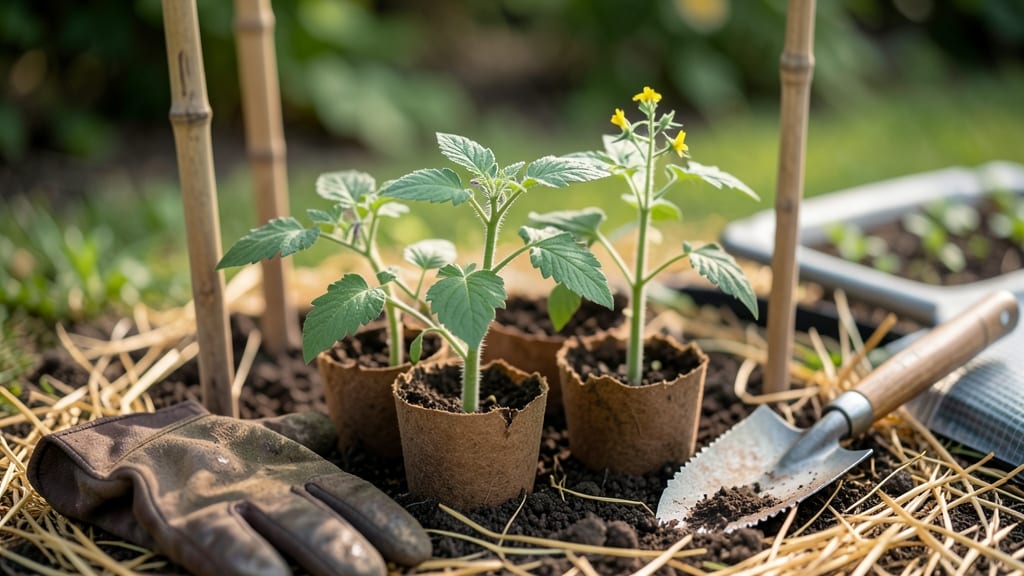
Starting tomato seeds outside directly can save you time and effort, especially if you’re in a mild climate or short on indoor space 🍅.
Skipping the indoor seed-starting phase and planting tomato seeds directly outside can save time—but without proper cold-hardening, your seedlings risk shock and stunted growth. I’ve seen weak, leggy plants flop in the garden because they weren’t ready for the elements.
Here’s how to time it right: soil temperature matters most, and the 7-day hardening schedule I’ll walk you through makes all the difference between thriving plants and a sad, scraggly mess.
You’ll learn the exact steps to prepare your seeds, when to plant by zone, and how to spot signs of stress before it’s too late. Let’s get those tomatoes off to a strong start!
When and how to direct-sow tomato seeds outside for maximum survival
Direct-sowing tomato seeds outside eliminates the need for indoor starts, but timing and technique are everything. Tomatoes thrive when soil temperatures hit 60°F+, and seeds planted too early risk rotting.
In USDA Zones 3-5, wait until after your last frost date—typically mid-May—while Zones 6-10 can start as early as late March. The key is balancing warmth with frost risk to give seedlings a fighting chance.
Before planting, ensure your soil is well-draining and amended with compost. Tomatoes hate soggy roots, so add organic matter like aged manure or worm castings to improve aeration. Test your soil’s pH (6.0-6.8 is ideal)—acidic soil stunts growth, while alkaline soil locks out nutrients.
If your garden soil is heavy clay, consider raised beds for better drainage and warmer soil.
Now, let’s dive into the step-by-step method for direct-sowing tomato seeds outdoors. This approach minimizes transplant shock and maximizes survival rates, even in less-than-perfect conditions.
Step-by-Step Guide to Direct-Sowing Tomato Seeds
- 1 Choose the Right Variety: Pick cold-tolerant varieties like 'Stupice' or 'Mountain Merit' for early planting. Avoid heat-lovers like 'Early Girl' if sowing before May.
- 2 Warm the Soil: Use black plastic mulch or a soil warming mat 1-2 weeks before planting to raise temperatures to 70°F+. Cold soil delays germination.
- 3 Plant Seeds Deep: Sow seeds 1/4 inch deep in furrows spaced 18-24 inches apart. Plant 3 seeds per spot to ensure at least one survives. Thin to the strongest seedling later.
- 4 Protect from Frost: Cover seeds with row fabric or a cloche until sprouts emerge (7-14 days). Remove covers once seedlings have 2 true leaves to prevent overheating.
- 5 Thin Seedlings: Once seedlings are 3-4 inches tall, thin to the strongest plant per spot. Snip weaker stems at soil level with scissors to avoid disturbing roots.
- 6 Cold-Harden Gradually: Start 7 days before transplanting by exposing seedlings to outdoor conditions for 1-2 hours daily. Increase exposure by 1 hour each day to toughen stems.
- 7 Support Early: Install cages or stakes at planting to prevent wind damage. Tomatoes grow 3-10 feet tall—support now saves pruning later.
One of the biggest mistakes gardeners make is planting seeds too early in cold soil. If your area has late frosts, opt for biodynamic planting calendars or use row covers to extend the season.
For example, in USDA Zone 4, wait until after May 15 unless you’re using heat mats or greenhouses.
After planting, monitor for damping-off, a fungal disease that causes seedlings to collapse at the soil line. To prevent it, avoid overhead watering and ensure good air circulation. If you notice yellowing leaves or wilting, reduce watering and apply a copper fungicide spray as a precaution.
Once your seedlings are established, focus on consistent watering and mulching. Tomatoes need 1-2 gallons of water per plant weekly, delivered at the base to keep foliage dry.
Mulch with straw or grass clippings to retain moisture and suppress weeds—this is especially critical in Zones 7-10, where drought stress is common.
For gardeners in warmer climates (Zones 8-10), direct-sowing in fall for winter harvests is possible. Plant seeds in September-October when daytime temps drop below 90°F. Use shade
Cold-hardening schedule: gradual acclimation for outdoor tomato seedlings
Transitioning tomato seedlings from indoor comfort to outdoor conditions requires patience and precision. A 7-day cold-hardening schedule prepares seedlings for temperature shifts, wind exposure, and direct sunlight without causing shock.
Start this process only when nighttime temperatures stay above 50°F (10°C)—any colder risks stunted growth or frost damage.
On Day 1, move seedlings outdoors for just 1-2 hours in partial shade using a 30% shade cloth. This mimics the gradual transition while protecting delicate leaves.
Monitor for wilting or yellowing, which signals stress rather than progress. If you notice these signs, extend the outdoor time by only 30 minutes the next day.
Indoor vs. Outdoor Hardening: Key Differences
| Factor | Indoor Hardening | Outdoor Hardening |
|---|---|---|
| Temperature Range | 65-75°F (18-24°C) | 50-85°F (10-29°C) |
| Light Exposure | Artificial grow lights (12-16 hrs) | Natural sunlight (6-12 hrs) |
| Wind Exposure | None (protected environment) | Gradual introduction (Days 4-7) |
| Humidity Control | High (50-70%) | Variable (30-60%) |
| Resulting Strength | Soft stems, slow acclimation | Sturdy stems, faster growth |
By Day 3, increase outdoor time to 4-5 hours and reduce shade to 20% coverage. Position seedlings in a spot with morning sun and afternoon shade to avoid leaf scorch.
If your region experiences early frost warnings, cover seedlings with a lightweight row cover during nights when temperatures drop below 55°F (13°C).
Days 4-5 are critical for wind acclimation. Place seedlings in an open area with gentle breezes (avoid direct wind tunnels). Watch for leaf curling, which is normal, but avoid browning edges, which indicate over-exposure.
Water seedlings early in the morning to prevent evening moisture, reducing fungal risks like early blight.
On Day 6, extend outdoor time to 8-10 hours and remove shade cloth entirely. This mimics full sun conditions while allowing seedlings to photosynthesize efficiently. If nighttime temps dip below 50°F (10°C), use cloche covers or black plastic mulch to retain heat.
By Day 7, seedlings should be ready for 24-hour outdoor exposure, provided nighttime temps stay above 55°F (13°C).
Compare your hardened seedlings to unhardened counterparts—you’ll notice thicker stems, darker green leaves, and better root development. These traits indicate readiness for transplanting or direct sowing in the garden.
If frost is still a risk, delay planting until soil temps reach 60°F (16°C) for 5+ consecutive days.