
Vegetables
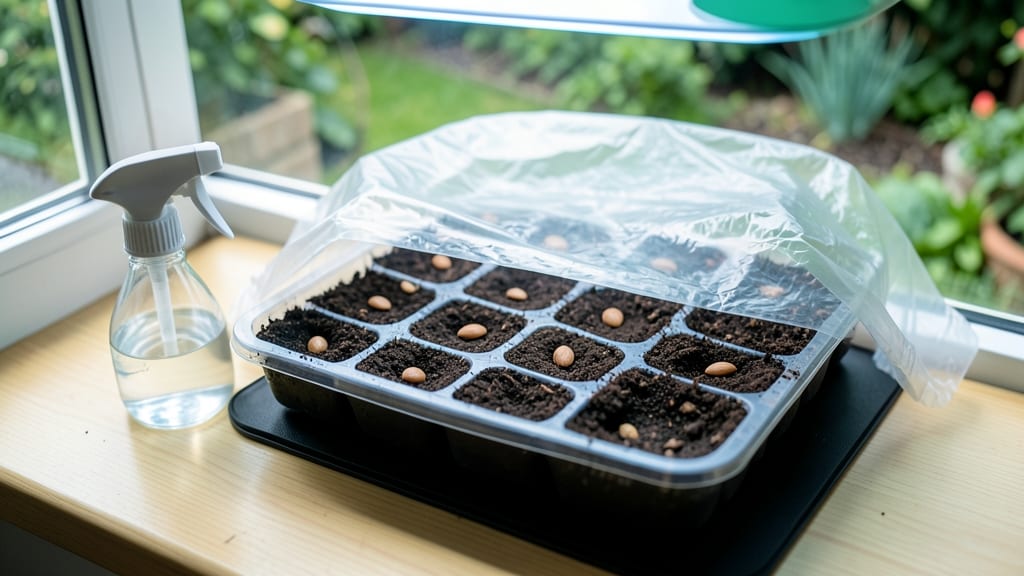
Starting tomato seeds inside gives you a 10-week head start on the garden center crowd—thicker stems, bigger yields, and varieties you’ll never find in stores. 🌱 I’ve nurtured dozens of seedlings, and these speed-germination tricks cut waiting time by half while keeping them stocky and strong.
The secret starts with the right setup: a warm spot (70-80°F), a seed-starting mix that drains like a sponge, and a grow light just inches above the tray.
Most beginners overwater or let seeds dry out—both kill more starts than you’d think. I’ll show you the exact balance that keeps them moist without drowning.
By week 3, you’ll see sturdy seedlings reaching for the light, ready to outpace anything from a big-box store. The payoff? Heirloom tomatoes that ripen weeks earlier, with flavors so rich they’ll make store-bought taste like cardboard. No fancy equipment needed—just patience and these simple steps.
Whether you’re a first-timer or a seasoned grower tweaking your method, this approach works for any tomato variety—from cherry-sized snacks to beefsteak slicers. Let’s get those seeds sprouting!
📚 In This Guide
- What you need
- Instructions
- Tips and common mistakes
- Wrapping up and next steps
What you need
- ● Tomato seeds: Choose heirloom, hybrid, or organic varieties (1–2 packets, ~50–100 seeds total).
- ● Seed-starting trays or containers: 2–4" deep, with drainage holes (e.g., cell packs, plastic trays, or recycled containers).
- ● Seed-starting mix: Lightweight, sterile, and well-draining (avoid garden soil—it’s too dense!).
- ● Grow lights or sunny windowsill: 12–16 hours of light daily (LED grow lights are ideal; south-facing windows work too).
- ○ Heat mat (optional but helpful): Keeps soil at 75–85°F for faster germination (especially for slow starters like heirlooms).
- ● Spray bottle: For gentle watering (avoid drowning seeds!).
- ● Plastic wrap or humidity dome: Retains moisture until seeds sprout.
- ● Fertilizer (balanced, water-soluble): ¼-strength dose (e.g., 5-5-5 or 10-10-10) after true leaves appear.
- ● Seedling heaters: For precise temperature control.
- ● Humidity tray: Adds extra moisture for tropical varieties.
- ● Fungicide (like hydrogen peroxide or cinnamon): Prevents damping-off disease.
- ● Labels & markers: Track varieties and planting dates.
- ● Transplanting pots (3–4" size): For hardening off seedlings later.
Step-by-step instructions for starting tomato seeds indoors
Here’s the method I’ve perfected over years of seed starting—guaranteed to give you burly, disease-resistant seedlings ready for transplant.
🌱 Step 1: Prepare Your Seed-Starting Containers
Use clean, 2-3 inch deep containers—biodegradable pots work best because they eliminate transplant shock when you move seedlings outdoors. Fill them with a sterile seed-starting mix (not garden soil) and moisten it until it’s damp but not soggy. Press the mix down lightly so it’s firm but not compacted.
I like to tap the containers gently on the table after filling to settle the soil evenly. This prevents air pockets that could delay germination. If you’re using reusable trays, place them on a seedling heat mat—this keeps soil at the ideal 75-85°F for faster sprouting. Without heat, germination can take twice as long.
🌱 Step 2: Sow Seeds at the Right Depth
Plant 1-2 seeds per cell at a depth of ¼ inch—about the width of the seed itself. Sowing too deep forces seedlings to work harder to reach light, which weakens them. Cover the seeds lightly with additional mix, then mist the surface with a spray bottle until evenly moist.
Here’s the thing—I tap the seed packet gently to release one seed at a time. Planting too many in a hole leads to weak, crowded seedlings that compete for nutrients. Label each pot with the variety and date, because after a week of identical green sprouts, you’ll forget which is which.
💧 Step 3: Create the Perfect Germination Environment
Cover the trays with a clear humidity dome or plastic wrap to trap warmth and moisture. Tomatoes thrive when soil stays consistently damp but not waterlogged. A seedling heat mat keeps the soil 10°F warmer than room temperature, which speeds germination from 10-14 days to just 5-7 days.
Check daily but resist watering—condensation inside the dome provides enough moisture. Once 50% of seeds sprout, remove the dome immediately. Leaving it on invites damping-off disease, which collapses stems overnight. You’ll see the first true leaves emerge in 7-10 days—that’s your signal everything’s working.
☀️ Step 4: Move Seedlings to Bright, Direct Light
The instant seedlings break through the soil, they need 14-16 hours of light daily. A south-facing window rarely provides enough intensity, so I use a full-spectrum LED grow light positioned 2-4 inches above the plants. Raise it as they grow to maintain that gap.
Without enough light, seedlings stretch toward the window (called “leggy”), and they’ll never recover proper strength. Strong seedlings have thick stems, deep green leaves, and compact spacing between leaves. If you see pale, spindly growth, your light is too far away—move it closer immediately.
⏰ Step 5: Harden Off Before Transplanting Outdoors
Two weeks before your last frost date, start hardening off seedlings by placing them outside in a sheltered, shaded spot for 1-2 hours the first day. Gradually increase outdoor time by 1 hour daily over 10-14 days, slowly introducing more sun and wind.
Skipping this step burns leaves, breaks stems, and shocks plants severely. Once seedlings tolerate a full day outside without wilting, they’re ready for the garden. Transplant on an overcast afternoon to reduce transplant shock, and water deeply at the base to encourage root growth.
Tips & tricks for speed-germination with tomato seedlings
These small adjustments can transform your seed-starting success rate from hit-or-miss to consistently robust seedlings.
Heat Mat Precision: The 75-85°F range isn't just a suggestion—it's the sweet spot for tomato seed germination. If you don't have a heat mat, place your seed trays on top of your refrigerator (not inside) for gentle warmth. I've seen germination times cut from 14 days to 5 days just by maintaining this consistent heat. For even better results, combine the heat mat with a humidity dome—this creates the tropical conditions tomatoes crave in their native habitat.
Lighting Strategy: That 14-16 hours of daily light isn't about quantity alone—it's about quality. Position your LED grow light so it's just 2-3 inches above the seedlings at their tallest point. As they grow, raise the light to maintain this distance. I use a simple clothespin to hang my light and adjust it easily. Watch for seedlings that grow toward the light (leggy growth)—this means they're stretching for more intensity. If you notice this, lower the light immediately or supplement with a second light source.
Soil Moisture Secret: The "damp but not soggy" description in Step 1 is crucial. Test your soil moisture by squeezing a handful—it should hold together but not drip water. Overwatering creates anaerobic conditions that suffocate seeds. I use a spray bottle with room-temperature water to maintain even moisture without disturbing the seeds. For the first 48 hours after planting, check moisture levels twice daily—this is when seeds are most vulnerable to drying out.
Disease Prevention: Removing the humidity dome when 50% of seeds sprout isn't just about preventing damping-off—it's about creating the right conditions for strong stems. I've found that leaving the dome on too long creates a breeding ground for fungal spores. Once you remove it, increase air circulation by placing a small fan on low setting nearby (about 6 inches away). This mimics natural wind conditions and strengthens seedlings without damaging them.
Pro Tips for Start Tomato Seeds Inside
- These small adjustments can transform your seed-starting success rate from hit-or-miss to consistently robust seedlings.
- Heat Mat Precision: The 75-85°F range isn't just a suggestion—it's the sweet spot for tomato seed germination.
- Lighting Strategy: That 14-16 hours of daily light isn't about quantity alone—it's about quality.
Frequently asked questions
Got questions about starting tomato seeds indoors? You’re not alone—germination, timing, and troubleshooting can be tricky! Here are answers to the most common queries to help you grow confident, thriving seedlings.
How long does it take for tomato seeds to germinate indoors?
Most tomato seeds sprout within 5–14 days when kept warm (70–85°F) and moist. Heirloom or older seeds may take longer. If no sprouts appear after 2 weeks, try gently pressing the seeds into fresh, damp soil or checking for rot. Patience pays off—just keep the heat and humidity steady!
When is the best time to start tomato seeds indoors?
Timing depends on your climate, but a general rule is to start 6–8 weeks before your last frost date. For example, if frost hits in mid-May, begin seeds in early March. Early varieties (like cherry tomatoes) can go in slightly later, while large heirlooms need the extra time to mature.
What if my tomato seeds won’t germinate? Troubleshooting tips.
Try these fixes if seeds refuse to sprout:
- Check seed viability: Soak a few seeds in water overnight—if they sink, they’re likely good. Floaters may be old or damaged.
- Adjust moisture: Overwatering can drown seeds; underwatering dries them out. Aim for consistently damp (not soggy) soil.
- Boost warmth: Place trays on a seedling heat mat or near a sunny window. Bottom heat (75–85°F) speeds up germination.
- Try a different method: Plant seeds shallowly (¼ inch deep) or even on top of moist soil with a light sprinkle of potting mix.
Can I use regular potting soil to start tomato seeds?
While potting soil works, it’s not ideal for seeds—it can compact and lack the fine texture they need. Instead, use a lightweight seed-starting mix (like coconut coir or peat-based blends) or amend potting soil with 30% perlite or vermiculite for better drainage and aeration.
Do I need to fertilize tomato seedlings right after germination?
Hold off on fertilizer until seedlings have 2–3 true leaves (about 2–3 weeks old). At that point, use a balanced, water-soluble fertilizer (like 5-5-5) at half-strength to avoid burning tender roots. Over-fertilizing can stunt growth—go easy!
Wrapping up and next steps
Starting tomato seeds indoors is a rewarding way to kickstart your gardening season—and you’ve got all the tricks to make it thrive! 🌱 With the right warmth, light, and care, you’ll soon be transplanting robust seedlings ready to conquer your garden. Now’s the time to take that next step: grab your seeds, set up your growing station, and watch those little sprouts burst with potential!
- 🌱 Ready to grow? Mark your calendar for seed-starting dates based on your frost date.
- 💡 Pro tip: Keep a seedling journal to track progress and refine your technique.