
Vegetables
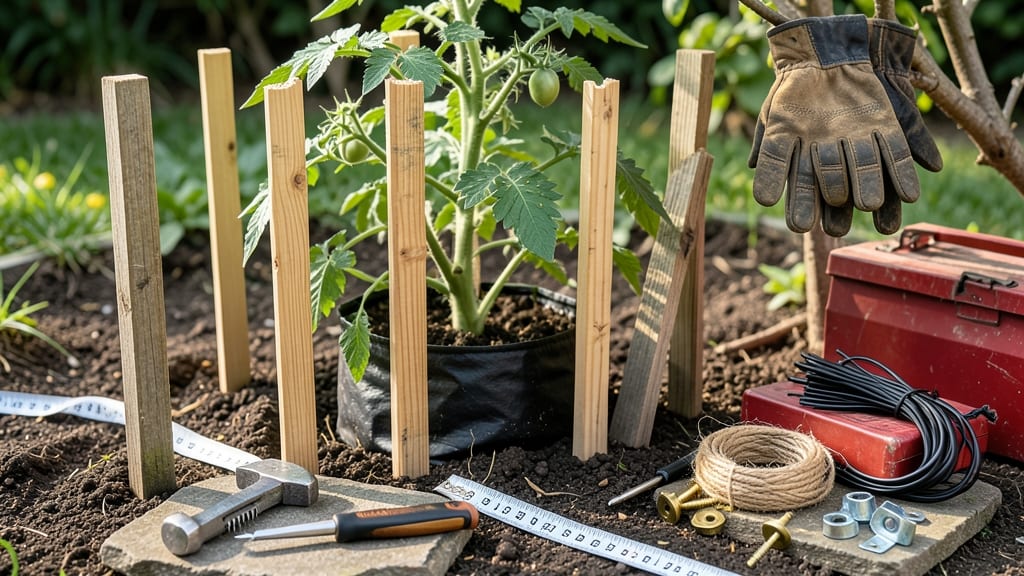
Building sturdy wooden tomato cages transforms floppy vines into neat, productive plants that yield more fruit. 🌱 I spent years wrestling with flimsy wire cages that collapsed under heavy tomatoes—until I designed this foolproof wooden frame that lasts for seasons.
The secret is in the 2x2-inch lumber and simple assembly that takes just 30 minutes with basic tools. You’ll need 12 feet of 2x2 lumber (cut into six 2-foot pieces), 4 corner brackets, and a power drill. Cedar or pine works best—cedar resists rot, while pine is budget-friendly.
Pre-drill holes to prevent wood splitting, and use deck screws for extra strength. The result? A 5-foot-tall cage that supports 10-pound tomatoes without bending. Once assembled, you’ll love how the square design guides vines upward while keeping them organized. No more tangled stems or fruit touching the ground!
The open sides make harvesting easier, and the wood blends into your garden instead of looking like a metal eyesore. Plus, you can customize the height or add a spiral twist for a unique look. This method works for determinate and indeterminate tomatoes alike.
For indeterminate varieties, add a topper piece to extend height. The cages double as seasonal supports for cucumbers or peas too. Ready to build? Grab your tools—your tomatoes will thank you!
📚 In This Guide
- What you need
- Instructions
- Tips and common mistakes
- Wrapping up and next steps
What you need
- ● 1x4 or 2x2 lumber – 6-8 feet long (cedar or pine for durability; cedar resists rot better).
- ● Wood screws or deck screws – 1.5" to 2" long (galvanized or stainless steel to prevent rust).
- ○ Wood glue (optional, for extra reinforcement at joints).
- ● Sandpaper (medium-grit, 120-150) – to smooth rough edges.
- ○ Non-toxic wood sealant or paint (optional, for weather resistance).
- ● Measuring tape and pencil (for marking cuts).
- ● Miter saw or handsaw (for precise cuts).
- ● Drill or screwdriver (with a Phillips or flathead bit).
- ○ Clamps (optional, to hold pieces steady while assembling).
- ● Ruler or speed square (for accurate angles).
- ● A flat, stable work surface (like a table or sawhorses).
- ● Safety gear (gloves, safety glasses, and a dust mask if sanding).
- ● Basic woodworking knowledge (or patience to follow step-by-step instructions!).
- ● Outdoor space where you’ll place the finished cage (near your tomato plants!).
Step-by-step instructions for building wood tomato cages
Here’s how I build sturdy, long-lasting tomato cages that actually support heavy vines—no flimsy wire frames here.
🪴 Step 1: Gather Materials and Measure Your Plants
For 4 cages, you’ll need 4 pieces of 1x1-inch untreated pine or cedar (rot-resistant), each 6 feet long, plus 4 corner stakes (16-inch galvanized steel rods). I cut my vertical supports at 36 inches tall—that’s plenty for indeterminate varieties like ‘Sungold’ or ‘Brandywine’ to climb without bending the frame. Measure your tomato plants’ mature height and adjust if needed (most bush types max out at 5-6 feet).
Use a miter saw or handsaw to cut the 1x1-inch boards into 4 vertical posts (36 inches each) and 4 horizontal rings (each made from 4 pieces at 22 inches long). The horizontal pieces should sit 6 inches apart vertically—this creates enough space for vines to weave through without tangling. Mark the cut lines with a pencil and safety goggles before cutting.
✂️ Step 2: Assemble the Cage Frame
Start by pre-drilling ¼-inch holes at each corner of the horizontal pieces where they’ll meet the vertical posts. This prevents wood splitting when you drive in 1½-inch deck screws. Assemble one cage at a time by attaching the bottom horizontal ring to the vertical posts first—use 3 screws per joint for stability. I like to clamp the pieces together while screwing to ensure perfect 90-degree angles.
Next, attach the second horizontal ring 6 inches above the first. Space the screws evenly along the edges to distribute weight. For extra durability, I add a diagonal brace (cut from leftover board) between opposite corners of the top and bottom rings. This prevents the cage from collapsing under heavy fruit loads. Repeat for all 4 cages before moving to staking.
🪴 Step 3: Install Corner Stakes for Stability
Drive each 16-inch galvanized steel rod into the ground at a 45-degree angle, about 6 inches from the cage’s base. Hammer it deep enough so 4 inches remain above ground—this creates a sturdy anchor point. Attach the cage to the stake using two 2-inch screws (one at the top, one at the bottom) to keep it from toppling in wind or when vines get heavy. I test stability by gently pushing the cage—it should barely budge.
For extra reinforcement, wrap the top of each stake with wire or twine and loop it through the top horizontal ring. This distributes tension from climbing vines and prevents the cage from leaning. If you’re planting in windy areas, add a second stake on the opposite side for even more support.
🌿 Step 4: Position and Plant
Place the assembled cage next to the tomato hole before planting. Press the corner stakes into the ground firmly—soil should be moist to make driving easier. Once the plant is in the ground, gently guide the main stem through the center of the cage and tie it loosely to the top horizontal ring with soft plant twine. Avoid pulling too tight; you want the vine to climb naturally without stress.
As the plant grows, weave the vines through the cage’s horizontal rings every 6-8 inches. This encourages bushier growth and prevents fruit from touching the soil (which reduces rot). I like to add small loops of twine to the cage’s interior at key heights—this makes it easier to secure vines without damaging them. Water deeply after planting to help roots establish before the vines start putting on weight.
Tips & tricks for building wood tomato cages
These small adjustments will transform your DIY tomato cages from functional to downright unbeatable for supporting even the heaviest vines.
Wood Selection Wisdom: While pine is budget-friendly, cedar is my go-to for its natural rot resistance—critical for multi-year use. If using pine, apply a non-toxic wood sealant after assembly to extend its lifespan. I’ve found that untreated cedar lasts 5-7 years in garden conditions, while pine may need replacing after 2-3 seasons unless sealed properly. The 1x1-inch dimension is perfect because it’s sturdy enough to handle weight but still lightweight enough for easy handling.
Cutting and Assembly Efficiency: In Step 1, use a speed square to mark your 90-degree angles for the horizontal rings before cutting. This ensures perfect fits when assembling—no more wobbly joints that compromise stability. For the 6-inch vertical spacing between rings, I snap chalk lines along the vertical posts as a guide. This visual cue prevents uneven gaps that could make vines slip through. When pre-drilling the ¼-inch holes, set your drill to a slow speed to prevent wood from splintering at the entry points.
Stake Reinforcement Strategy: The 45-degree angle for stakes is non-negotiable—it creates a triangular anchor system that resists lateral pressure from wind and climbing vines. For extra security in windy areas, I add a third stake on the downwind side, creating a triangular support network that mimics professional garden structures. When attaching cages to stakes, use stainless steel screws instead of galvanized ones—they resist corrosion better over time, especially in moist soil conditions.
Vine Management Pro Tip: In Step 4, those 6-8 inch intervals for weaving vines aren't arbitrary—they match the natural growth pattern of tomato plants. I add small fabric strips (cut from old t-shirts) to the interior of each ring at key heights. These gentle "landing pads" prevent vine abrasion when you guide them through the cage, reducing damage that could lead to disease entry points. For indeterminate varieties like 'Sungold', I also add a top horizontal ring at 30 inches to support the early heavy fruit loads before the vines reach full height.
Pro Tips for Build Tomato Cages Wood
- These small adjustments will transform your DIY tomato cages from functional to downright unbeatable for supporting even the heaviest vines.
- Wood Selection Wisdom: While pine is budget-friendly, cedar is my go-to for its natural rot resistance—critical for multi-year use.
- Cutting and Assembly Efficiency: In Step 1, use a speed square to mark your 90-degree angles for the horizontal rings before cutting.
Frequently asked questions
Got questions about building your own wood tomato cages? You’re not alone! Here are some of the most common queries—and their straightforward answers—to help you DIY like a pro.
How tall should my wood tomato cage be?
For standard tomato varieties, aim for 5 to 6 feet tall. If you’re growing indeterminate (vining) tomatoes, opt for 6 to 8 feet to support their height. Pro tip: Add a few extra inches for stability—your plants will thank you when they’re heavy with fruit!
Can I use untreated wood for tomato cages?
While untreated wood is cheaper, it’s not ideal for edible gardens. Chemicals in raw wood can leach into the soil. Instead, use cedar, redwood, or pressure-treated wood labeled "ground contact". If you’re on a budget, seal untreated wood with a food-safe sealant (like linseed oil) before planting.
When is the best time to build tomato cages?
Build your cages 2 to 4 weeks before transplanting seedlings (late spring, after the last frost). This gives you time to assemble, treat the wood, and let it weather slightly. If you’re in a hurry, a week’s notice works for quick projects—just ensure the wood is dry to avoid warping.
What if my cage collapses under the weight of tomatoes?
Collapsing cages usually mean they’re too narrow or flimsy. Reinforce with diagonal braces (like X-shaped supports) or use thicker wood (2x2 or 2x3 inches). For extra durability, space cages 18–24 inches apart and tie vines to stakes for shared support. Think of it like a safety net for your harvest!
Are there alternatives to wood tomato cages?
Try metal cages, bamboo stakes, or even repurposed wire fencing. For a rustic look, stack old pallets or cinder blocks with twine. Just ensure any material is sturdy and non-toxic. Wood cages win for customization, but don’t hesitate to get creative!
Wrapping up and next steps
Building your own wooden tomato cages is a rewarding project that saves money and gives your vines the sturdy support they deserve! With just a few basic materials and a little elbow grease, you’ve got a custom, durable frame ready to boost your harvest.
Now that you’re equipped with the knowledge, grab those tools and get building—your tomato plants will thank you!
🌱 Next step: Once your cages are up, pair them with healthy seedlings and watch your garden thrive! Ready to share your DIY success or try another project? The garden awaits! 🌿