
Tools
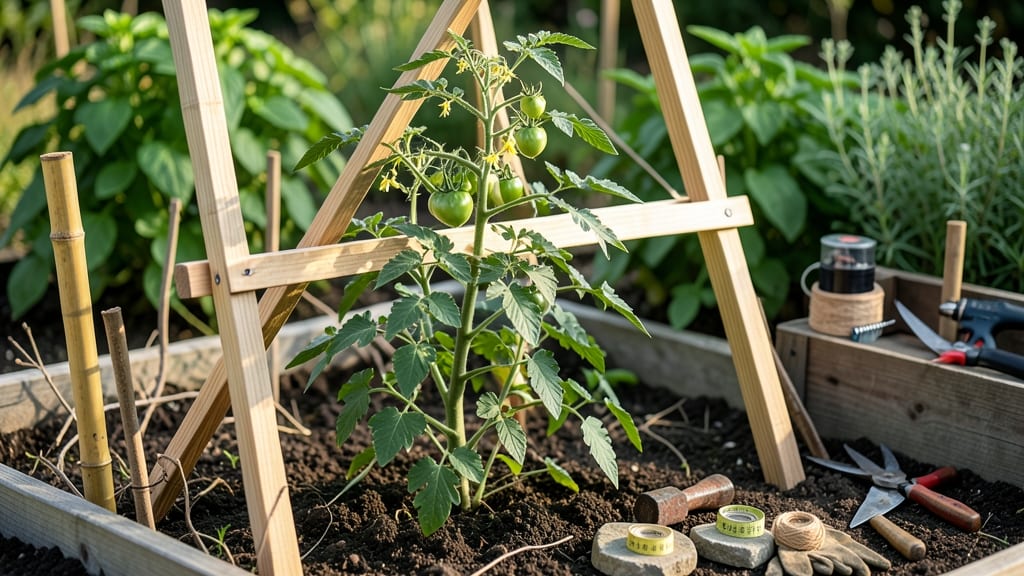
Building a trellis for tomato plants saves your vines from sprawling chaos—and your back from bending over to harvest. 🌱 The right support turns floppy plants into upright, high-yielding powerhouses, with better airflow that keeps diseases at bay.
I’ve built trellises from scrap wood, bamboo stakes, and even repurposed ladders, and the difference in plant health and harvest size is night-and-day.
You don’t need fancy tools or expensive materials to get started. A simple wooden frame with crossbars or sturdy bamboo poles tied at intervals works perfectly for most gardeners. The key is making sure your trellis can handle 20-30 pounds per plant—tomatoes get heavy fast!
For a 5-foot-tall trellis, you’ll need two vertical posts (4x4s work great), horizontal supports every 18 inches, and either zip ties, twine, or wire to secure the vines.
Once your trellis is up, you’ll notice tomatoes ripen faster and stay cleaner, with fewer cracks from touching the ground. Harvesting becomes a breeze, and the plants look neat and professional—no more tangled vines or hidden rot.
Even my first attempt, built in under an hour with leftover lumber, held up all summer long. The best part? You can reuse the same trellis for years with minimal maintenance.
For larger varieties like beefsteaks or heirlooms, opt for a 6-foot trellis with wider spacing between supports. Avoid overcrowding plants on the trellis—give each vine 12-18 inches of space to prevent competition.
And if you’re short on time, pre-cut materials at the hardware store and assemble them in your garden in 15 minutes flat. Ready to transform your tomato game?
📚 In This Guide
- What you need
- Instructions
- Tips and common mistakes
- Wrapping up and next steps
What you need
- ● Trellis Structure: Wooden posts (4x4 inches or thicker) – 4-6 pieces, cut to 6-8 feet tall (depending on plant height).
- ○ Cinder blocks or concrete footings – 4-6 blocks (optional but recommended for stability).
- ● Trellis lattice or netting – 1 roll (plastic, bamboo, or metal mesh, 4-6 feet wide).
- ○ PVC pipes (optional) – 2-4 pieces, 1-inch diameter, cut to 6-8 feet for a lightweight frame.
- ● Fasteners & Hardware: Galvanized screws or nails – 1 box (for wooden trellises).
- ● Zip ties or twine – 1 pack (for securing netting or vines).
- ○ Hinges or brackets (optional) – 2-4 pieces (for adjustable or freestanding designs).
- ● Tools: Measuring tape – 1 (for precise cuts).
- ● Hacksaw or circular saw – 1 (for cutting posts or PVC).
- ● Drill or hammer – 1 (for assembling components).
- ● Level – 1 (to keep posts straight).
- ○ Staple gun (optional) – 1 (for attaching netting to wood).
- ● Paint or stain – To protect wood from weather.
- ● Tomato cages (pre-made) – For a no-build solution (though less customizable).
- ● Drip irrigation kit – To keep vines hydrated without overwatering.
- ● Reflective mulch – To deter pests and boost plant health.
Step-by-step instructions for building a sturdy tomato trellis
Here's how to create a simple yet robust support system that keeps your tomato vines thriving.
🪴 Step 1: Choose Your Trellis Design and Materials
For four plants, I recommend a 4-foot tall A-frame trellis using 2x4 lumber for the vertical supports and 1x2 boards for the horizontal rungs. The A-frame design naturally resists leaning in windy conditions, which is critical for heavy tomato vines. You'll need two 4-foot 2x4s cut at a 45-degree angle for the legs, two 4-foot 2x4s for the vertical center supports, and four 1x2 boards cut into 18-inch lengths for the rungs.
Pre-drill holes at the top and bottom of your vertical supports to accept 3-inch deck screws—this prevents wood splitting when you assemble. I always use galvanized screws because they resist rust, and that's especially important if your garden gets morning dew. For extra stability, bury the bottom 6 inches in the ground or anchor them with T-posts if you're working in sandy soil.
✂️ Step 2: Assemble the Frame and Attach Horizontal Rungs
Start by screwing together the two 45-degree angled 2x4s at the top to form the trellis's peak. Then attach the two vertical 2x4s to the sides, creating an open rectangle. Space the vertical supports 2 feet apart at the base to give you room to work between them. Use three screws per joint—two at the top and one at the bottom—to ensure the frame stays square.
Now attach the 18-inch rungs horizontally. Space them 6 inches apart vertically, starting 6 inches from the ground. This spacing gives your tomato plants plenty of handholds to climb while keeping the structure lightweight enough to handle. I like to stagger the rungs slightly on each side so the vines weave naturally between them. Use 2-inch deck screws for the rungs to prevent them from loosening over time.
🌱 Step 3: Position and Secure the Trellis in the Garden
Place the trellis in the garden 2-3 feet away from the tomato plant's base. This gives the vine room to grow toward the support without crowding the stem. If you're working with indeterminate varieties (like 'Sungold' or 'Brandywine'), position the trellis so the peak faces north—this prevents the weight of heavy fruit from bending the structure toward the sun.
For extra stability, especially in windy areas, drive 2-foot rebar stakes into the ground on either side of the trellis and attach them to the frame with zip ties. This creates a guy-wire effect that keeps the trellis upright even when loaded with tomatoes. Bury the bottom 6 inches of the trellis legs in the soil or secure them with concrete footings if your garden has loose soil that might shift.
💧 Step 4: Train Tomato Vines as They Grow
Once your tomato plants reach 12 inches tall, gently tie the main stem to the lowest rung using soft plant ties or old fabric strips. Avoid wire or plastic ties—they can cut into the stem as it thickens. As the vine grows, weave the new growth between the rungs rather than tying it. This encourages the plant to cling naturally and strengthens the stem.
Here's the thing—don't let the vines get too heavy on one side. If you notice most of the fruit hanging to one side, gently adjust the plant by tying the main stem to the opposite rung. This keeps the weight balanced and prevents the trellis from tipping. Prune suckers (the small shoots that form in the leaf axils) regularly to direct the plant's energy into fruit production rather than excessive foliage.
☀️ Step 5: Maintain and Reinforce as Needed
Check the trellis weekly for loose screws or wobbly joints, especially after heavy rain or wind. Tighten any screws immediately—vibrations from the wind can work them loose over time. If you're growing extra-heavy varieties like 'Beefsteak' or 'Black Krim', consider adding diagonal braces from the base to the top of the trellis for additional support.
As the season progresses, you may need to add more rungs if the vines outgrow the original spacing. Simply cut additional 1x2 boards and attach them between existing rungs. This keeps the trellis functional even as your plants grow taller. By the end of the season, you'll have a sturdy, long-lasting support system that makes harvesting a breeze and keeps your tomatoes off the ground where pests and diseases can't reach.
Tips & tricks for building sturdy tomato trellises
Building a tomato trellis that actually holds up through the growing season takes a few key tricks—here's what I've learned after years of trial and error.
Material Selection: Don't skimp on lumber quality—pressure-treated 2x4 lumber holds up better than regular pine in damp conditions. For the 1x2 rungs, I recommend cedar if you can find it; it naturally resists rot and lasts longer than pine. If you're working with extra-heavy tomato varieties like 'Beefsteak', consider using 2x2 lumber for the vertical supports instead of 2x4s to increase structural integrity.
Assembly Precision: The 45-degree angle cut on your trellis legs is critical—measure twice before cutting. I use a speed square to mark the angles perfectly, then double-check with a protractor. When attaching the vertical supports, use a level tool to ensure they're perfectly plumb before screwing them in. This prevents the trellis from leaning over time, especially when loaded with fruit. The 6-inch rung spacing gives vines plenty of support without making the structure too heavy.
Wind Resistance: For wind-prone areas, add diagonal cross braces between the base and top of the trellis using 1x2 boards. These simple additions create a triangle effect that dramatically improves stability. I also recommend burying the bottom 6 inches of the legs in concrete mix rather than just soil—this prevents shifting in loose or sandy ground. If you're near a fence, attach the trellis to it with heavy-duty zip ties for additional support.
Vine Training: When tying your tomato vines to the rungs, use soft fabric strips or old T-shirts rather than wire or plastic ties. These materials stretch as the vine grows, preventing damage to the stem. The key is to weave the vine between rungs rather than tying it—this encourages natural clinging and strengthens the stem. Check the ties weekly and loosen them if they start to constrict as the vine thickens.
Pro Tips for Build A Trellis For Tomato Plants
- Building a tomato trellis that actually holds up through the growing season takes a few key tricks—here's what I've learned after years of trial and error.
- Material Selection: Don't skimp on lumber quality—pressure-treated 2x4 lumber holds up better than regular pine in damp conditions.
- Assembly Precision: The 45-degree angle cut on your trellis legs is critical—measure twice before cutting.
Frequently asked questions
about building a trellis for tomato plants—because even the best gardeners have questions! Here are the answers to the most common ones.When is the best time to build a trellis for tomato plants?
Install your trellis before planting tomatoes—ideally 2–3 weeks ahead. This gives roots time to establish near the support, and you can plant seedlings directly next to it. If you’re retrofitting, set it up as soon as you transplant seedlings to avoid disturbing the roots later. Pro tip: Use stakes or cages temporarily if you’re late!
How tall should a tomato trellis be?
Most tomato varieties need a trellis 6–8 feet tall, but indeterminate types (like cherry tomatoes) can climb 10+ feet! For determinate (bush) tomatoes, a 4–5 foot trellis suffices. Rule of thumb: Build it taller than you think—tomatoes grow fast!
Can I use wire or string instead of a wooden trellis?
Wire or twine trellises
(like A-frame or teepee styles) work great for smaller gardens or renters. Just ensure the gauge is thick enough (14–16 gauge wire) to support heavy vines. For extra durability, add wooden posts at the base. Bonus: They’re budget-friendly and easy to assemble!
How do I keep pests off my trellised tomatoes?
Pests like hornworms and aphids love trellised tomatoes! Prevent them with:
- Row covers (early in the season)
- Neem oil or insecticidal soap (spray undersides of leaves)
- Handpicking (check vines daily for eggs/larvae)
- Beneficial insects (ladybugs, lacewings)
Do I need to winterize or remove the trellis after harvest?
You can leave it up if it’s sturdy, but remove it if storms or heavy snow are likely. For next year, clean it thoroughly (scrub with soapy water) to prevent disease. Store wooden trellises in a dry place or repurpose them as garden art! Fun fact: Some gardeners use trellises as vertical compost bins in winter.
What’s the quickest way to build a trellis on a budget?
Use repurposed materials like:
- Old ladder frames (sand and seal)
- Bamboo stakes (tie with twine)
- PVC pipes (cut and connect with fittings)
- Cattle panels (unrolled and bent into arches)
Wrapping up and next steps
Building a trellis for your tomato plants doesn’t have to be complicated—with the right materials and a little elbow grease, you’ll create a sturdy, space-saving support system that will keep those vines happy and your harvests thriving! 🌱 Whether you opt for a simple A-frame, a sturdy wooden lattice, or a repurposed cage, the key is consistency and stability.
Now that you’re armed with the know-how, grab your tools and get growing! Next, head to your garden and watch those tomatoes climb to new heights—literally.