
Planting
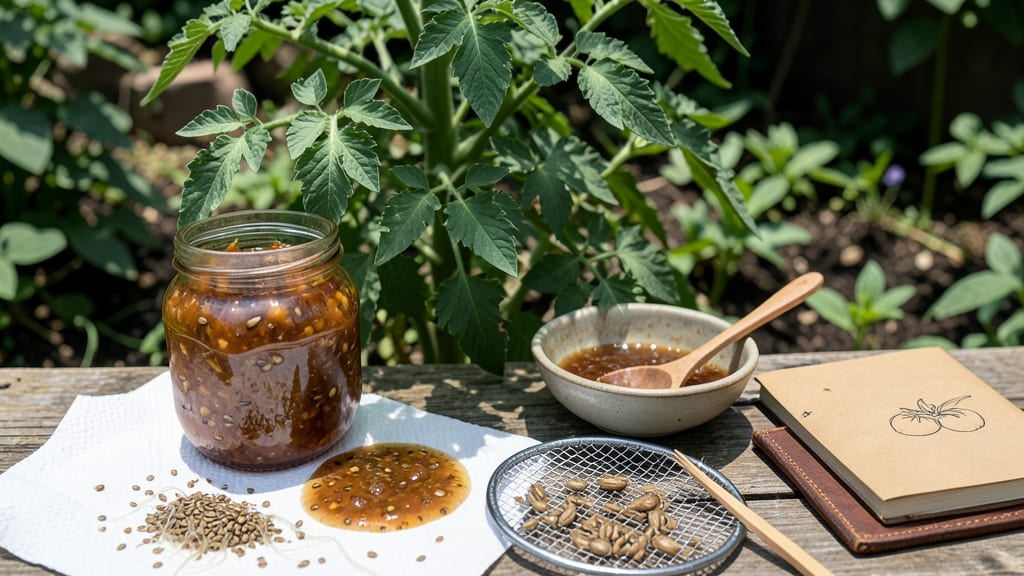
How do I save tomato seeds to plant next year?—it’s like unlocking a free pass to next year’s harvest, no seed packets or guesswork required. 🌱 The process is simpler than you think, and I’ve saved seeds from my own heirloom tomatoes for years, always ending up with plants that outperform store-bought seedlings. Start with the ripest, healthiest tomatoes you grew—those are the ones carrying the best genetics. Cut them open, scoop out the gel-like pulp with seeds, and let it ferment in a jar for 2-3 days. This fermentation step removes the gel that inhibits germination, giving you clean, viable seeds ready for drying. After fermentation, rinse the seeds gently, spread them on a paper towel to dry completely (about a week), then store them in an envelope in a cool, dark place. By spring, you’ll be planting seeds that grow into plants identical to your favorites, with the added bonus of saving money and preserving heirloom traits. This method works for any tomato variety, from beefsteaks to cherry tomatoes. The key is patience—good seeds take time to dry properly, but the payoff is worth it when you see those first true leaves emerge next spring.
📚 In This Guide
- What you need
- Instructions
- Tips and common mistakes
- Wrapping up and next steps
What you need
- ● Mature tomato fruits: Choose heirloom or open-pollinated varieties (hybrids won’t produce true seeds). Pick fully ripe tomatoes—3–5 should suffice for a good seed stash.
- ● Knife or spoon: A sharp knife or small spoon for scooping out seeds and gel.
- ● Fine-mesh strainer or cheesecloth: A 1–2 mm mesh strainer or a small piece of cheesecloth to separate seeds from pulp.
- ● Small bowl or container: For fermenting seeds (use a glass or food-safe plastic container).
- ● Water: Distilled or dechlorinated water (tap water is fine if left out for 24 hours to off-gas chlorine).
- ● Paper towels or coffee filters: For drying seeds (use unbleached if possible).
- ● Envelope or small paper bag: For storing dried seeds (label with the tomato variety and date!).
- ● Permanent marker or labels: To mark seed varieties and harvest dates.
- ● Seed-saving journal: Track varieties, germination rates, and notes on plant performance.
- ● Desiccant packets: For long-term seed storage (place in an airtight container with seeds).
- ● Humidity pack: A small silica gel packet to absorb moisture in storage containers.
- ● Seed tray or small pots: If you want to test germination before planting next year.
- ● Hand lens or magnifying glass: For inspecting seed quality (look for plump, firm seeds!).
Step-by-step instructions for saving tomato seeds
Here's my foolproof method for harvesting and storing seeds that'll grow into vigorous plants next season.
🍅 Step 1: Select and Prepare the Best Tomatoes
Choose 4-6 ripe, healthy tomatoes from your best-performing plants—these will carry the strongest genetics. Look for fruits with deep red or fully colored skins and no signs of disease or cracking. I always pick from the second flush of fruit in the season, as these tend to be more vigorous.
Cut the tomatoes open and scoop out the gel-like pulp containing the seeds. Place the pulp in a clean glass jar (the one you already have in your kitchen works perfectly). Add ½ cup of water and stir gently to mix. Let it sit at room temperature for 2-3 days, stirring once daily. You'll see the seeds separate from the pulp and sink to the bottom.
💧 Step 2: Ferment and Clean the Seeds
This fermentation step removes the gel coating that inhibits germination. After 2-3 days, you'll notice a white, moldy scum forming on top—this is normal and actually helps break down the gel. Pour the mixture through a fine-mesh strainer or cheesecloth into another jar, leaving the scum behind.
Rinse the seeds gently under lukewarm water until the water runs clear. Spread them on a paper towel in a single layer and let them dry for 3-5 days in a warm, dry place (like a sunny windowsill). They're ready when they're completely dry and brittle—crush one between your fingers to test. Store the dried seeds in a small envelope labeled with the variety and year.
⏰ Step 3: Test Germination Before Storing
Before you tuck those seeds away, do a quick germination test to ensure viability. Moisten a paper towel and place 10 seeds in a single layer on it. Fold the towel and put it in a ziplock bag, then seal it. Keep it in a warm spot (70-75°F) and check daily. If 80% or more sprout within 7-10 days, your seeds are ready for long-term storage.
If germination is poor, try storing the seeds in the fridge for another 2-4 weeks before testing again. Viable seeds can sometimes need extra time to break dormancy. Once you confirm good germination, store the remaining seeds in an airtight container in a cool, dark place—they'll stay viable for 4-5 years this way.
🌱 Step 4: Plan for Next Year's Planting
Label your seed packets with the variety name and year saved. Include notes like "heirloom", "cherry", or "disease-resistant" if applicable. When spring rolls around, soak the seeds overnight before planting to speed up germination. Use the same seed-starting mix you'd use for fresh seeds, and keep them in a warm spot (75-85°F) until they sprout.
Here's the thing—saved seeds often produce hardier plants than store-bought ones because they're adapted to your local climate. Start them indoors 8-10 weeks before your last frost date for the best results. Watch for first true leaves (the second set after the initial seed leaves) before transplanting outdoors.
Tips & tricks for perfect seed saving
These simple secrets will help you maximize your tomato seed harvest and ensure next year's plants thrive.
Tomato Selection: Focus on heirloom varieties—they're the best for saving seeds because they produce true-to-type plants. Avoid hybrid tomatoes (marked with "F1" or "hybrid"), as their seeds won't grow into the same plants. The second flush of tomatoes often yields seeds with the strongest genetic traits for your climate.
Fermentation Insight: That white moldy scum during the 2-3 day fermentation isn't bad—it's actually helping break down the gel that inhibits germination. Stirring once daily prevents mold from growing too thick, which could contaminate your seeds. If your kitchen is cooler than 70°F, you might need to extend the fermentation to 4-5 days to fully break down the gel coating.
Drying Technique: For even drying in Step 2, place your paper towel with seeds on a baking sheet and cover it loosely with another paper towel. This creates a gentle airflow while protecting from dust. Test seed dryness by crushing one between your fingers—if it feels completely brittle with no moisture, they're ready for storage. Uneven drying can lead to moldy seeds later.
Storage Wisdom: Label your seed envelopes with more than just the variety—include the year saved and any special characteristics like "disease-resistant" or "early producer." Store them in a cool, dark place (like your fridge) for maximum longevity. I've kept seeds viable for up to 5 years using this method, though germination rates may decrease after 3 years.
Pro Tips for How Do I Save Tomato Seeds To Plant Next Year
- These simple secrets will help you maximize your tomato seed harvest and ensure next year's plants thrive.
- Tomato Selection: Focus on heirloom varieties—they're the best for saving seeds because they produce true-to-type plants.
- Fermentation Insight: That white moldy scum during the 2-3 day fermentation isn't bad—it's actually helping break down the gel that inhibits germination.
Frequently asked questions
Can I save seeds from store-bought tomatoes?
It depends! Hybrid (F1) tomatoes—like most grocery-store varieties—often produce seeds that won’t grow true to the parent plant. For reliable seeds, choose heirloom or open-pollinated tomatoes. If you’re curious, try it anyway—you might get surprises!
How long do saved tomato seeds last?
Properly dried and stored seeds stay viable for 3–5 years in a cool, dark place (like a sealed jar in the fridge). For best results, label seeds with the variety and harvest year. Test germination by planting a few—if they sprout, the rest are good!
What if my seeds mold or smell bad?
Mold or a funky odor means fermentation went too far or seeds were contaminated. Rinse them gently in water, pat dry, and spread on paper towels to dry. If mold persists, discard them—safety first! Always work in a clean, dry space to avoid issues.
Can I save seeds from cherry tomatoes?
Cherry tomatoes are great for seed-saving—the small size makes fermentation easier. Just follow the same steps as larger varieties. Bonus: Their compact plants are perfect for containers or small gardens!
Do I need to refrigerate seeds over winter?
Not required! Seeds stored in a cool, dry place (like a pantry) at room temperature (50–70°F) will stay fresh. A fridge adds extra insurance, especially in humid climates. Just avoid freezing—it can damage viability.
Wrapping up and next steps
Saving tomato seeds is a rewarding way to ensure a thriving garden next year—plus, it’s free and eco-friendly! 🌱 With just a little patience and the right steps, you’ll have a stash of heirloom seeds ready to grow into delicious, homegrown tomatoes. Now that you’re armed with the know-how, why not start small? Try saving seeds from your favorite variety this season and watch your gardening skills—and harvests—grow even bigger.
Ready to dive in? Grab a ripe tomato, follow the steps, and let the cycle of saving and planting begin! 🌿