
Propagation
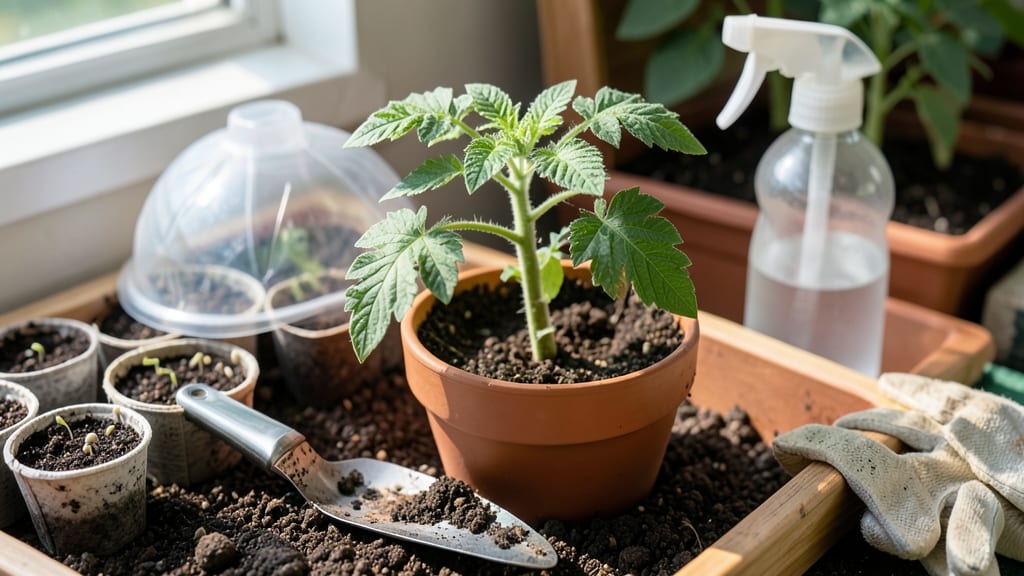
Growing tomatoes from fresh tomato seeds means fast sprouts in just 5-7 days instead of the usual two weeks. 🌱 I learned this trick after struggling with slow germination—now my seedlings pop up reliably, and I get a head start on the season.
The secret is simple: skip the drying process and plant the seeds fresh, with just a little moisture and warmth to kickstart growth.
You’ll need ripe tomatoes, a sharp knife, paper towels, a seed-starting mix, and small pots or trays. No fancy equipment—just what you likely already have. The process takes about 30 minutes to prep seeds, and you’ll be watching those first green shoots appear in less than a week.
It’s beginner-friendly, but the speed makes all the difference for a longer growing season.
By the time your neighbors are buying transplants, you’ll already have stocky, dark-green seedlings ready to transplant. The flavor? Unmatched—homegrown tomatoes taste nothing like store-bought. Plus, you’ll save money and avoid the stress of last-minute seedling shortages. This method works for heirlooms, cherry tomatoes, and even beefsteaks.
Whether you’re growing in a greenhouse, on a sunny windowsill, or under grow lights, the principles stay the same. The key is consistency—keep the soil moist but not soggy, and provide 6-8 hours of light daily.
Mistakes? Overwatering or cold soil slows sprouts, so warmth and patience are your best friends. Let’s get those seeds growing!
📚 In This Guide
- What you need
- Instructions
- Tips and common mistakes
- Wrapping up and next steps
What you need
- ● Fresh tomato seeds: Harvested from ripe, healthy tomatoes (or buy organic, non-hybrid seeds). Aim for 10–20 seeds per batch.
- ● Small containers: Seed trays, egg cartons, or even recycled yogurt cups (with drainage holes!). Use 1–2 per seed for easy transplanting.
- ● Seed-starting mix: Lightweight, sterile potting soil (avoid garden soil—it’s too dense!). A 1-quart bag covers ~50 seeds.
- ● Spray bottle: For gentle watering (a 16 oz. misting bottle works perfectly).
- ● Plastic wrap or humidity dome: To trap moisture and speed up germination (a clear plastic bag or a DIY cover from a cut soda bottle).
- ○ Grow lights or sunny windowsill: A 6–12 inch LED grow light (optional but ideal) or a south-facing window with 6+ hours of sunlight daily.
- ○ Heat mat (optional but helpful): A 10x20 inch heating mat set to 70–85°F to boost germination speed (especially for slow starters).
- ● Seedling labels: Toothpicks or plant markers to track varieties (especially if growing multiple types).
- ● Fertilizer: A balanced, water-soluble fertilizer (5-5-5 ratio) to use after sprouts appear (not during germination!).
- ● Fungicide: A natural option like cinnamon or hydrogen peroxide (3%) to prevent damping-off disease.
- ● Transplant pots: 3–4 inch pots for seedlings before moving them outdoors.
- ● Timer: To regulate grow light cycles (14–16 hours of light/day for seedlings).
Step-by-step instructions for germinating tomato seeds quickly
Here's how I get tomato seeds sprouting in 3-5 days instead of the usual two weeks.
🌱 Step 1: Prep Seeds for Maximum Germination Speed
First, I remove seeds from their pulp by fermenting them in warm water for 24 hours. Place seeds in a jar with warm tap water (not hot) and let them soak. The fermentation process breaks down the seed coat, which is the biggest barrier to fast germination. You'll see foam rise to the surface—that's natural and expected.
After 24 hours, drain the water and rinse the seeds thoroughly. The seeds should now feel slightly softer when pressed between your fingers. This is your signal that the seed coat has weakened. Pat them dry with a paper towel—moisture on the seeds can encourage mold before germination.
💧 Step 2: Create the Ideal Moisture and Heat Environment
Fill a shallow tray with damp paper towels—not dripping wet, but enough that they hold together when squeezed. I spread the seeds about 1 inch apart on the towels. The spacing prevents them from sticking together and ensures each seed gets proper airflow. Here's the thing—tomato seeds need warmth to germinate quickly, so I place the tray on top of a seedling heat mat set to 80-85°F.
Cover the tray with another damp paper towel and then a clear plastic lid or wrap to create a mini greenhouse effect. This traps heat and moisture right where the seeds need it. Check daily for condensation on the plastic—this is normal, but if you see mold (fuzzy spots), increase airflow immediately by lifting the lid for 10 minutes.
☀️ Step 3: Monitor Daily for Sprouts and Adjust Conditions
Germination usually starts in 3-5 days, but I check the tray every 24 hours for signs of sprouting. You'll see tiny white roots first, followed by the seed coat splitting open. This is your cue that germination is underway. Once you see the first sprouts, remove the plastic cover immediately to prevent damping-off disease, which can kill seedlings overnight.
Keep the paper towels consistently moist but never soggy. I use a spray bottle to mist lightly when the towels feel dry to the touch. Move the tray to a bright location with indirect light—direct sun at this stage can overheat the seeds. You'll know you're on track when the sprouts reach about ½ inch tall and have developed their first true leaves.
🪴 Step 4: Transplant Sprouts to Soil for Continued Growth
Once sprouts have 2-3 true leaves, it's time to move them to soil. Fill small pots or seed trays with a lightweight seed-starting mix and make a tiny hole with your finger—about ½ inch deep. Gently place each sprout into its own hole, being careful not to damage the delicate roots. Cover the hole lightly with soil, pressing down just enough to secure the sprout without compacting.
Water the soil gently until it's evenly moist but not waterlogged. Place the pots in a warm, bright spot (a sunny windowsill works well) and keep the soil consistently moist. You'll see new growth within 3-5 days, confirming that your fast start is paying off. Avoid overwatering now—you want the soil to stay damp, not soggy, to prevent disease.
Tips & tricks for fast tomato seed germination
These insider tricks will help you beat the two-week germination wait and get those tomato sprouts popping in record time.
Fermentation Precision: The 24-hour fermentation step is non-negotiable for fast germination. Use warm tap water (around 70-75°F)—hot water can kill seeds while cold water won't break down the seed coat effectively. I've found that placing the jar in a warm spot (like on top of the fridge) helps maintain consistent temperature throughout the 24 hours. The foam you see is completely normal and actually helps remove the gelatinous coating that slows down germination.
Heat Mat Hack: That 80-85°F range is critical for speed, but not all heat mats are created equal. If you don't have one, try placing your seed tray on top of a refrigerator (not inside) or on a sunny windowsill with a clear plastic dome. I've even used a simple incandescent bulb (40-60 watts) placed 6 inches above the tray for consistent warmth. Just monitor closely—you want warmth, not heat that could cook your seeds!
Mold Prevention Strategy: The 10-minute daily airing is your best defense against mold. When you see condensation on the plastic, that's your signal to lift the lid and let fresh air circulate. I've learned this the hard way—once I let mold take hold, it killed 80% of my seedlings overnight. Keep a small fan nearby on low setting if you notice excessive moisture buildup. The goal is humidity, not a swamp environment.
Transplant Timing: Waiting for 2-3 true leaves before transplanting gives your seedlings the strength they need to handle the shock of soil transition. I've found that seedlings with just the first true leaves often struggle when moved too soon. Look for leaves that are fully unfurled and have visible veins—this indicates they've developed strong enough roots to support themselves in soil. The ½-inch deep planting hole might seem shallow, but tomato roots need room to spread horizontally, not grow deeper.
Pro Tips for Grow Tomatoes From Fresh Tomato Seeds
- These insider tricks will help you beat the two-week germination wait and get those tomato sprouts popping in record ...
- Fermentation Precision: The 24-hour fermentation step is non-negotiable for fast germination. Use warm tap water (aro...
- Heat Mat Hack: That 80-85°F range is critical for speed, but not all heat mats are created equal. If you don't have o...
Frequently asked questions
Got questions?
Growing tomatoes from fresh seeds can feel like a puzzle at first—but don’t worry! Here are answers to the most common queries to help you ace your seed-starting game.
How long does it take for tomato seeds to germinate?
With the right tricks (like warm soil and moisture), tomato seeds typically sprout in 5–14 days. Speed-germination methods can cut this to 3–7 days! Patience is key—keep seeds warm and hydrated, and avoid moving them until sprouts appear.
What if my seeds aren’t sprouting after 2 weeks?
If seeds stay dormant past 14 days, they might be old, damaged, or buried too deep (¼ inch max). Try replanting a few in fresh, warm soil or test viability by soaking them in water—if they sink, they’re likely still good! If not, grab new seeds.
Do tomato seeds need light to germinate?
Nope! Seeds sprout in darkness—light is for seedlings after they break the soil. Keep them covered until sprouts emerge, then move them to a sunny spot (or grow lights) to prevent leggy growth. Think of it like a surprise party—they’ll pop up when they’re ready!
Can I grow tomatoes from store-bought seeds?
Save seeds from heirloom or non-hybrid tomatoes (avoid F1 hybrids—they won’t breed true). Rinse, dry, and store them in a cool, dark place. For store-bought seeds, just follow the packet instructions—no fancy prep needed!
What’s the best soil mix for fast germination?
Use a light, sterile potting mix (like seed-starting blend) with perlite or vermiculite for drainage. Avoid garden soil—it can harbor fungi or pests. Pro tip: Mix in a tiny bit of compost (10%) for nutrients without compacting the soil.
Why are my seedlings turning yellow or weak?
Yellowing leaves often mean overwatering, poor light, or nutrient deficiency. Let the top inch of soil dry between waterings, and place seedlings 6 inches from grow lights (or in full sun). If they’re wobbly, they might need support (like toothpicks) or a nutrient boost with diluted fertilizer.
Wrapping up and next steps
Growing tomatoes from fresh seeds is a rewarding journey that connects you to your food in a whole new way! 🌱 With the right techniques—like speed-germination and proper care—you’ll soon be harvesting juicy, homegrown tomatoes in no time. Start small, stay patient, and let your green thumb shine!
Now that you’re armed with these speed-germination tricks, why not take the next step? Try experimenting with different tomato varieties or share your newfound knowledge with fellow gardening enthusiasts. Happy growing!