
Planting
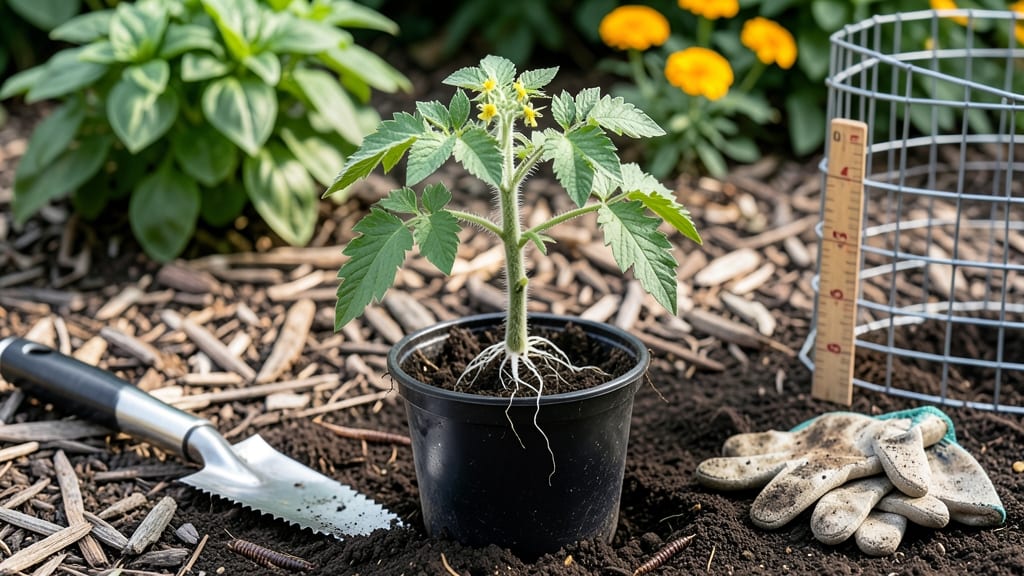
Burying tomato plants at the right depth is the key to stronger roots and bigger harvests—aim for deep enough to cover the stem up to the first true leaves.
Struggling with weak tomato plants? The secret to robust growth starts below the soil—burying your tomato plants at the right depth can boost yields by up to 40%. Too shallow, and your plants wobble in the wind; too deep, and you risk rot or stunted growth.
Getting it right means healthier vines and more fruit by harvest time.
Most gardeners focus on what they see above ground, but the magic happens underground. Tomato roots grow along the buried stem, creating a stronger anchor and better access to water and nutrients. Whether you're transplanting seedlings or pruning mature plants, knowing how deep to bury them makes all the difference.
In this guide, I’ll break down the science-backed depth rules, step-by-step burying techniques, and the common mistakes that can ruin your harvest—so you can grow tomatoes that thrive from the ground up.
Optimal tomato plant bury depth: science-backed soil depth guidelines
When transplanting your tomato seedlings, the depth at which you bury them directly impacts root development and future yields. Most gardeners overlook this critical step, but science shows that proper stem burial depth can increase root mass by 30-40%.
The key lies in understanding how deep to bury based on your tomato variety and growth habits.
Tomatoes fall into two main categories: determinate (bush varieties) and indeterminate (vining varieties). Each type has slightly different burial requirements due to their growth patterns.
For both, the general rule is to bury up to the first set of true leaves, but there are nuances worth exploring to maximize your harvest.
The reason for these depth guidelines comes down to root biology. When you bury part of the stem, hidden axillary buds along the stem (where leaves attach) receive soil contact and begin growing into new roots.
This creates a more extensive root system that can better absorb water and nutrients, especially during fruit development.
For indeterminate varieties like 'Sungold' or 'Better Boy', deeper burial (up to the second or third leaf) encourages more robust root growth to support their 6-foot vines. These varieties benefit most from the additional root mass to prevent toppling under heavy fruit loads.
In contrast, determinate types like 'Roma' or 'Celebrity' only need shallow burial since their growth habit is naturally compact.
One common misconception is that burying deeper always means better results. However, burying beyond the first true leaves can lead to stem rot or disease pressure from poor air circulation.
The sweet spot is creating soil contact with those lower leaf nodes while keeping the upper stem exposed to sunlight for photosynthesis. Think of it as creating a root factory along your plant's lower stem.
Professional growers often use this technique with tall seedlings that develop in containers. If your seedlings have grown 6 inches or taller before transplanting, bury about one-third of the stem to create stability while still allowing the upper portion to photosynthesize. This angled approach prevents lodging while maximizing root development.
Soil type also plays a subtle role in optimal burial depth. In heavy clay soils, bury slightly deeper (up to the second leaf) to encourage more root mass that can penetrate compacted layers.
Conversely, in sandy soils, shallower burial (just to first leaves) prevents roots from drying out too quickly. Always amend your planting hole with compost or aged manure to create an ideal root zone.
Here's a pro tip: After transplanting, gently pat the soil around the base to remove air pockets, then water thoroughly. This helps the buried stem sections establish contact with the soil more quickly.
Within 7-10 days, you should see new root growth emerging from those buried leaf nodes—a clear sign your plant is adapting to its new depth.
Remember that proper burial depth isn't just about the numbers—it's about creating an environment where your tomato plant can thrive from its very first days in the ground.
When done correctly, you'll notice stronger stems, better disease resistance, and ultimately, a more productive plant that rewards you with an abundant harvest.
Step-by-step guide: how to properly bury tomato plants for maximum growth
Burying tomato plants correctly isn’t just about planting—it’s about unlocking their full potential. When done right, this simple technique stimulates root growth along the buried stem, leading to stronger plants and higher yields.
Many gardeners skip this step, missing out on a 40% boost in fruit production. The key is understanding when and how to bury, whether you're transplanting seedlings or pruning established plants.
Before you begin, gather your tools: a hand trowel or transplanter, loose garden soil or compost, and a watering can. The right tools make the process smoother and reduce the risk of damaging delicate stems.
Work on a cloudy day or in the early morning to avoid transplant shock from direct sunlight. Now, let’s dive into the step-by-step process to ensure your tomatoes thrive from the ground up.
Dig a hole twice as wide as the tomato seedling’s root ball. For determinate varieties, aim for 6-8 inches deep. For indeterminate types, go 8-12 inches deep to accommodate their sprawling growth.
Grasp the seedling by its base, not the leaves. Loosen the roots if they’re circling the pot. Shake off excess soil to inspect for root damage or pests. Trim any broken roots with clean pruning shears.
Place the seedling in the hole and cover the stem up to the first set of leaves (about 1/3 of the stem). For transplanting, bury half the stem if it’s lanky. Press soil lightly around the base to remove air pockets.
Pour 1 gallon of water around the base to settle the soil and eliminate air gaps. Avoid soaking the leaves to prevent fungal diseases. Mulch with straw or grass clippings to retain moisture.
Insert a tomato cage or bamboo stake now to support the plant as it grows. Secure the main stem to the stake with soft ties to prevent wind damage.
For established tomato plants, you can also prune and bury stems during the growing season. When your plant reaches 18-24 inches tall, pinch off the top leaves and bury the exposed stem under loose soil.
This encourages additional root growth, which supports more fruit production. Repeat this process every 4-6 weeks until late summer.
Avoid the temptation to bury too deeply—this can suffocate the plant and lead to rot. Conversely, shallow burying misses the chance to strengthen roots. Always bury up to the first true leaves (the leaves that appear after the initial seed leaves).
With this method, you’ll see healthier stems, more vigorous growth, and a bumper crop of tomatoes by harvest time.
Remember, the goal is to create a strong root system that supports your tomato plant’s needs. By following these steps, you’ll give your plants the best possible start—and watch them reward you with abundant harvests all season long. Happy planting! 🌱