
Vegetables
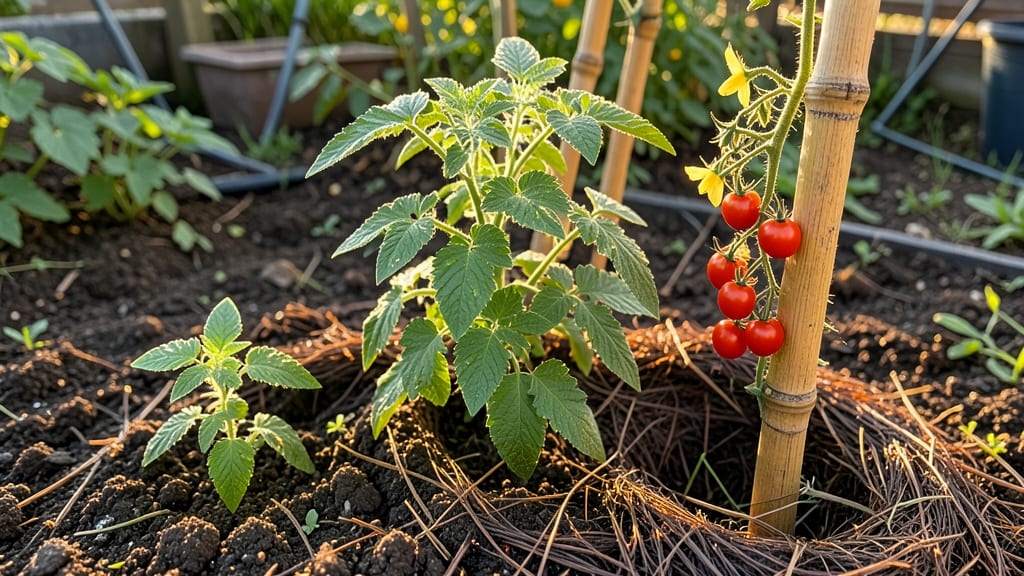
The cherry tomato growth stages unfold like a tiny, edible adventure—from the first crack of a seed to sun-ripened jewels ready to pop in your mouth. 🌱 I’ve watched this process every spring, and there’s nothing like seeing those first green nubs swell into sweet, bite-sized perfection.
The magic happens in just 60 days if you give them the right care at each step.
It all starts with germination, where seeds push through soil in 5-10 days if kept warm and moist. Then come the seedlings—delicate stems that need support to avoid flopping—and the first real test: transplanting.
Skip hardening them off, and you’ll lose tender plants to shock. But once they’re in the ground, the real show begins: flowering, pollination, and finally, the fruit.
By day 45, you’ll see clusters of green tomatoes growing heavier by the day. The moment they turn from pale green to deep red is the best part—harvesting every other day keeps the plant producing. The flavor? Unmatched. Nothing beats a vine-ripened cherry tomato straight from your garden.
Whether you’re a first-timer or a seasoned grower, these stages are where the real satisfaction lies. Mistakes happen—blossom end rot, pests, or uneven ripening—but each stage teaches you how to fine-tune next year’s harvest. Let’s break it down so you can grow like a pro.
📚 In This Guide
- What you need
- Instructions
- Tips and common mistakes
- Wrapping up and next steps
What you need
- ● Seeds: High-quality cherry tomato seeds (e.g., 'Sweet 100,' 'Sun Gold,' or 'Black Cherry'). Aim for 3-5 seeds per container if starting indoors.
- ● Growing Containers: Seed Starting: 2-3 inch biodegradable pots or cell trays (1 per seed).
- ● Transplanting: 5-7 gallon pots or garden beds with at least 18-24 inches of depth and width for proper root spread.
- ● Growing Medium: Seed Starting Mix: Lightweight, sterile potting soil with perlite or vermiculite (e.g., 50% peat moss, 30% perlite, 20% compost).
- ● Transplanting Mix: Well-draining garden soil amended with 2-3 inches of compost or a 50/50 blend of topsoil and coconut coir.
- ● Fertilizer: Seedling Stage: Balanced liquid fertilizer (e.g., 10-10-10 NPK) at ½ strength.
- ● Growth Stage: Tomato-specific fertilizer (e.g., 5-10-10 NPK) or compost tea.
- ● Watering Tools: Spray bottle (for seedling hydration).
- ● Watering can with a fine rose nozzle or drip irrigation system.
- ● Support Structures: Cages (5-6 ft tall) or stakes (6 ft long) for indeterminate varieties.
- ● Trellis or tomato clips for vining types.
- ● Pruning Tools: Sharp pruning shears or bypass pruners.
- ● Gloves (to protect from thorns and sap).
- ● Grow Lights: LED or fluorescent lights (12-16 hours/day) for indoor seed starting.
- ● Mulch: Straw or shredded leaves to retain moisture and suppress weeds.
- ● Row Covers: Frost cloth (for early-season protection) or shade cloth (if in hot climates).
- ● Pest Control: Neem oil, insecticidal soap, or beneficial nematodes for soil pests.
- ● pH Test Kit: To ensure soil pH is between 6.0-6.8 (ideal for tomatoes).
How to track cherry tomato growth stages at home
Watch your plants transform from tiny seeds to bursting clusters of sweet fruit—here's exactly what to expect each week.
🌱 Step 1: Germination and First True Leaves
Your seeds will sprout in 5-10 days when kept in 75-85°F soil under a humidity dome. You'll see tiny green loops break through the soil first—that's the seedling's first leaves, called cotyledons. These look different from real leaves: they're rounder and thicker, storing energy for the plant.
Once you see these cotyledons, remove the humidity dome immediately to prevent damping-off. Water gently from below (place trays in ½ inch of water for 10 minutes) so seedlings don't get fungal diseases from wet leaves. You'll know your seedlings are healthy when they develop their first true leaves—these are the smaller, serrated leaves that look like miniature tomato foliage.
☀️ Step 2: Vegetative Growth and Staking Prep
Between 3-4 weeks after germination, your plants will enter rapid growth. You'll notice 4-6 inch stems with multiple sets of true leaves appearing every 2-3 days. This is when you should start hardening off seedlings if moving outdoors—acclimate them to sun and wind over 7-10 days to prevent shock.
If growing indoors, provide 14-16 hours of light daily using grow lights. Leggy seedlings (long stems with widely spaced leaves) mean your lights are too far away—move them within 2-3 inches of the plant tops. At this stage, set up stakes or cages (even small ones) to train vines early—cherry tomatoes grow fast and need support.
🌿 Step 3: Flower Truss Formation
Around 5-6 weeks after planting, you'll spot tiny yellow flowers forming in clusters called trusses. These appear in the leaf axils (where leaves meet stems). Cherry tomatoes typically produce 3-5 flower trusses per plant, with each truss capable of holding 10-20 tomatoes.
Here's the thing—you want to remove the first flower cluster if growing in cooler climates (55°F nights). This redirects energy to root and stem growth. For warm climates, let all flowers set. You'll know flowers are pollinated when they start turning green and swelling—this happens 7-10 days after blooming. Give plants a balanced fertilizer at half-strength when you see these green tomatoes forming.
🍅 Step 4: Fruit Development and Ripening
Green tomatoes will grow rapidly over 2-3 weeks, turning from marble-sized to 1-2 inch diameter. You'll notice color changes first on sunny sides of the fruit—cherries develop their signature red, yellow, or orange hues from the outside in. Harvest when 75-100% of the surface shows final color—waiting too long makes them mealy and less sweet.
Cluster harvesting works best: pick all ripe tomatoes from a truss at once. This prevents the plant from diverting energy to unripe fruit and encourages new flower production. In warm climates, you'll get 2-3 harvests per season from each truss. Watch for sunscald (white patches) on exposed fruit—provide afternoon shade if temperatures exceed 90°F.
⏰ Step 5: Final Growth Check and Winter Prep
Your plants will slow growth 60-70 days after planting as days shorten. You'll see new growth stop and existing leaves yellow—this is normal. Harvest any remaining fruit before first frost, as even 32°F temperatures will damage unripe tomatoes. Cut plants back to 6 inches tall and compost healthy stems (diseased plants should be discarded).
Here's what I do next: save seeds from your best tomatoes by fermenting them in water for 3-5 days, then drying on paper towels. Store in a cool, dark place for next year's plants. The reason this matters is that homegrown seeds adapt perfectly to your local climate and produce fruit identical to the parent plant—no need to buy new seeds every year.
Tips & tricks for perfect cherry tomato growth tracking
These simple strategies will help you navigate each growth stage like a pro—no guesswork involved.
Soil Temperature Secret: Maintain that 75-85°F soil temperature range during germination by using a seedling heat mat if your home runs cooler. I learned this the hard way after waiting two weeks for sprouts in my 68°F basement—just trust me, those extra few degrees make all the difference.
Lighting Technique: For indoor grow lights, position them just 2-3 inches above seedlings during the 14-16 hour daily cycle. I use a simple timer to automate this, and it prevents those leggy seedlings that stretch desperately toward light. The key is consistency—don't let them get too close or you'll burn the leaves.
Climate Adaptation: In cooler climates with 55°F nights, remove that first flower cluster to build stronger stems. I've seen plants collapse under heavy fruit trusses when they're not ready—it's heartbreaking. For warm climates, let all flowers set, but be prepared to provide afternoon shade when temps hit 90°F to prevent sunscald.
Harvesting Hack: Use a pair of clean scissors to snip trusses at the stem when harvesting. This prevents damaging the plant and makes future harvesting easier. I also wear gloves—those little tomatoes are slippery and can leave stains on your hands for days!
Pro Tips for Cherry Tomato Growth Stages
- These simple strategies will help you navigate each growth stage like a pro—no guesswork involved.
- Soil Temperature Secret: Maintain that 75-85°F soil temperature range during germination by using a seedling heat mat if your home runs cooler.
- Lighting Technique: For indoor grow lights, position them just 2-3 inches above seedlings during the 14-16 hour daily cycle.
Frequently asked questions
Got questions about growing cherry tomatoes?
Here are answers to the most common queries—from timing to troubleshooting—so you can enjoy a bountiful harvest with confidence!
How long does it take for cherry tomatoes to go from seed to harvest?
Cherry tomatoes typically take 60–70 days from seed to harvest, depending on the variety and growing conditions. If you start with transplants, expect 50–60 days to fruiting. Warmth and consistent care speed up growth, while cooler temps may delay ripening.
Can I grow cherry tomatoes in containers, and what size pot do I need?
Yes! Cherry tomatoes thrive in containers. Use a pot at least 12–18 inches deep and wide (bush varieties need less space than indeterminate types). Ensure it has drainage holes and support (like a cage or trellis) for vining plants. Smaller pots may stunt growth.
Why are my cherry tomato flowers falling off before fruiting?
This is often due to temperature stress (below 55°F or above 90°F), lack of pollinators, or overwatering. Hand-pollinate flowers with a small brush, ensure consistent watering, and protect plants from extreme heat with shade cloth. Calcium deficiency (blossom end rot) can also cause drop.
Do cherry tomatoes need pruning, and how do I do it?
Pruning indeterminate cherry tomatoes (like ‘Sweet 100’) boosts yield and airflow. Remove suckers (shoots between the stem and branches) weekly, leaving only the top 2–3 leaves for fruiting. Avoid pruning bush varieties—let them grow naturally. Use clean scissors and prune in the morning for faster healing.
What’s the best way to pollinate cherry tomatoes if I don’t have bees?
Gently shake the plant or use a small paintbrush to transfer pollen from male to female flowers (the female has a tiny tomato at its base). Do this on dry, sunny mornings when flowers are open. For large plants, a handheld vacuum can also work—just release pollen near flowers!
Wrapping up and next steps
Growing cherry tomatoes from seed to harvest is a rewarding journey filled with vibrant colors and fresh flavors! 🌱 By understanding each growth stage—from germination to fruiting—you’ll unlock the secrets to a bountiful, healthy crop in just 60 days.
Whether you’re a beginner or a seasoned gardener, patience and care will pay off with sweet, juicy tomatoes straight from your garden.
Ready to take the next step? Start your seeds indoors or plant them directly in warm soil, and watch your green thumb shine! 🌟 For extra success, track your plant’s progress and adjust care as needed—soon, you’ll be savoring homegrown cherry tomatoes all season long.