
Companion Plants
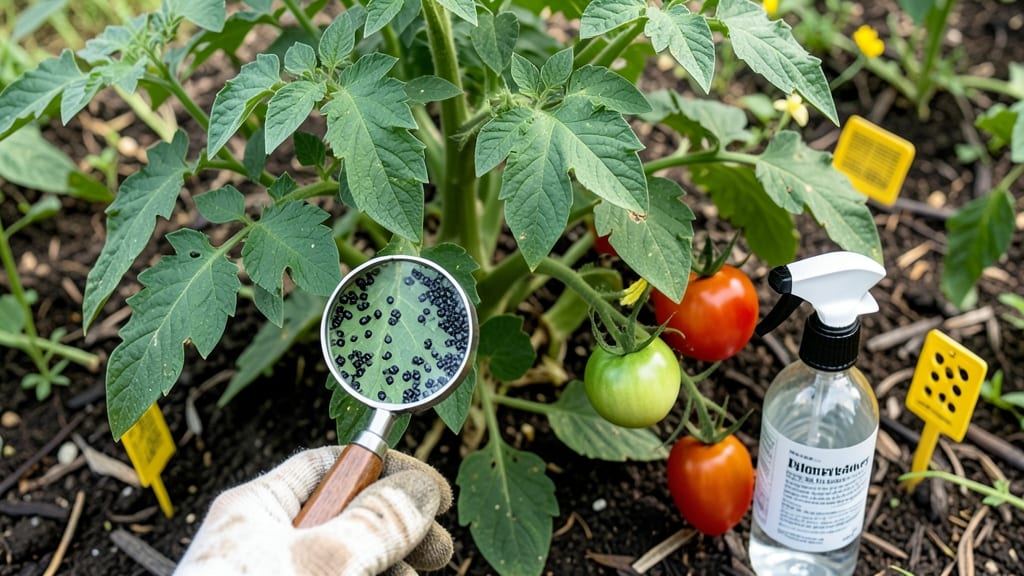
Those tiny black dots on your tomato leaves aren't just cosmetic—they're early blight, and it spreads fast if you ignore it. 🌱 I've seen this fungal disease turn lush plants into yellowing skeletons by midseason, but I've also saved gardens with simple, early action.
The key is spotting the difference between early blight and other problems like stink bug damage or environmental stress.
Early blight starts with small black spots on lower leaves, often with concentric rings that look like bullseyes. Unlike stink bug damage—which leaves clean holes—these spots stay attached and multiply when wet.
The fungus thrives in warm, humid conditions, so if your tomatoes are wilting and the spots are spreading upward, you're dealing with a classic case that needs immediate attention.
You can stop it in its tracks with a mix of prevention and treatment: remove infected leaves daily, space plants for airflow, and apply copper fungicide at the first sign.
Organic options like baking soda spray (1 tbsp per gallon of water) work too, but act fast—once the spots hit the fruit, your harvest is at risk.
This isn't just about saving individual plants—it's about protecting your entire garden. Early blight overwinters in soil and debris, so clean up thoroughly after harvest. With these steps, you'll go from stressed to confident, turning those black dots into a lesson for next season's thriving tomatoes.
Root Causes Behind Tiny Black Spots
If you’ve noticed tiny black dots dotting your tomato leaves or fruit, don’t panic—there’s usually a logical explanation behind them. These spots can stem from a mix of environmental stressors, fungal infections, or even natural plant behaviors.
Below, we break down the most common culprits, why they happen, and what triggers them in your garden.
One of the most frequent causes of black dots on tomato plants is fungal disease, particularly Alternaria solani (early blight) or Alternaria alternata. These fungi thrive in warm, humid conditions and spread rapidly when moisture lingers on leaves.
How it happens:- Spores land on leaves—Fungal spores are present in soil and organic matter. When splashed by water (from rain or overhead irrigation), they attach to leaves and stems.
- High humidity accelerates growth—Fungi need at least 9–12 hours of leaf wetness per day to germinate. Greenhouses, dense foliage, and poor air circulation create the perfect breeding ground.
- Black dots expand into lesions—Initially, you’ll see small, dark specks (spores). Over time, these develop into target-shaped or concentric-ringed spots with gray centers, a classic sign of early blight.
💡 Pro Tip: Check the underside of leaves first—fungal spores often appear there before spreading. If you see black dots with a velvety texture, it’s a red flag.
Not all black dots are fungal. Sometimes, your tomato plants are reacting to environmental conditions that cause stress, leading to tiny necrotic (dead) spots.
Key triggers:- Excessive heat or sunburn—Tomatoes left in direct, intense sunlight for long hours (especially in hot climates) can develop small black or brown dots from sun scald. This often appears on fruit or upper leaves first.
- Water stress (over- or under-watering)—
- Underwatering: Causes tiny black or brown specks due to plasmolysis (cell dehydration). Leaves may also curl or feel crispy.
- Overwatering: Leads to root rot, which restricts nutrient uptake. The plant may produce small black dots on leaves as a stress response.
- Poor air circulation—Stagnant air traps moisture, encouraging black fungal growth or sooty mold (a side effect of sap-sucking pests like aphids).
🌡️ Quick Fix: If stress is the issue, adjust watering (aim for 1–1.5 inches per week) and provide shade cloth during peak afternoon sun. Prune plants to improve airflow.
Some black dots aren’t from disease—they’re pest-related. Tiny insects feed on plant sap, leaving behind black specks, frass (droppings), or sooty mold (a black, powdery residue from their honeydew).
Common culprits:- Aphids—These sap-suckers excrete sticky honeydew, which attracts sooty mold fungi. Black dots may appear along leaf veins or on the undersides.
- Spider mites—While they don’t leave black dots directly, their feeding scars can look like tiny stippled marks. Severe infestations cause bronzing or yellowing between veins.
- Thrips—These tiny pests leave black fecal spots and can cause silvering or scarring on leaves and fruit.
🔍 Inspect closely: Hold a leaf over a white sheet of paper and tap gently—if you see tiny moving specks, you’ve got pests. Treat with neem oil or insecticidal soap for organic control.
Sometimes, those black dots are harmless—or even beneficial! Here’s when they’re not a cause for alarm:
- Mineral deposits—If your water is hard (high in calcium or magnesium), tiny black or brown spots may form on leaves. This is non-toxic but can be unsightly.
- Pollination drops—Some tomato varieties produce tiny black or translucent droplets on leaves, especially in high humidity. These are harmless and related to the plant’s natural processes.
- Seed development—On the inside of tomato fruit, black dots are simply developing seeds. No action needed!
✨ When in doubt: Scrape a spot gently with your fingernail. If it doesn’t leave a mark or feels rough/textured, it’s likely natural. If it smudges or feels powdery, it’s probably fungal.
Now that you know the why behind those black dots, the next step is identifying the right fix. Stay tuned for actionable solutions to save your tomato plants! 🍅🌿
Quick Fixes for Tomato Plant Spots
If you’ve spotted those pesky black dots marring your tomato plants, don’t panic—there’s hope! The key is acting fast and targeting the root cause (literally and figuratively). Below, we’ve mapped out practical, step-by-step solutions for the most common culprits behind those unsightly spots, plus tips to keep your plants thriving.
Let’s turn those blemishes into a thing of the past!
Fungi love damp, crowded conditions—and your tomato plants are basically an all-you-can-eat buffet. Here’s how to starve the spores and save your harvest:
🔥 Remove and Replace Infected Foliage
- Snip it out: Use sterilized pruners (wipe with rubbing alcohol) to cut off yellowed or spotted leaves—especially the lower ones. Dispose of them in the trash (not compost!).
- Avoid overhead watering: Water at the base of the plant in the morning so leaves dry quickly. Wet foliage = fungal party time.
- Space plants wisely: Give tomatoes 18–24 inches of airflow between plants. Crowding = humidity trap.
🍳 Homemade Fungicide Sprays (Safe & Effective)
Mix one of these in a spray bottle and apply every 7–10 days (or after rain):
- Baking soda spray: 1 tsp baking soda + 1 tbsp vegetable oil + 1 tsp dish soap + 1 gallon water. Shake well before use!
- Neem oil: 1 tbsp neem oil + 1 tsp mild soap + 1 quart water. Reapply every 5–7 days.
- Copper fungicide: Follow label instructions (great for severe cases).
🌡️ Boost Plant Immunity
- Mulch heavily: Use straw or grass clippings (2–3 inches deep) to block spore-splashing from soil.
- Rotate crops: Never plant tomatoes (or nightshades) in the same spot two years in a row.
- Companion plants: Interplant with garlic, basil, or marigolds—they repel fungi and pests naturally.
Tiny invaders can leave tiny black specks (frass, aka insect poop) or chew holes. Here’s how to evict them for good:
👨🍳 Manual Removal (For Small Infestations)
- Blast them off: Spray plants with a strong stream of water (aphids hate this!).
- Sticky traps: Hang yellow sticky cards near plants to catch flying pests.
- Handpick: Check under leaves for tiny black mites (use a magnifying glass). Drop them in soapy water.
🥘 Natural Pest Repellents
- Insecticidal soap: Mix 2 tbsp castile soap + 1 quart water, spray directly on pests (reapply every 4–5 hours if needed).
- Diatomaceous earth (DE): Sprinkle food-grade DE around the base of plants (avoid direct contact with leaves—it’s abrasive). Reapply after rain.
- Beneficial insects: Release ladybugs or lacewings (they love munching on aphids).
🔪 Prevent Future Visits
- Row covers: Use floating row covers early in the season to block pests before they arrive.
- Interplant herbs: Mint, dill, or thyme confuse pests and deter egg-laying.
- Clean up debris: Remove fallen leaves/fruit to eliminate hiding spots.
Sometimes those dots aren’t pests or fungi—they’re physical damage from the great outdoors!
🔪 Immediate First Aid
- Gently wipe leaves: Use a damp cloth to remove loose debris (avoid harsh scrubbing).
- Shade cloth: If hail or intense sun caused spotting, drape light shade cloth (30–50%) over plants for a few days.
- Adjust watering: If soil splatter is the issue, water less frequently but deeply to reduce muddy spray.
🎯 Long-Term Protection
- Windbreaks: Plant fast-growing tall plants (like sunflowers) on the windward side to shield tomatoes.
- Raise beds: Use elevated containers to keep foliage off damp soil.
- Pollen traps: If nearby trees are the culprit, prune them or water plants in the late afternoon to wash off pollen.
To avoid future breakouts, follow this golden rule: ✅ Rotate crops every 3 years. ✅ Sterilize tools between uses (bleach or alcohol). ✅ Inspect plants weekly (early detection = easier fixes). ✅ Support strong growth: Use balanced fertilizer (10-10-10) and compost tea for resilient plants. ✅ Harvest promptly: Pick tomatoes as soon as they ripen to reduce stress.
Pro Tip 💡: If all else fails, grow resistant varieties like ‘Mountain Merit’ or ‘Defiant PhR’—they’re bred to fight early blight like pros!
With these fixes, your tomato plants will be back to their lush, spot-free selves in no time. Now go forth and grow—no black dots allowed! 🍅✨
Frequently asked questions
Are black dots on tomato leaves always a sign of disease?
Not always! While fungal diseases like early blight often cause black dots, they can also appear from pest damage (like thrips or aphid frass), environmental stress (sun scald or water splatter), or even harmless mineral deposits from hard water. Always check for other symptoms—like concentric rings or yellowing—to confirm.
How do I tell if black dots are fungal spores vs. pest droppings?
Scrape a spot gently with your fingernail. Fungal spores will smudge or feel powdery (like soot), while pest droppings (frass) are usually gritty or dry. Also check for live pests—aphids or mites often cluster where they feed. A magnifying glass helps spot tiny eggs or webbing too!
Will removing infected leaves stop the black dots from spreading?
Yes! Prune off lower leaves with black spots (especially if they have concentric rings) and dispose of them in the trash—not compost. This removes fungal spores before they spread upward. Pair this with morning watering at the base and proper spacing (18–24 inches apart) to break the disease cycle.
Can I still eat tomatoes with black dots on the fruit?
Only if the dots are harmless seed specks (inside the fruit) or superficial sun scald. If the spots are raised, velvety, or spreading (like early blight), avoid eating them—they can harbor toxins. When in doubt, cut away affected areas or harvest smaller, unaffected tomatoes first.
How often should I spray homemade fungicide if I see black dots?
Apply baking soda or neem oil sprays every 7–10 days (or after rain) until new growth appears. For severe cases, use copper fungicide every 5–7 days at dusk to avoid leaf burn. Always spray undersides of leaves where spores hide and reapply after heavy rain.