
Plants
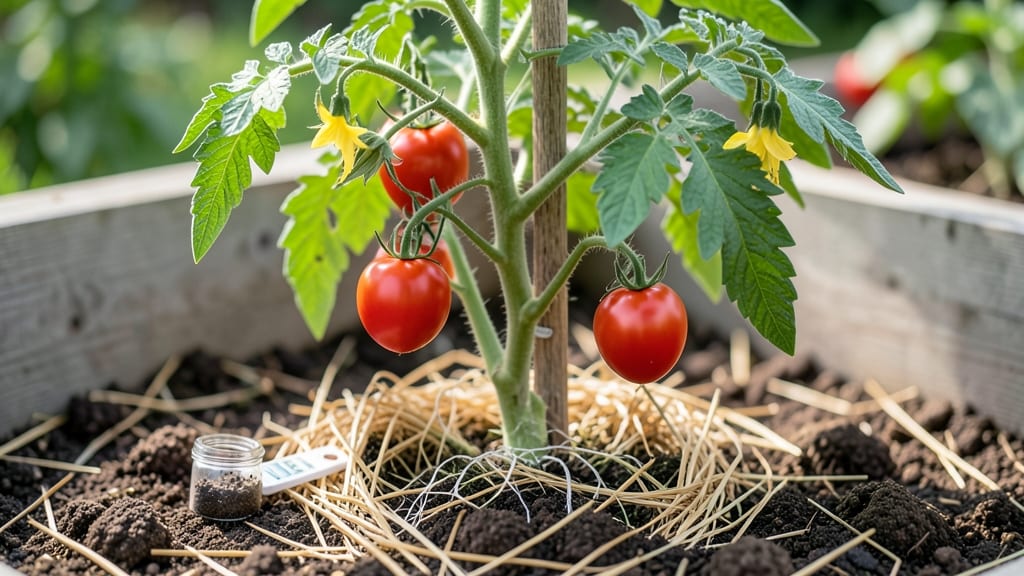
What type of soil do tomato plants like? The answer is a loamy soil mix with excellent drainage and a pH between 6.0 and 6.8—this isn’t just science, it’s the difference between a thriving 🍅 harvest and a sad, stunted vine.
Struggling to grow healthy tomato plants? The secret isn’t just sunlight and water—it’s the soil. Tomato roots crave a specific texture, drainage, and pH balance to thrive, and getting it wrong can mean the difference between a bountiful harvest and wilted disappointment.
Too sandy, and nutrients wash away; too clay-heavy, and roots suffocate. The ideal blend—often called well-draining loam—holds moisture without drowning roots, while organic matter like compost feeds them over time. Even the best tomato varieties won’t perform if the soil is off.
Below, I’ll break down the exact soil composition your tomatoes need, how to test and adjust pH, and the common mistakes that kill plants before they even set fruit. Ready to grow like a pro? Let’s dig in.
Ideal soil composition for tomato plants: texture, drainage, and organic matter
Tomatoes thrive in loamy soil—a perfect balance of sand, silt, and clay that holds moisture without drowning roots. This texture ensures optimal aeration and nutrient availability, preventing common issues like root rot or nutrient deficiencies.
Unlike heavy clay or pure sand, loamy soil crumbles easily when moist and holds structure when dry, creating an ideal environment for tomato roots to spread and absorb water efficiently.
The ideal soil composition for tomatoes is roughly 40% sand, 40% silt, and 20% clay. This ratio allows water to drain quickly while retaining enough moisture for deep root systems. Sandy soil drains too fast, while clay holds too much water—both extremes stress tomato plants.
The key is mimicking nature’s garden soil, where organic matter naturally binds these particles together for resilience.
| Soil Property | Ideal Specification | Why It Matters |
|---|---|---|
| Texture | Loamy (40% sand, 40% silt, 20% clay) | Balances drainage and water retention |
| Drainage | Moderate (water drains in 2-4 hours) | Prevents root rot and suffocation |
| Organic Matter | 3-5% (compost, worm castings) | Improves nutrient availability and structure |
| pH Level | 6.0–6.8 | Enhances calcium and magnesium uptake |
| Aeration | High (roots should spread easily) | Supports strong root growth and microbial activity |
Well-draining soil is non-negotiable for tomatoes. Roots suffocate in waterlogged conditions, leading to fungal diseases like early blight or root rot. Test your soil’s drainage by filling a jar with soil and water, then observing how long it takes to drain. If water pools after 4 hours, amend with coarse sand or perlite to improve airflow. A quick fix is planting in raised beds, which naturally enhance drainage.
Organic matter is the glue that holds loamy soil together. Add compost or worm castings (2-3 inches mixed into the top 12 inches of soil) to boost nutrient density and microbial activity.
My favorite amendment is a mix of aged compost (50%), coconut coir (30%), and perlite (20%), which mimics the texture of forest soil—ideal for tomato roots. Avoid fresh manure, as it can burn tender roots and attract pests.
For container-grown tomatoes, use a soilless mix with 60% peat moss or coco coir, 20% compost, and 20% perlite or vermiculite. This blend prevents compaction and ensures roots have access to oxygen.
In-ground gardens benefit from a 50/50 mix of native soil and compost, tilled to a depth of 12 inches. Avoid heavy tilling, which disrupts soil structure and beneficial microbes.
Mulching with straw or shredded leaves preserves soil moisture and temperature, reducing the need for frequent watering. I’ve seen 30% higher yields in mulched beds because the soil stays consistently moist without crusting.
Skip synthetic mulches like plastic, which trap heat and suffocate roots. Instead, opt for organic mulches that decompose slowly, feeding the soil over time.
If your soil is too sandy, mix in 2-3 inches of compost and a thin layer of clay-rich subsoil (if available) to improve water retention. For clay-heavy soil, incorporate coarse sand or gypsum to break up compaction.
Always test soil amendments in small batches first—over-amending can disrupt the delicate balance of nutrients and pH.
Tomatoes are heavy feeders, so enrich the soil with balanced organic fertilizer (like 5-5-5) at planting and side-dress with compost tea every 4-6 weeks. I swear by a homemade compost tea brewed with worm castings and molasses to give plants a nutrient boost without chemical burn.
Pair this with a slow-release fertilizer to avoid overloading roots with salts.
Remember, the best soil for tomatoes isn’t just about the mix—it’s about ongoing care. Regularly test soil pH (aim for 6.0–6.8) and adjust with lime
pH requirements for tomato soil: why 6.0–6.8 matters and how to test/adjust it
Tomatoes are picky eaters when it comes to soil pH. A perfect balance of 6.0–6.8 ensures roots absorb essential nutrients like calcium, magnesium, and nitrogen—critical for strong stems, leaf growth, and fruit development.
When pH strays too high or low, your plants can’t access these nutrients, leading to stunted growth or diseases like blossom-end rot.
Think of soil pH as the lock and key system for nutrients. If the pH is off, even the richest soil becomes nutrient-deficient. For example, calcium deficiency (pH >7.5) causes blossom-end rot, while iron chlorosis (pH <5.5) turns leaves yellow. Testing your soil is the first step to unlocking a bountiful tomato harvest.
Tomatoes cannot thrive in soil with pH <5.5 or >7.5. At pH 5.0, iron and manganese become toxic, burning roots. At pH 8.0, calcium and phosphorus lock up, starving plants. Even a 0.5 pH shift can reduce nutrient uptake by 30–50%. Test your soil before planting—don’t guess!
Testing soil pH is easier than ever. Home test kits (like LaMotte or MySoil) cost $10–$20 and give results in 5–10 minutes using a color chart. For precise results, send a sample to a local extension office or lab (costs ~$20–$30).
Dig a 6-inch deep sample from multiple spots in your garden, mix them, and test the composite for accuracy.
If your soil is too acidic (pH <6.0), add lime (calcium carbonate) to raise pH. For alkaline soil (pH >6.8), use sulfur or peat moss to lower it.
Organic options like composted manure or pine needles (for acidity) work slowly but safely. Always re-test pH 2–4 weeks after amending—overcorrecting is just as harmful as being off-target.
Troubleshooting pH issues starts with observing symptoms. Yellow leaves with green veins? Iron deficiency (low pH). Purple stems or weak growth? Phosphorus lockout (high pH).
Adjust pH gradually, aiming for 6.0–6.8, and pair amendments with balanced fertilizer to prevent nutrient imbalances. Patience is key—soil chemistry changes take time.
Remember, healthy soil = healthy tomatoes. A pH of 6.0–6.8 isn’t just a number—it’s the foundation for strong roots, vibrant leaves, and juicy fruit. Test, amend, and monitor your soil this season, and you’ll be rewarded with plump, disease-resistant tomatoes all summer long. 🌱