
Companion Plants
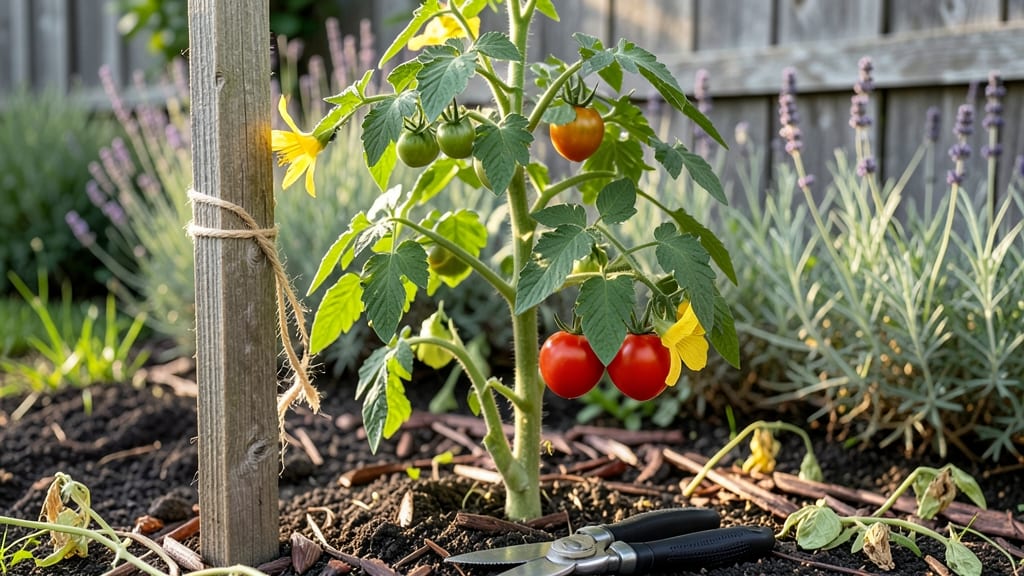
Tying tomato plants saves your harvest from collapsing under its own weight—and my first year without it ended with bruised tomatoes and broken branches. 🌱 The right technique keeps vines upright, improves airflow (so fewer diseases), and makes harvesting easier.
You’ll see why every gardener who grows tomatoes does this within minutes of planting.
You only need three things: sturdy stakes (5-6 feet tall), soft plant ties (or old T-shirts cut into strips), and a gentle touch. Avoid wire or tight knots—those can gouge stems as plants grow.
I’ve tried everything from cheap bamboo stakes to heavy-duty metal cages, and the right setup makes all the difference for your plant’s health and your harvest.
Start by placing stakes when you transplant seedlings, then loosely tie the main stem like a bow—never tight enough to restrict growth. As vines climb, weave them upward in a spiral (like a corkscrew) and tie every 12 inches.
Prune suckers (those little shoots in the leaf axils) to focus energy on fruit, not foliage. Your plants will reward you with stronger stems and more accessible tomatoes.
Even experienced gardeners struggle with this at first—too tight, too loose, or missing the right spots. But once you get the rhythm, it takes just 5 minutes per plant every two weeks.
The payoff? Tomatoes stay disease-free, ripen faster, and you’ll avoid the heartbreak of watching a heavy vine snap under its own fruit. Let’s get those plants growing straight and strong!
📚 In This Guide
- What you need
- Instructions
- Tips and common mistakes
- Wrapping up and next steps
What you need
- ● Tomato plants: 1-6 plants (depending on space and variety—determinate or indeterminate).
- ● Support stakes: Bamboo stakes (5-6 ft tall, ½-inch diameter) – 1 per plant.
- ● OR Metal/wooden stakes (6 ft tall, 1-inch diameter) – 1 per plant.
- ● OR Heavy-duty garden twine (30-50 ft roll) – for DIY trellis setups.
- ● Soft plant ties: 3-6 ft of eco-friendly, stretchy fabric ties (avoid plastic or wire).
- ● Pruning shears: Sharp, clean pair for trimming excess growth.
- ● Gloves: 1 pair (gardening or work gloves for comfort).
- ● Tomato cages: 1-2 (for smaller varieties or supplementary support).
- ● T-posts or metal stakes: For windy areas (drive stakes 12+ inches deep).
- ● Twine or zip ties: 10-20 ft (as a backup to fabric ties).
- ● Mulch: Straw or shredded leaves (to retain moisture and reduce weeds).
- ● Plant markers: Labels to track varieties (if growing multiple types).
Step-by-Step instructions for tying tomato plants
Here's how I keep my tomato plants sturdy and productive all season long.
🪴 Step 1: Choose and Install the Right Support System
For 4 tomato plants, I use 6-foot wooden stakes or heavy-duty tomato cages (6 inches in diameter). Drive stakes 2-3 inches deep into the soil 2-3 inches away from the main stem—never right next to it, or you'll risk girdling the plant as it grows. If using cages, place them immediately after transplanting so roots don't get disturbed later.
I always add 1-2 inches of mulch around the base after staking to retain moisture and prevent weeds. This keeps the soil cool, which is especially important in hot climates where tomato plants can stress easily. For indeterminate varieties (the ones that keep growing all season), I use tall bamboo stakes instead—they're lightweight but strong enough to handle 20+ pound fruit loads.
✂️ Step 2: Tie the Main Stem as It Grows
Start tying when the plant reaches 12-18 inches tall—that's usually 3-4 weeks after transplanting. Use soft plant ties (not wire or twine—they cut into stems) and loop them gently but securely around the stake and main stem. I like to make a figure-eight pattern to distribute pressure evenly.
Here's the thing—I never tie at the very top of the plant. Instead, leave 6-8 inches of free growth above the last tie. This prevents the stem from breaking under fruit weight. You'll know you're doing it right when the plant sways slightly in the wind but doesn't flop over. Re-tie every 7-10 days as the plant grows, always adding a new tie below the previous one to support new growth.
🌿 Step 3: Secure Branches and Fruit-Laden Stems
Once flowers appear, I switch to soft cloth strips for secondary support. Gently weave these around suckers (those little side shoots in the leaf axils) and fruit clusters to prevent them from snapping under weight. The key is gentle pressure—you're guiding, not strangling. I avoid tying directly to the stake for side branches; instead, I loop them around the main stem or a nearby branch.
Watch for leggy growth (long, weak stems with small leaves)—this happens when plants get too much light but not enough support. If you see this, immediately add a new tie below the weak section and move the plant 1-2 inches closer to the stake to redistribute weight. You'll see stronger growth within a week if the plant isn't already too far gone.
💧 Step 4: Adjust Ties as the Plant Matures
By mid-season, your tomato plants will be topping out (reaching their maximum height). This is when I switch to wide, stretchy fabric ties that can accommodate rapid growth. Loosen all ties every 2 weeks and re-position them—never leave them too tight as the stem thickens. I make a habit of checking ties after heavy rain, since wet fabric can chafe stems if left unchecked.
For heavy fruit loads (think beefsteak tomatoes or heirlooms), I add horizontal support wires at 12-inch intervals up the stake. These create a "ladder" for branches to lean against, distributing weight more evenly. You'll know your support system is working when fruit hangs parallel to the ground instead of drooping toward the soil—this prevents rot and makes harvesting easier.
⏰ Step 5: Prepare for Late-Season Support
As summer winds down, I prune lower leaves (up to 12 inches from the ground) to improve air circulation and reduce disease risk. This also makes it easier to see the main stem when re-tying. For determinate varieties (the bush types), I stop tying entirely once they stop growing—these plants naturally support their own weight.
I know it seems like a lot of work, but here's the payoff: no broken stems, no lost fruit, and plants that keep producing until frost. Even in windy conditions, my staked tomatoes stay upright. The last step? Remove all ties in fall and compost them—don't leave plastic or fabric in the soil where it can degrade and harm next year's plants.
Tips & tricks for perfect tomato plant tying
These simple tricks will transform your tomato plants from floppy to flourishing all season long.
Support System Selection: For indeterminate varieties that grow continuously, bamboo stakes are my go-to—they're sturdy yet flexible enough to sway with wind without snapping. I've learned the hard way that cheap plastic stakes bend under heavy fruit loads, so invest in quality. For bush varieties, cages work perfectly, but place them immediately after transplanting to avoid disturbing roots later.
The Tie Placement Technique: When tying the main stem in Step 2, think of it like a safety harness—never tie at the very top. Always leave that 6-8 inches of free growth above your last tie. This prevents the stem from breaking under fruit weight. I've seen too many plants snap because someone tied too high. The figure-eight pattern distributes pressure perfectly, and you'll notice the plant sways naturally in the wind without flopping.
Secondary Support Strategy: Once flowers appear, switch to soft cloth strips for branches and fruit clusters. These are gentler than plant ties and won't damage delicate stems. The key is to weave them loosely—you're guiding growth, not restricting it. For heavy fruit loads like beefsteak tomatoes, add horizontal wires at 12-inch intervals to create a support ladder. This keeps fruit hanging parallel to the ground, preventing rot and making harvesting easier.
Seasonal Adjustments: By mid-season, when plants are topping out, switch to stretchy fabric ties that can accommodate rapid growth. Loosen all ties every 2 weeks to prevent constriction as stems thicken. After heavy rain, check ties immediately—wet fabric can chafe stems if left unchecked. This simple habit has saved me from losing plants to stem damage during summer storms.
Pro Tips for Tying Tomato Plants
- These simple tricks will transform your tomato plants from floppy to flourishing all season long.
- Support System Selection: For indeterminate varieties that grow continuously, bamboo stakes are my go-to—they're stur...
- The Tie Placement Technique: When tying the main stem in Step 2, think of it like a safety harness—never tie at the v...
Frequently asked questions
When is the best time to start tying tomato plants?
Start tying your tomato plants when they reach about 12–18 inches tall—typically after they’ve developed their first few true leaves and before heavy fruiting begins. This prevents stem damage while still providing support for rapid growth. For indeterminate varieties, continue tying every 5–7 days as they grow taller.
What if I forget to tie my tomato plants regularly?
Don’t panic! If you skip a few weeks, gently retie the plant, focusing on supporting the main stem and fruit-heavy branches. Loosen any tight ties to avoid bruising. However, consistent tying prevents sprawling, disease, and broken stems, so aim for regular check-ins—especially during windy or rainy weather.
Can I use anything other than twine or soft ties for tomato plants?
Yes! While soft plant ties or Velcro strips are ideal, you can also use:
- Old T-shirts or fabric strips (gentle and breathable)
- Bungee cords (adjustable but avoid over-tightening)
- Plastic zip ties (use sparingly—they can cut into stems)
- Hair ties or pantyhose (for small plants or emergencies)
Why are my tomato leaves turning yellow after tying?
Yellowing leaves after tying usually signals restricted airflow or over-tightening. Loosen the ties immediately and check for:
- Tight spots around the stem (leave 1–2 fingers’ space for growth)
- Signs of blossom end rot (from uneven water absorption)
- Pests like aphids or spider mites hiding in crowded foliage
Do I need to tie tomatoes in containers or hanging baskets?
Container-grown tomatoes need even more support since their roots can’t anchor deeply. Use:
- A small stake or cage inserted at planting
- Soft ties every 6–8 inches up the stem
- Fabric strips to avoid damaging delicate stems
Wrapping up and next steps
Tying your tomato plants isn’t just a chore—it’s the secret to stronger stems, bigger yields, and healthier vines all season long! 🌱 Whether you’re a first-time gardener or a seasoned pro, mastering this technique ensures your tomatoes thrive, even as they grow heavy with fruit.
Now that you’ve got the tools, tips, and answers, it’s time to roll up your sleeves and give your plants the support they deserve.
Ready to watch your garden flourish? Start by tying your first plant today—and don’t forget to check in weekly as your tomatoes grow! For extra inspiration, explore companion plants like basil or marigolds to boost your harvest even further. Happy gardening! 🌿