
Vegetables
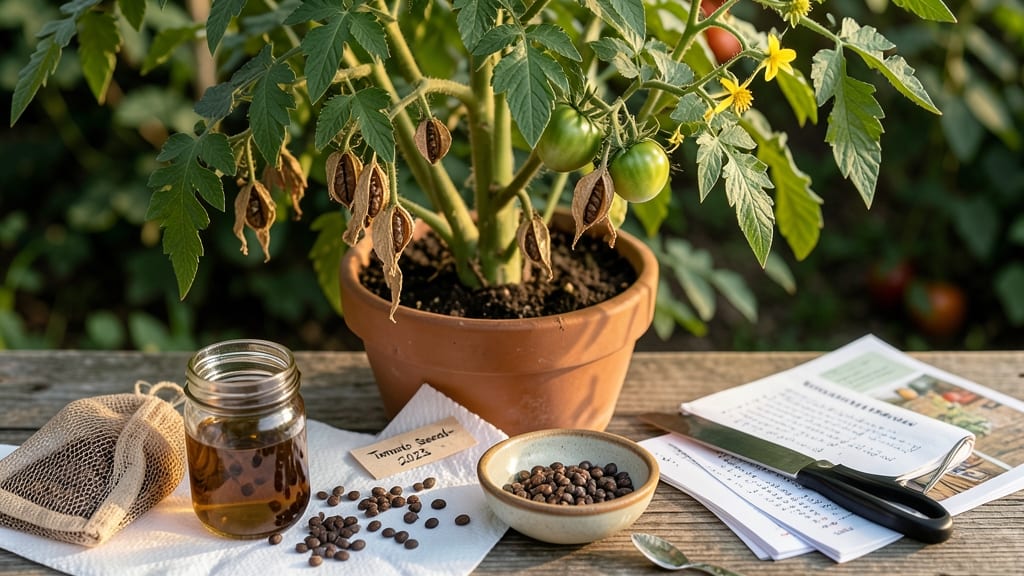
Keeping tomato seeds for next year from this year’s harvest means next summer’s plants could outperform store-bought varieties—and it’s simpler than you’d think. 🌱 I’ve saved seeds from my heirloom tomatoes for three seasons now, and the process has become second nature, turning grocery-store tomatoes into the start of my garden’s next generation.
The key is patience and a few simple supplies: ripe tomatoes, a bowl of water, a fine-mesh strainer, and a warm, dry spot for drying. Most people rush the drying step, which leads to mold or poor germination.
I learned that the hard way after my first batch of seeds sprouted unevenly—now I know exactly how long to let them air-dry before storage.
By the time you’re done, you’ll have a stash of seeds that could last 5+ years if stored properly, ready to grow into plants with the same flavor and vigor as their parents. The satisfaction of watching those first seedlings emerge from seeds you saved yourself? Unmatched.
Works for any tomato variety—heirlooms, hybrids, or even those mystery tomatoes from the farmers' market. Here’s exactly how to do it without losing viability or dealing with moldy surprises.
📚 In This Guide
- What you need
- Instructions
- Tips and common mistakes
- Wrapping up and next steps
What you need
- ● Ripe tomatoes: Choose 3–5 healthy, fully ripe tomatoes (the riper, the better for seed quality!). Avoid hybrid varieties if you want seeds that’ll grow true to type.
- ● Knife or spoon: A sharp knife or sturdy spoon for scooping out the gel and seeds.
- ● Small bowl or jar: A clean, shallow container (8 oz or larger) to ferment the seeds.
- ● Water: Enough to cover the seeds and gel mixture (about 1–2 cups). Use filtered or distilled water if possible.
- ● Fine-mesh strainer or cheesecloth: A strainer with holes smaller than 0.5mm or cheesecloth to rinse seeds.
- ● Paper towels or coffee filters: 2–3 sheets to dry the seeds.
- ● Small envelope or seed packet: A labeled, airtight container (e.g., a seed-saving envelope or ziplock bag with a silica packet).
- ● Permanent marker or labels: To write the variety name, harvest date, and year.
- ○ Optional but helpful: 🔍 Magnifying glass: For inspecting seed quality before storage.
- ○ 🌡️ Hydrometer (optional): To check seed viability by testing density (seeds should sink!).
- ● 📅 Seed storage chart: To track germination rates over time.
Step-by-step instructions for saving tomato seeds properly
Here's the method I trust year after year to collect healthy, viable seeds from your best tomatoes.
🍅 Step 1: Select and Harvest Ripe Tomatoes
Pick tomatoes that are fully ripe—deep red or their mature color—and slightly soft to the touch. Avoid any that show signs of disease or damage, as those seeds may not germinate well. I always choose the best-performing varieties from my garden, like the ones with the biggest fruit or best flavor.
Cut the tomato open and scoop out the seeds along with the gel-like pulp into a small bowl. Don't rinse them yet—the gel contains enzymes that help break down the seed coat naturally. This step is crucial for ensuring strong germination later.
💧 Step 2: Ferment the Seeds for 2-4 Days
Leave the seed-and-gel mixture uncovered at room temperature (65-75°F) for 2-4 days. You'll see bubbles form and mold may appear on the surface—this is normal and part of the natural fermentation process. The gel will turn cloudy and smell slightly sour, but don't worry, it's working.
Stir the mixture gently once a day to keep the seeds suspended and prevent mold from taking over. After 2-3 days, the good seeds will sink to the bottom while the bad ones float. This is your signal to rinse and prepare them for drying.
⏰ Step 3: Rinse and Dry the Seeds Thoroughly
Pour the mixture through a fine-mesh strainer and rinse the seeds under cool water until the gel washes away completely. The seeds should feel clean and slippery when you rub them between your fingers. Spread them in a single layer on a clean, dry paper towel or seed-saving screen.
Place the seeds in a warm, dry spot with good airflow—70-75°F is ideal. I use a mesh screen over a cardboard box to allow air to circulate on both sides. The seeds are ready when they're completely dry and brittle to the touch, which usually takes 5-7 days. Don't rush this step; damp seeds will mold in storage.
🪴 Step 4: Store Seeds in Airtight Containers
Once fully dry, transfer the seeds into small, airtight containers like envelope-style seed packets or labeled glass jars. I like to add a tiny bit of silica gel packet (the kind that comes with electronics) to absorb any lingering moisture. Label each container with the tomato variety and the year saved.
Store the containers in a cool, dark place—35-40°F is perfect for long-term viability. A refrigerator's crisper drawer works well, or you can use a sealed container in a basement. Properly stored seeds stay viable for 4-5 years, though germination rates drop after 2 years.
🌱 Step 5: Test Germination Before Planting Next Year
Before using your saved seeds, do a quick germination test. Place 10 seeds between damp paper towels in a sealed plastic bag and keep them at 70-75°F for 5-7 days. Count how many sprout—if 80% or more germinate, your seeds are good to go. If fewer sprout, store the remaining seeds for another year or try a different variety.
This test gives you confidence that your seeds will perform well when you're ready to plant. I always do this in early spring so I can start my tomatoes indoors at the right time for my climate zone.
Tips & tricks for perfect tomato seed preservation
These little tricks will help you avoid common pitfalls and maximize your seed-saving success.
Selection Tip: Choose tomatoes that are fully ripe but not overripe for the best seed quality. I look for tomatoes with vibrant color and a slight give when gently squeezed—this indicates peak ripeness. Overripe tomatoes may have seeds that won't germinate well, while underripe ones won't have fully developed seeds.
Fermentation Insight: The 2-4 day fermentation period is crucial for removing the gel coating that inhibits germination. Don't rush this step! The bubbles and slight mold you see are natural—this is how the good seeds separate from the bad ones. If your kitchen is cooler (below 65°F), extend fermentation to 5 days to ensure proper separation.
Drying Strategy: Spread seeds in a single layer for maximum airflow during drying. I use a mesh screen over a cardboard box because it allows air circulation on both sides. Check daily after the 3rd day—they're ready when they're completely dry and brittle. If you notice any seeds starting to mold during drying, spread them out again immediately.
Storage Wisdom: The cool, dark environment for storage (35-40°F) is non-negotiable for long-term viability. I store my seed packets in the crisper drawer of my refrigerator because it maintains consistent humidity levels. Label each container with the tomato variety and year—trust me, you'll forget otherwise after a few years!
Pro Tips for Keeping Tomato Seeds For Next Year
- These little tricks will help you avoid common pitfalls and maximize your seed-saving success.
- Selection Tip: Choose tomatoes that are fully ripe but not overripe for the best seed quality. I look for tomatoes wi...
- Fermentation Insight: The 2-4 day fermentation period is crucial for removing the gel coating that inhibits germinati...
Frequently asked questions
Got questions about saving tomato seeds? You’re not alone! Here are answers to the most common queries to help you succeed.
How do I know if my tomato seeds are viable after drying?
Test viability by placing a few seeds in a damp paper towel, sealing them in a plastic bag, and storing them in a warm spot. After 5–7 days, check for sprouts—if 50% or more germinate, your seeds are good to go! Discard old or moldy seeds.
Can I save seeds from hybrid tomatoes?
Hybrid tomatoes (like ‘Early Girl’ or ‘Better Boy’) often produce inferior or sterile seeds because they’re bred for specific traits. For reliable results, save seeds from heirloom varieties (e.g., ‘Brandywine’ or ‘Cherokee Purple’). If you must try hybrids, expect mixed results!
How long can I store tomato seeds before planting?
Properly dried and stored seeds (in a cool, dark, airtight container) stay viable for 2–5 years. For best germination, plant within 1–2 years. Label containers with the variety and date to track freshness.
What if my seeds smell bad or have mold?
Foul odors or mold mean fermentation went too far or moisture lingered. Don’t panic! Discard affected seeds and repeat the drying process with fresh pulp. Use a fan to speed up drying next time, and store seeds in a desiccant packet to prevent humidity.
Can I save seeds from store-bought tomatoes?
Yes, but only if they’re heirloom or open-pollinated (check labels!). Most grocery-store tomatoes are hybrids. If unsure, ask the seller or grower. If you’re experimenting, try it—worst case, you’ll learn for next time!
Pro Tip:
Store seeds in small, labeled envelopes (or glass jars with silica gel) in a freezer for long-term preservation (up to 10+ years!). Just thaw them overnight before planting.
Wrapping up and next steps
Saving tomato seeds is a rewarding way to grow heirloom varieties year after year—and you’ve got all the tools to succeed! 🌱 With just a little patience and the right techniques, you’ll have fresh, homegrown tomatoes ready for next season.
Now that you’re equipped with drying, storing, and testing methods, why not take the next step? Try saving seeds from your favorite tomato this year and share the joy of gardening with friends or fellow plant enthusiasts. Happy growing! 🌿