
Vegetables
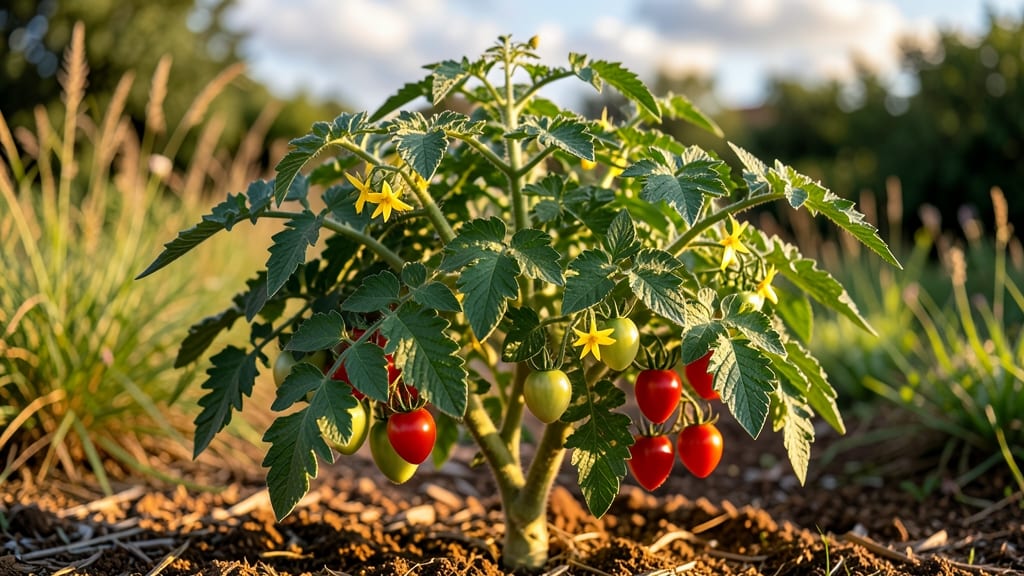
The tomato growth process starts with a seed and ends with your first homegrown, vine-ripe fruit—80 days of transformation if you time it right. 🌱 I’ve watched seedlings push through soil, vines stretch toward the sky, and blossoms turn into plump tomatoes, and I’m sharing exactly how to guide them every step of the way.
Germination kicks off the magic, but it’s just the beginning. Seedlings need warmth, light, and patience before they’re strong enough to handle outdoor conditions. The real payoff comes when those first flowers appear—each one a promise of future harvests—if you’ve given them the right support from the start.
By midseason, you’ll be pinching suckers, pruning leaves, and watching fruit swell on the vine. The texture changes from firm to soft, the color deepens from green to red, and suddenly, you’re holding something you grew yourself.
This isn’t just gardening; it’s a season-long journey with a delicious reward at the end. Whether you’re growing in containers or a full garden bed, the principles stay the same. Let’s break it down so you can skip the guesswork and enjoy the harvest.
📚 In This Guide
- What you need
- Instructions
- Tips and common mistakes
- Wrapping up and next steps
What you need
- ● Tomato seeds – Choose heirloom or hybrid varieties (e.g., Cherry Tomatoes, Beefsteak, or Roma). Start with 3–5 seeds per pot for better germination rates.
- ● Seed-starting mix – A lightweight, sterile potting mix (avoid garden soil). 1–2 cubic feet per batch of seeds.
- ● Containers or seed trays – 3–4 inch deep pots or cell trays with drainage holes. 1–2 seeds per cell.
- ● Grow lights or sunny windowsill – 12–16 hours of light/day for seedlings. LED grow lights work great!
- ● Watering can or spray bottle – Keep soil moist but not soggy.
- ● Fertilizer (seedling stage) – A balanced, water-soluble fertilizer (5-5-5 or 10-10-10) diluted to half-strength.
- ● Transplant pots or garden bed – 5-gallon containers or well-draining garden soil (add compost!).
- ● Stakes or cages – 6–8 foot tall stakes or 5–6 foot tomato cages (1 per plant).
- ● Mulch – Straw or shredded leaves (2–3 inches thick) to retain moisture.
- ● Pruning shears – For trimming suckers and dead leaves.
- ● pH test kit – Ideal soil pH: 6.0–6.8.
- ○ Drip irrigation system – Automates watering (optional but handy!).
- ● Compost or worm castings – Boosts soil nutrients (1–2 cups per plant).
- ● Row covers or shade cloth – Protects from pests or extreme heat.
- ● Garden journal – Track growth stages, watering, and fertilizing schedules!
Step-by-step guide to growing tomatoes from seed to harvest
Here's how I turn tiny seeds into sun-ripened tomatoes in just 80 days—no shortcuts, just reliable growth.
🌱 Step 1: Start Seeds Indoors 6-8 Weeks Before Last Frost
Fill seed trays with sterile seed-starting mix and plant seeds ¼ inch deep, two per cell. I use a toothpick to make small holes—this prevents burying them too deep, which slows germination. Cover lightly with mix, then mist until evenly damp. Place trays on a seedling heat mat set to 75-85°F.
Germination takes 5-10 days, but don't water again until the top inch of soil feels dry. The moment you see sprouts, remove any humidity dome immediately—trapped moisture causes damping-off, which kills seedlings overnight. You'll know it's time when the first true leaves (not the initial seed leaves) appear.
☀️ Step 2: Provide Light and Fertilize for Strong Seedlings
Move seedlings under grow lights for 14-16 hours daily once they sprout. I position the light 2-3 inches above the plants and raise it weekly to prevent leggy growth. Without enough light, stems stretch thin and weak—you'll see them bending toward the light like they're reaching for a hand.
When seedlings have 2-3 sets of true leaves, fertilize with a half-strength liquid fertilizer. Over-fertilizing now burns tender roots. Watch for dark green leaves and sturdy stems—these are your signs of healthy growth. Harden off seedlings by placing them outside for 1 hour daily starting 10 days before transplanting.
🪴 Step 3: Transplant After All Frost Risk Has Passed
Choose a sunny spot with 6-8 hours of direct sun and soil that warms to 60°F. Dig holes twice as wide as the root ball but no deeper. I loosen the roots slightly before planting—this encourages them to spread into the new soil. Space plants 18-24 inches apart for indeterminate varieties or 24-36 inches apart for determinate ones.
Water deeply after transplanting to settle the soil. Mulch with 2-3 inches of straw to retain moisture and prevent soil-borne diseases. You'll see new growth within 7-10 days—this is your confirmation that the plants have rooted successfully. Avoid fertilizing for 1-2 weeks to let roots establish.
💧 Step 4: Water Deeply and Support Vines as They Grow
Water at the base of the plant 1-2 inches deep every 2-3 days during dry spells. Wet leaves invite disease, so I water early in the morning when foliage dries quickly. You'll know moisture is right when the soil feels damp 6 inches down—stick your finger in to check.
Install cages or stakes when plants reach 12 inches tall. I weave vines through cages weekly to keep them contained—this prevents breakage from wind or fruit weight. Prune suckers (the shoots that grow between the stem and branches) to direct energy into fruit production. You'll see flowers in 4-6 weeks after transplanting, signaling the next growth phase.
✂️ Step 5: Harvest When Tomatoes Turn Color and Feel Firm
Pick tomatoes when they're fully colored and slightly soft to the touch. I twist gently until the stem snaps—this prevents tearing the vine. Harvest in the morning when sugars are highest. You'll get 4-6 weeks of production from each vine, depending on the variety and care.
Don't let tomatoes overripe on the vine—this attracts pests and reduces flavor. Store harvested tomatoes at 55-65°F and use within 1 week for peak taste. The first flush of fruit is always the sweetest, so enjoy them while they're fresh!
Tips & tricks for perfect tomato growth
Here's what nobody tells you about growing tomatoes that'll make all the difference between a decent harvest and a bountiful one.
Seedling Heat Mat Matters: That 75-85°F range on your heat mat isn't just arbitrary—it's the sweet spot for germination. If your mat runs cooler, consider adding a second one or using a small space heater nearby. I've seen germination times stretch to 14 days when temps dip below 70°F. The moment you see sprouts, remove any humidity dome immediately—trapped moisture causes damping-off, which kills seedlings overnight. This is where most beginners lose their first batch.
Lighting Strategy for Strong Seedlings: Position your grow lights 2-3 inches above seedlings and raise them weekly to prevent leggy growth. Without enough light, stems stretch thin and weak—you'll see them bending toward the light like they're reaching for a hand. I've had to start over three times before I learned to adjust the light height. If you're using natural light, rotate your trays daily to ensure even growth. The 14-16 hours of light requirement is non-negotiable for sturdy seedlings.
Transplanting Timing and Technique: The 6-8 hours of direct sun requirement is crucial, but soil temperature matters just as much. Use a soil thermometer to confirm your garden bed has reached 60°F before transplanting. When digging holes, make them twice as wide as the root ball but no deeper—this encourages roots to spread outward rather than growing in a tight circle. I've seen plants struggle for weeks when transplanted too deep, with roots circling instead of spreading.
Watering Wisdom: Watering at the base of the plant 1-2 inches deep every 2-3 days during dry spells prevents many common problems. Wet leaves invite disease, so I water early in the morning when foliage dries quickly. The 6-inch deep moisture check is your best friend—stick your finger in to confirm proper watering. Overwatering is just as damaging as underwatering, so let the top inch of soil dry between waterings once plants are established.
Pro Tips for Tomato Growth Process
- Here's what nobody tells you about growing tomatoes that'll make all the difference between a decent harvest and a bountiful one.
- Seedling Heat Mat Matters: That 75-85°F range on your heat mat isn't just arbitrary—it's the sweet spot for germination.
- Lighting Strategy for Strong Seedlings: Position your grow lights 2-3 inches above seedlings and raise them weekly to prevent leggy growth.
Frequently asked questions
Got questions about growing tomatoes from seed to harvest?
Here are some of the most common ones—plus quick, actionable answers to help you cultivate a thriving tomato patch!
How long does it take for tomato seeds to germinate?
Tomato seeds typically sprout in 5–14 days after planting, depending on temperature and moisture. Keep soil warm (70–85°F) and consistently damp (not soggy) to speed up germination. A heat mat can cut wait time by days! If no sprouts appear after 2 weeks, try replanting fresh seeds.
Can I plant tomato seeds directly in the ground, or should I start indoors?
For most climates, start seeds indoors 6–8 weeks before the last frost to give seedlings a head start. Transplant them outdoors after the soil warms to 50°F+ and nighttime temps stay above 55°F. Direct sowing works in warm regions (like Zone 9+) but risks slower growth and pest damage.
What are the most common tomato plant problems, and how do I fix them?
Here’s a quick troubleshooting guide:
- Yellow leaves: Often overwatering or nutrient deficiency (add compost or balanced fertilizer).
- Blossom end rot: Caused by calcium deficiency or uneven watering. Use crushed eggshells or calcium spray.
- Pests (aphids, hornworms): Spray with neem oil or handpick pests early.
- Wilting: Check for underwatering (soil should be 1–2" deep) or disease (remove affected leaves).
Rotate crops yearly to prevent soil-borne diseases!
Why aren’t my tomato plants flowering or fruiting?
Common culprits include:
- Not enough sunlight: Tomatoes need 6–8+ hours of direct sun daily. Move plants to a sunnier spot.
- Temperature stress: Flowers drop if temps dip below 55°F or rise above 95°F. Use shade cloth in extreme heat.
- Over-fertilizing with nitrogen: Too much green growth = fewer flowers. Switch to a phosphorus-rich fertilizer (like 5-10-10) to boost blooms.
Give plants a light prune to improve airflow and fruit production!
How do I know when tomatoes are truly ripe for picking?
Ripeness depends on the variety:
- Heirloom tomatoes: Fully colored, slightly soft to touch, and fragrant at the stem.
- Cherry/roma tomatoes: Deep, even color (red, yellow, etc.) and firm but yielding slightly.
Pick in the morning when sugars are highest. Never harvest green tomatoes unless you’re making sauce—wait for full ripeness for the best flavor!
Wrapping up and next steps
Watching a tomato grow from a tiny seed to a juicy, vine-ripe fruit is a rewarding journey filled with science, patience, and a little green thumb magic! 🌱 Whether you’re a beginner or a seasoned gardener, understanding each stage—from germination to harvest—sets you up for success.
With the right soil, sunlight, and care, you’ll be savoring homegrown tomatoes in just 80 days.
Now that you’re armed with the knowledge, it’s time to roll up your sleeves and start planting! Pick a sunny spot, grab your seeds, and let the tomato adventure begin. Happy gardening—your future salads (and bragging rights) are waiting! 🍅✨