
How To
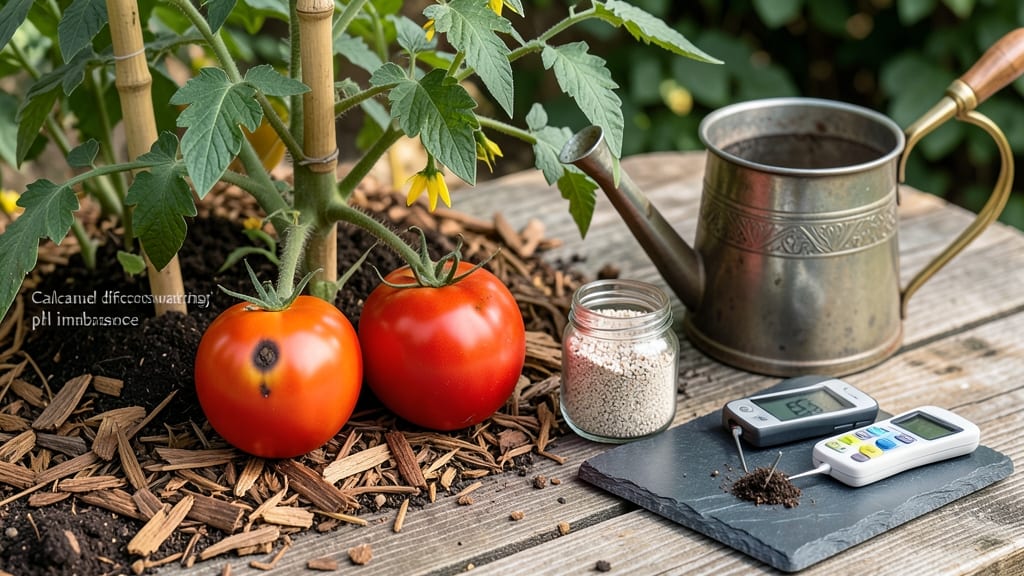
Your tomatoes are screaming for help—those ugly black spots on the bottom mean tomato end rot cure starts with calcium, not just water. 🌱 I’ve saved dozens of plants by fixing this exact problem, and the solution is simpler than you think: steady moisture, the right soil boost, and a little patience.
The rot happens when calcium can’t reach the fruit fast enough—usually because soil stays too dry or gets too wet, or the pH is off.
Most gardeners overwater or panic and yank plants, but the fix is actually about balance: keep soil moist like a wrung-out sponge, not soggy or bone-dry. Within 2-3 weeks, new growth will show no signs of rot, and existing fruit might even recover if you act fast.
I’ve seen tomatoes bounce back completely after adding crushed eggshells or a light calcium spray—no fancy tools needed. Works for backyard gardens, containers, and even greenhouse tomatoes. Let’s get those plants healthy again—before another batch of fruit turns to mush.
Root Causes of Tomato End Rot
Tomato end rot isn’t just a random tragedy for your garden—it’s a clear cry for help from your plants.
When the blossom end (the opposite end of the stem) of your tomatoes turns brown, leathery, and sunken, it’s usually a sign that your plants are starving for calcium, but the real culprits run deeper than just a missing nutrient.
Let’s break down the science behind why this happens, so you can fix it for good.
🌱 Why it happens: Calcium is the structural backbone of plant cell walls, especially in fast-growing fruits like tomatoes. When your plants can’t absorb enough calcium—either because it’s not available in the soil or because the plant can’t take it up efficiently—your tomatoes develop end rot.
This isn’t just a surface issue; it’s a failure in the plant’s ability to deliver calcium to the blossom end of the fruit, where it’s needed most during rapid growth.
- Soil pH imbalance: Calcium becomes less available when soil pH is too high (alkaline) or too low (acidic). The ideal range for tomatoes is 6.0–6.8.
Outside this, calcium binds tightly to soil particles or dissolves, making it inaccessible. - Water stress: Uneven watering causes calcium to move erratically in the plant.
When roots can’t keep up with the fruit’s demand (like during a dry spell followed by a heavy watering), calcium gets "trapped" in the roots and never reaches the blossom end. - Over-fertilization with nitrogen: Too much nitrogen (common in synthetic fertilizers) fuels rapid leafy growth but starves roots of energy to transport calcium.
It’s like feeding a car gas but no oil—everything runs hot and breaks down.
💡 Pro Tip: Test your soil’s pH and calcium levels with a simple kit. If pH is off, amend with sulfur (to lower pH) or lime (to raise it), and add gypsum (calcium sulfate) for a quick calcium boost.
🔍 Why it happens: Even if calcium is in the soil, your tomato plants might not be able to access it due to root stress. The root zone is the plant’s lifeline, and when it’s compromised, calcium uptake plummets.
- Compacted or waterlogged soil: Roots need oxygen to function. In dense or soggy soil, roots suffocate and can’t absorb nutrients efficiently. This is especially common in clay-heavy soils or after heavy rains. - Inconsistent moisture: Tomato roots thrive in consistent moisture—not too dry, not too wet.
Fluctuations cause roots to "shut down" temporarily, halting calcium transport to the fruit. - Limited root growth: Young seedlings or plants in containers with restricted root space struggle to explore enough soil for calcium. Even mature plants in small pots can suffer.
🌡️ Actionable Fix: Improve drainage by mixing compost or perlite into heavy soil, and water deeply 1–2 times per week (adjust for climate). For container gardens, use 5-gallon pots minimum and a well-draining potting mix.
🌡️ Why it happens: Tomatoes are sensitive to their environment, and extreme conditions can disrupt calcium uptake faster than a nutrient deficiency alone.
- Temperature swings: Heat stress (above 90°F/32°C) or sudden cold snaps slow down root activity and nutrient absorption.
Calcium moves through the plant via a process called translocation, which stalls when the plant is stressed. - Salt buildup: Over-fertilization or poor-quality water (high in sodium or chlorine) can create a salt crust around roots, blocking calcium absorption.
This is common in greenhouses or areas with hard water. - Transplant shock: Moving tomato plants—especially from nursery pots to the ground—can damage roots temporarily, halting calcium flow until they recover.
✨ Prevention Tip: Mulch around plants to regulate soil temperature, and avoid fertilizing during heatwaves. If using well water, test for salt content and flush soil occasionally with rainwater.
🍅 Why it happens: Tomatoes grow fast, and when they’re producing more fruit than the plant can support, calcium gets diverted to newer growth instead of existing fruit. This is why end rot often appears in older tomatoes while younger ones stay firm.
- Overloading the plant: Too many flowers or fruits competing for resources force the plant to prioritize survival over fruit quality.
A single tomato plant can support 3–5 large fruits—any more, and calcium gets stretched thin. - Rapid growth spurts: After a dry spell or sudden warm weather, tomatoes can swell unnaturally fast. The blossom end, being the oldest part of the fruit, gets "left behind" in the calcium race.
🎯 Solution: Prune excess flowers/fruit when tomatoes are 1–2 inches wide, leaving only the healthiest 3–5 per plant. This ensures the remaining fruit gets enough calcium.
🦠 Why it happens: Healthy soil isn’t just dirt—it’s a bustling ecosystem of microbes that help break down nutrients into forms plants can use. When this balance is off, calcium becomes locked away.
- Fungal or bacterial overgrowth: Pathogens like Pythium or Fusarium can damage roots, reducing their ability to absorb calcium. Even beneficial microbes can become aggressive in imbalanced soil. - Lack of organic matter: Soil rich in compost or worm castings teems with microbes that release calcium from organic material.
Sterile or chemically treated soil lacks this "helper network."
🔥 Fix It: Add compost tea or mycorrhizal fungi to boost beneficial microbes. Avoid chemical soil sterilants, which kill both bad and good microbes.
Tomato end rot is rarely just a calcium problem—it’s a cascade of stress signals telling you something’s off with your plant’s environment, roots, or growth conditions. The good news? Once you identify the root cause (or causes), you can reverse it with targeted fixes.
Stay tuned for the next section, where we’ll dive into how to rescue your tomatoes with calcium and smart gardening tweaks!
Fixing tomato end rot naturally
Tomato end rot—those unsightly, sunken black patches on the blossom end of your tomatoes—can be frustrating, but the good news is that you can often reverse the damage and prevent future outbreaks with simple, science-backed fixes.
Below, we’ll break down cause-specific solutions to rescue your plants and keep your harvest healthy.
🔥 Problem: Low calcium in the soil or uneven water uptake leads to cell wall breakdown.
🍳 Quick Fix: - Spray with calcium-rich solutions 2–3 times weekly (especially during hot, dry spells). - Epsom salt spray: Mix 1 tbsp Epsom salt (magnesium sulfate) + 1 tbsp calcium chloride in 1 gallon of water.
Spray foliage and soil around the base. - Eggshell tea: Crush 3–4 eggshells, boil in water for 20 minutes, strain, and water plants with the cooled liquid. (Rich in calcium carbonate!) - Milk or yogurt: Dilute 1 part milk/yogurt to 10 parts water and spray on leaves and soil. (Lactic acid helps calcium absorption!)
👨🍳 Soil Boost (Long-Term):
- Add crushed eggshells, oyster shell, or bone meal to planting holes or top-dress soil.
- Use a balanced fertilizer with calcium nitrate (e.g., 5-10-10 or 10-10-10) every 2–3 weeks during fruiting.
- Avoid high-nitrogen fertilizers (like fresh manure or blood meal) during flowering/fruiting—they worsen calcium uptake.
💡 Pro Tip: If your soil is sandy or acidic (pH < 6.0), calcium leaches out faster. Test your soil and amend with lime (calcium carbonate) if needed.
🌡️ Problem: Fluctuating soil moisture (dry spells followed by deep watering) starves roots of calcium.
⏰ Watering Fix: - Deep, consistent watering (1–2 inches per week) is non-negotiable.
Use a moisture meter or stick your finger 2 inches deep—if dry, water thoroughly. - Drip irrigation or soaker hoses deliver water slowly and evenly (better than overhead sprinklers). - Mulch heavily (straw, grass clippings, or wood chips) to retain moisture and prevent temperature swings.
🎯 Emergency Rescue for Affected Tomatoes:
- Prune off severely rotted fruit (it won’t recover, but saving the plant matters).
- Water deeply for 10 minutes, then reduce frequency to avoid shocking the roots.
🔪 Problem: Compacted soil, root damage, or fungal issues block calcium absorption.
🌱 Root Care Solutions: - Loosen soil gently around plants (6 inches deep) to improve oxygen flow—never disturb roots during flowering/fruiting. - Compost tea or mycorrhizal fungi (available at garden centers) boost root health and calcium uptake. - Avoid over-fertilizing—too much salt (from fertilizers) burns roots.
Flush soil with rainwater if using high-salt amendments.
💡 Pro Tip: If your tomatoes are in containers, ensure pots have drainage holes and use a well-draining potting mix (add perlite or vermiculite).
🌡️ Problem: Extreme heat, cold snaps, or drought disrupt calcium movement in the plant.
🌿 Climate Control Tips:
- Shade cloth (30–50%) during peak sun (10 AM–4 PM) in scorching climates.
- Evening watering (before 8 PM) reduces evaporation and stress.
- Row covers protect young plants from late frosts, which slow calcium uptake.
✨ Future-Proof Your Tomatoes:
- Start with calcium-rich soil: Mix 1 cup crushed eggshells or oyster shell per plant at planting.
- Use calcium supplements early: Begin foliar sprays or soil drenches when flowers appear (calcium moves to fruit last!).
- Monitor pH: Aim for 6.0–6.8—calcium is less available in acidic soil.
- Choose resistant varieties: Some heirlooms (like ‘Brandywine’) are more prone; opt for ‘Mountain Merit’ or ‘Celebrity’ for better resilience.
🍅 For Minor Rot:
- Cut off the blackened end and use the rest in sauces, salsas, or roasted dishes (the flesh is still safe!).
- Cooking reduces acidity, making tomatoes more palatable for eating.
🚫 For Severe Rot:
- Discard heavily infected fruit to prevent spore spread (though end rot isn’t fungal, mold can set in).
- Focus on saving the plant—healthy leaves = more future tomatoes!
Remember: End rot is often reversible if caught early. With calcium boosts, steady water, and root care, your tomatoes can bounce back—and your next harvest will be rot-free and bountiful! 🍅✨
Frequently asked questions
Can I still eat tomatoes with end rot?
Yes! Cut off the blackened, sunken area and use the rest. The flesh is perfectly safe to eat—just remove at least ½ inch around the rot to avoid any bitter or spoiled taste. Great for sauces, salsas, or roasting.
How quickly will my tomatoes recover after fixing end rot?
With proper calcium treatment and consistent watering, you’ll see improvement in 2-3 weeks. New fruit should form without rot, but existing affected tomatoes likely won’t recover. Focus on saving the plant for future harvests!
Is crushed eggshells really effective for calcium?
Eggshells are 25% calcium carbonate—just crush them finely and mix into soil or brew as tea. For faster results, combine with gypsum (calcium sulfate) which dissolves quickly. Start seeing benefits within 1-2 weeks of application.
Why does my tomato plant keep getting end rot even after adding calcium?
This usually means root stress is blocking calcium uptake. Check for:
- Inconsistent watering (soil should stay evenly moist)
- Compacted soil (loosen gently with a fork)
- High nitrogen fertilizer (switch to balanced 10-10-10 during fruiting) Root health is just as important as calcium!
Can I prevent end rot in container-grown tomatoes?
Yes! Use 5-gallon minimum pots with drainage holes, and:
- Water daily in hot weather (containers dry faster)
- Mix 1 cup crushed eggshells into potting soil at planting
- Use drip irrigation for consistent moisture
- Avoid letting soil dry completely between waterings.