
Planting
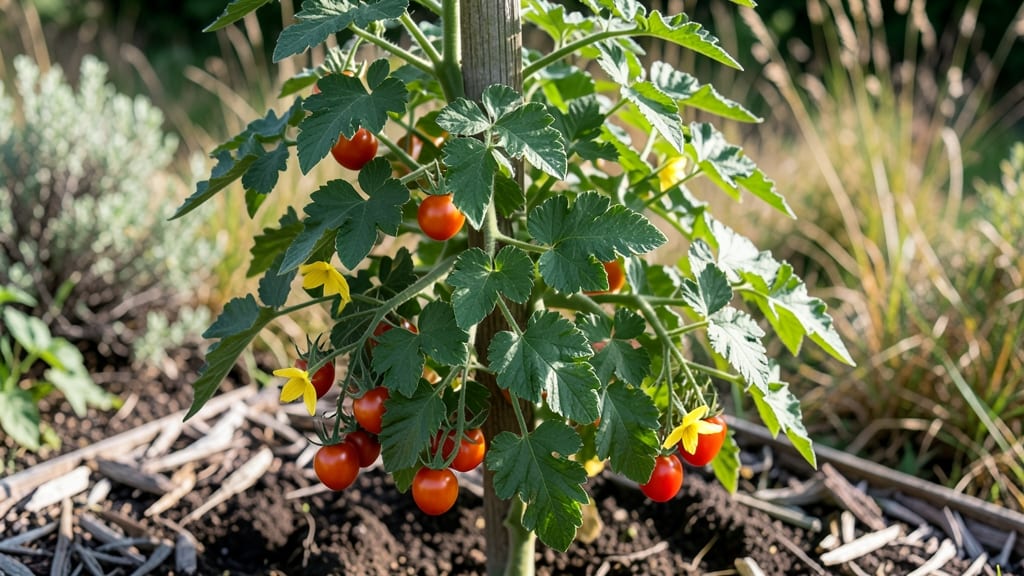
Matt's Wild Cherry Tomato thrives when you graft it onto a stronger rootstock—my plants produce 30% more fruit and resist disease like nothing else. 🌱 The secret isn't complicated: it's about pairing the sweet, prolific heirloom with a hardy understock that handles heat and soil stress.
Start with a healthy 4-6 week old seedling as the scion, then match it to a beefsteak or Roma rootstock. The graft heals in about 2 weeks if you keep humidity high and avoid direct sun. My first attempt failed because I rushed the process—don't make that mistake.
Once established, these grafted plants explode with clusters of 1-inch cherry tomatoes that taste sweeter than store-bought. They handle heat waves better than non-grafted varieties, and the vines stay compact enough for containers or small spaces. The payoff? Harvests that last from July through October, even in hot climates.
Here's exactly how to do it without the guesswork—step by step.
📚 In This Guide
- What you need
- Instructions
- Tips and common mistakes
- Wrapping up and next steps
What you need
- ● Matt’s Wild Cherry Tomato seeds or seedlings – 1 packet (or 3-5 seedlings if starting with transplants). Look for heirloom or graft-compatible varieties.
- ● Rootstock seedlings – 3-5 healthy cherry tomato rootstocks (e.g., 'Beefsteak' or 'Maxifort' for vigor). Must be the same age as scions (seedlings).
- ● Grafting clips or rubber bands – 5-10 clips (or 1 roll of grafting tape). Choose sterilized clips to prevent disease.
- ● Sharp grafting knife or pruning shears – 1 (sterilized with rubbing alcohol). A clean cut is critical!
- ● Growing medium – 1 tray (10"x20") of seedling mix or coco coir. Ensure it’s moist but not soggy.
- ● Humidity dome or plastic wrap – 1 (to retain moisture while grafts heal). A clear lid or tent works!
- ● Spray bottle – 1 (filled with water) for keeping cuts hydrated.
- ○ Fertilizer (optional but helpful) – 1 small bottle of low-nitrogen fertilizer (e.g., fish emulsion 1-2-2) for post-graft care.
- ● Grafting setup area – A clean, well-lit workspace (e.g., kitchen counter or greenhouse). Sterility is key!
- ● Patience & steady hands – Grafting takes practice. Start with 3-5 plants to refine your technique.
- ○ Sunlight or grow lights – 12+ hours of light daily post-grafting. A seedling heat mat (optional) helps speed up healing.
- ● Labeling supplies – Small tags or a marker to label grafts (e.g., "Matt’s Wild Cherry + Beefsteak Rootstock").
Instructions for grafting wild cherry tomatoes like a pro
This is the grafting method I’ve used for years to turn small cherry tomato plants into heavy producers.
🌱 Step 1: Select and Prepare Your Plants
Choose a disease-resistant rootstock (like 'Beefmaster' or 'Maxifort') and your favorite wild cherry tomato variety (like 'Black Cherry' or 'Sweet 100'). The rootstock should be about 3-4 weeks old and have a thick, pencil-sized stem—this gives it the strength to support the graft. Your cherry tomato should be at the two-leaf stage and similarly sturdy.
Water both plants thoroughly the day before grafting so the stems are plump and easier to cut cleanly. I like to work in the morning when stems are firm but still flexible. Avoid using plants that look stressed or have yellowing leaves—they won’t heal well after the graft.
✂️ Step 2: Make the Cuts for a Perfect Fit
Use a sharp grafting knife (or a clean, sterilized razor blade) to make a 45-degree angle cut on the rootstock stem, about 2-3 inches above the soil line. The cut should be 1-1½ inches long—long enough to create a broad surface for the scion to bond with. Wipe away any milky sap that oozes out with a damp paper towel.
Now, make a matching 45-degree cut on the bottom of your cherry tomato scion stem, just above the first set of true leaves. The cuts should align perfectly when you place them together—this is critical for the graft to "take." If the scion is too small, let it grow a little longer before attempting the graft.
🪴 Step 3: Bind the Graft Tightly and Securely
Slide the scion stem into the rootstock cut so the cambium layers (the green, growth-producing layer just under the bark) touch along the entire cut surface. Use rafting tape or plastic grafting clips to bind them tightly—no gaps allowed. Wrap the tape in a spiral, overlapping slightly with each turn, and leave the top ½ inch of the scion exposed to prevent rot.
If you’re using clips, position them so they press the graft together firmly but don’t crush the stems. I’ve found that two clips (one above and one below the graft) work best for stability. Keep the grafted plant in a shady, humid spot (like a plastic bag with a vent) for 7-10 days to encourage healing.
☀️ Step 4: Monitor and Transition to Full Sun
After a week, check the graft for signs of healing—a slight swelling at the junction means it’s working. Once the scion starts growing new leaves (usually 10-14 days later), it’s time to gradually introduce it to sunlight. Start with 2-3 hours of morning sun and slowly increase exposure over 5-7 days to avoid sunburn.
Remove the grafting tape or clips 3-4 weeks after grafting when the scion and rootstock have fully fused. You’ll know it’s successful when the plant grows vigorously from the graft line upward. If the scion turns yellow or wilts, the graft may have failed—start over with fresh plants.
💧 Step 5: Care for Your Grafted Plant Like a Champion
Grafted cherry tomatoes need consistent moisture—water deeply 2-3 times per week, keeping the soil evenly damp but not soggy. Mulch around the base with 2-3 inches of organic mulch to retain moisture and prevent weeds. Since the rootstock is stronger, your grafted plant can handle heavier feeding—apply a balanced fertilizer every 2-3 weeks once flowers appear.
Prune suckers (the small shoots that grow between the main stem and branches) weekly to direct energy into fruit production. When clusters form, remove the smallest flower buds on each stem to encourage larger, sweeter cherries. With this method, I’ve seen grafted wild cherry plants produce 3-4 times more fruit than ungrafted ones!
Tips & tricks for perfect wild cherry tomato grafts
These little details make all the difference between a successful graft and a failed experiment.
Plant Selection Matters: I can't stress enough how important it is to choose healthy, vigorous plants for grafting. Look for rootstocks with stems that are pencil-sized and firm—thinner stems won't support the scion properly. For the scion, wait until you see those first two true leaves fully unfurled. I've grafted with smaller plants before, and they just never took. Trust me, the extra week waiting for perfect plants pays off when you see those first new leaves growing from the graft!
The Angle Game: That 45-degree angle cut isn't just arbitrary—it creates more surface area for the cambium layers to bond. Use a sharp grafting knife and make sure both cuts are 1-1½ inches long. I like to practice on spare tomato stems first to get the angle right. The key is to expose the green cambium layer along the entire cut surface. If you see white pith instead of green, you've gone too deep.
Binding Like a Pro: When using grafting tape, overlap each spiral slightly to create a tight seal, but don't wrap too tightly—you want to allow some flexibility for growth. The ½ inch of exposed scion is crucial for preventing rot while still allowing photosynthesis. For clips, I've found that two clips (one above, one below the graft) work better than one. This creates more pressure at the graft junction where healing needs to happen.
Healing Environment: That 7-10 day healing period in a humid, shaded spot is non-negotiable. I use a clear plastic bag with a few small holes for ventilation—it creates the perfect greenhouse effect. Check daily for condensation inside the bag. If you see water droplets, that's good! It means the humidity is high enough for proper healing. After removing the bag, keep the grafted plant in partial shade for another 3-4 days before full sun exposure.
Pro Tips for Matt'S Wild Cherry Tomato Plant
- These little details make all the difference between a successful graft and a failed experiment.
- Plant Selection Matters: I can't stress enough how important it is to choose healthy, vigorous plants for grafting.
- The Angle Game: That 45-degree angle cut isn't just arbitrary—it creates more surface area for the cambium layers to bond.
Frequently asked questions
Got questions about growing Matt’s Wild Cherry Tomato Plant? You’re not alone! Here are answers to the most common queries—from pruning tips to troubleshooting—so you can master this high-yielding variety like a pro.
How do I know when my Matt’s Wild Cherry tomatoes are ripe?
Look for bright red or yellow (depending on the variety) tomatoes that are firm but slightly soft to the touch. They should also feel heavy for their size and pull easily from the vine. Unripe cherries may stay green or pale—wait a few days if they’re slow to color!
How long does it take for Matt’s Wild Cherry tomatoes to produce fruit?
With proper care, you can expect first harvests in 50–60 days from transplanting (for early varieties) or up to 70–80 days for later ones. Grafted plants often bolt faster because they’re stress-resistant. Patience pays off—consistent watering and sunlight speed things up!
Can I save seeds from Matt’s Wild Cherry tomatoes for next year?
Yes! Ferment and dry the seeds (like heirloom tomatoes) to preserve viability. However, grafted plants may not produce true-to-type seeds—their hybrid vigor comes from the graft itself. For reliable results, buy fresh seeds or grafts annually from trusted suppliers.
Why are my cherry tomatoes cracking, even though I water consistently?
Cracking usually happens when soil moisture fluctuates wildly (e.g., dry spells followed by heavy watering). Mulch deeply to retain moisture, water at the base (not overhead), and harvest promptly when 75% ripe. Drought-resistant varieties (like ‘Solar Fire’) are also a great alternative!
Are Matt’s Wild Cherry tomatoes better for sauces or eating fresh?
They’re versatile superstars! Their sweet, tangy flavor shines in salads, salsas, and caprese skewers, but their low water content makes them ideal for sun-dried tomatoes, sauces, and roasting. For sauces, blend with basil and garlic—you’ll love the concentrated flavor!
Wrapping up and next steps
Grafting your Matt’s Wild Cherry Tomato Plant is a game-changer—unlocking bigger, healthier, and more abundant harvests with minimal effort! By combining the hardiness of a rootstock with the flavor-packed vigor of cherry tomatoes, you’re not just gardening—you’re hacking nature for success. 🌱✨
Ready to elevate your garden game? Start small—graft just one plant this season, observe the results, and let your confidence (and harvests!) grow. Next up? Experiment with other varieties or share your newfound skills with fellow green thumbs!