
Planting
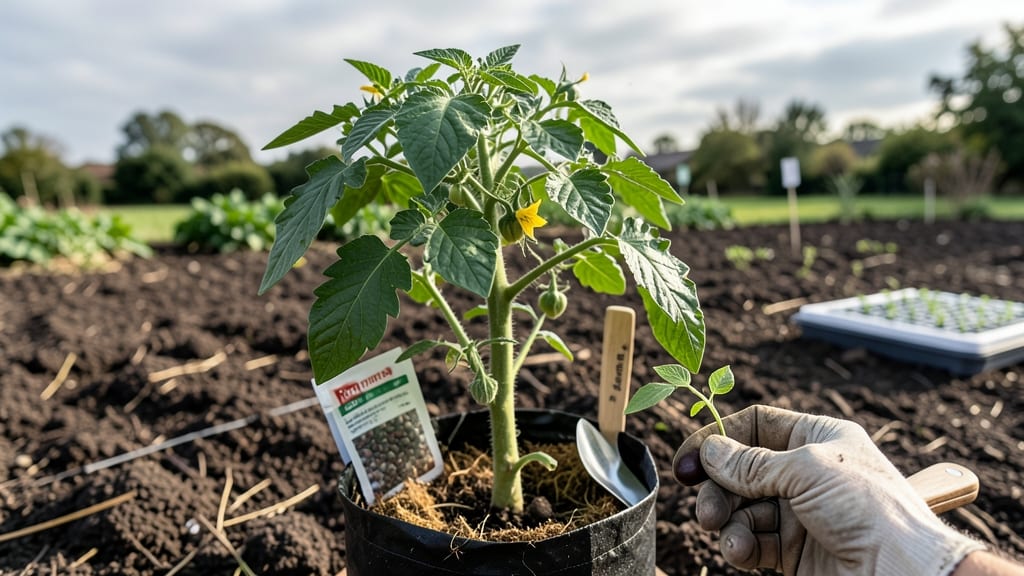
Planting Roma tomato seeds starts with timing—six to eight weeks before your last frost date is the sweet spot for stocky, early-producing plants that outperform store-bought seedlings. 🌱 I learned the hard way that rushing this step leads to leggy, weak plants that struggle to support their own fruit weight.
The secret? A cozy, well-draining mix that mimics their Mediterranean roots, paired with just enough warmth to trigger those first stubborn sprouts.
You'll need a seed-starting tray with drainage holes, sterilized potting mix (no garden soil!), and a heat mat or sunny windowsill—Roma tomatoes love warmth, and they'll germinate faster (in 5-10 days) when soil stays between 70-85°F. The biggest mistake?
Planting too deep or burying the seeds under cold soil. Stick them ¼ inch deep, press gently, and keep the mix moist but never soggy. A spray bottle works better than a watering can to avoid disturbing the seeds.
What you're aiming for is bushy, compact plants with thick stems—these are the ones that load up with meaty, flavor-packed Roma tomatoes instead of flopping under their own weight.
Within 3-4 weeks, you'll see the first true leaves appear, and that's when you can introduce a balanced fertilizer (half-strength) to encourage strong root and stem development. The payoff? Plants that handle transplanting like pros and start fruiting earlier than anything from the nursery.
This method works for any climate, though timing shifts slightly—start earlier in cooler zones and later in warm areas where frost isn't a concern. The key is adapting the heat and light to match your growing season.
Once you've mastered these early steps, you'll be harvesting pint-sized perfection by midsummer, and your neighbors will be asking for cuttings.
📚 In This Guide
- What you need
- Instructions
- Tips and common mistakes
- Wrapping up and next steps
What you need
- ● Roma tomato seeds – 5–10 seeds (start small if testing germination or save extras for future batches). Choose heirloom or hybrid varieties labeled for your climate zone.
- ● Seed-starting mix – 1–2 gallons of sterile, lightweight potting soil (avoid garden soil—it’s too dense!). Look for mixes labeled "seed-starting" or "organic starter soil."
- ● Seed trays or small pots – 4–6 inches deep, with drainage holes. Biodegradable peat pots (3–4 inches) are a great eco-friendly option!
- ● Grow lights or sunny windowsill – A full-spectrum LED grow light (12–16 hours/day) or a south-facing window (6+ hours of sunlight).
- ● Spray bottle – For gentle watering (avoid drowning seeds!).
- ● Plastic wrap or humidity dome – To create a mini greenhouse and retain moisture.
- ○ Heat mat – Optional but game-changing! Keeps soil at 75–85°F to speed up germination (especially in cool climates).
- ● Fertilizer – A balanced, water-soluble fertilizer (e.g., 5-5-5 or 10-10-10) for when seedlings sprout.
- ● Labels & markers – To track planting dates and varieties (trust us, you’ll forget!).
- ● Tweezers – For delicate seed placement (if you’re a perfectionist!).
- ● Fan – A small oscillating fan on low to harden off seedlings before transplanting (prevents leggy growth).
- ● Patience – Roma seeds can take 7–14 days to germinate (longer in cold soil).
- ● Warmth – Ideal soil temp: 70–85°F (use a heat mat if needed).
- ● Space planning – Romas need 2–3 feet of space per plant (they’re bushy but not sprawling).
- ● Sunlight commitment – Once transplanted, they’ll need 6–8+ hours of sun daily.
Step-by-step instructions for planting Roma tomato seeds
Here's my foolproof method for coaxing strong, disease-resistant Roma tomato plants from seed.
🌱 Step 1: Prepare Containers and Seed Starting Mix
Roma tomatoes thrive when started in 2-3 inch deep biodegradable pots or cells—this prevents root disturbance later. Fill each container with a sterile seed-starting mix (never garden soil—it's too dense and may harbor pathogens). Moisten the mix until it holds together when squeezed but doesn't drip. I press the soil down lightly with my fingers to create a firm surface—this helps seeds maintain consistent contact with moisture.
Here's the thing—Roma seeds germinate best when the soil stays consistently warm. Place your containers on a seedling heat mat set to 75-85°F (or use a warm spot like on top of your refrigerator). The heat mat will become your most important tool for fast, even germination. Once the soil is pre-warmed, you're ready for planting.
🌱 Step 2: Plant Seeds at Correct Depth and Cover Properly
Plant 1-2 seeds per cell at a depth of about ¼ inch—this is roughly the diameter of a Roma seed. Sowing too deep delays germination because the seedling must expend energy pushing through extra soil. I use my pinky finger to make a small hole, drop in the seed, then cover lightly with additional mix. A good rule is to cover seeds with soil equal to 2-3 times their diameter.
After planting, mist the surface gently with a spray bottle until evenly moist. You want the soil to feel like a wrung-out sponge—not soggy, not bone-dry. I label each pot with the date and variety immediately—Roma seeds can look identical to other tomato varieties at first, and I've learned the hard way that forgetting which is which leads to confusion later. Place a clear humidity dome or plastic wrap over the tray to trap warmth and moisture.
💧 Step 3: Maintain Ideal Germination Conditions
Keep the soil consistently moist but never waterlogged—soggy conditions invite damping-off disease, which will rot stems at the soil line. I check the soil daily by pressing my finger ½ inch deep—if it feels dry, it's time for a light misting. The humidity dome creates a mini greenhouse effect, so you'll rarely need to water during germination.
Roma seeds typically sprout in 7-14 days, though cooler rooms may extend this to 3 weeks. The first sign of life is a tiny white root pushing through the soil, followed by the seedling's first true leaves. Once 50% of seeds have sprouted, remove the humidity dome immediately—excess moisture around new seedlings encourages fungal diseases. Place the tray under grow lights or in a south-facing window within 4 inches of the plants.
☀️ Step 4: Provide Optimal Light for Strong Seedlings
Roma tomato seedlings need 14-16 hours of light daily to prevent leggy growth. I use a full-spectrum LED grow light on a timer to ensure consistent lighting. Position the light 2-4 inches above the seedlings—close enough to see gentle leaf movement when it's on, but not so close it burns them. Raise the light as the plants grow to maintain that distance.
Watch for leggy seedlings—these have thin, pale stems with leaves spaced far apart. This happens when light is too distant. If you see this, move the light closer immediately. Strong Roma seedlings have thick stems, deep green leaves, and compact spacing between nodes. I rotate the trays a quarter turn daily so plants grow straight instead of leaning toward the light.
⏰ Step 5: Harden Off and Transplant at the Right Time
Two weeks before your last frost date, begin hardening off seedlings by placing them outside in a sheltered, shaded spot for 1-2 hours the first day. Gradually increase outdoor time by 1 hour daily over 10-14 days, slowly introducing more sun and wind. This prepares them for the garden without shock.
Roma tomatoes are ready for transplant when they have 4-6 true leaves and the soil is warm (60°F+). Transplant on an overcast afternoon to reduce stress. Dig a hole the same depth as the root ball, place the plant in, and water deeply at the base. I always add a handful of compost to the planting hole—this gives Roma plants a nutrient boost for their first fruit set.
Tips & tricks for planting Roma tomato seeds
These little details make all the difference between scraggly seedlings and robust, fruit-loaded plants.
Soil Warmth is Non-Negotiable: That 75-85°F heat mat temperature isn't just a suggestion—it's the difference between germination in 7 days versus 3 weeks. I've seen Roma seeds take 21 days to sprout when kept at room temperature (around 68°F). If you don't have a heat mat, try placing your trays on top of your fridge or near a sunny window with a clear plastic cover to trap heat. The goal is to keep the soil consistently warm until you see those first white roots pushing through.
Light Positioning Matters More Than You Think: The 2-4 inch distance for your grow light isn't arbitrary—it's the sweet spot where seedlings get enough light without burning. I've ruined batches by getting too close (leaving brown patches) and by being too distant (resulting in leggy, weak plants). Here's my trick: hold your hand between the light and seedlings—if you can see gentle leaf movement when the light's on, you're golden. And remember to rotate those trays daily so plants grow straight instead of stretching toward one side.
The 50% Rule Saves Lives: Once 50% of your seeds have sprouted, remove that humidity dome immediately. I've seen damping-off disease wipe out entire trays when left too long under plastic. The dome creates the perfect conditions for germination, but once seedlings are up, they need airflow to prevent fungal growth. This is also when you'll want to move them under your grow lights—just make sure that light is positioned properly (as mentioned above) before you make the switch.
Harden Off Gradually (This Can't Be Stressed Enough): Those 1-2 hours outside on day one might seem like nothing, but it's the first step in preparing your seedlings for the real world. I've watched plants go from thriving to wilting overnight when transplanted too soon. The key is to increase outdoor time by 1 hour daily—this gradual exposure toughens up cell walls and prevents transplant shock. And always do this in the shade to avoid sunburn on delicate young leaves.
Pro Tips for Plant Roma Tomato Seeds
- These little details make all the difference between scraggly seedlings and robust, fruit-loaded plants.
- Soil Warmth is Non-Negotiable: That 75-85°F heat mat temperature isn't just a suggestion—it's the difference between germination in 7 days versus 3 weeks.
- Light Positioning Matters More Than You Think: The 2-4 inch distance for your grow light isn't arbitrary—it's the sweet spot where seedlings get enough light without burning.
Frequently asked questions
Got questions about growing Roma tomatoes from seed? You’re not alone! Here are answers to the most common queries to help you grow a thriving, productive plant.
How long does it take for Roma tomato seeds to germinate?
Roma tomato seeds typically sprout in 5–14 days when kept in warm (70–85°F), moist soil. Use a seedling heat mat if your home runs cool—consistent warmth speeds up germination. Pro tip: Keep soil damp (not soggy) and cover seeds lightly with soil to maintain humidity. Patience is key!
When is the best time to plant Roma tomato seeds indoors vs. outdoors?
Start seeds 6–8 weeks before your last frost date indoors under grow lights. Transplant seedlings outdoors 2–3 weeks after the last frost when soil temps hit 55°F+. Roma tomatoes thrive in warm weather, so avoid planting too early—cold soil stunts growth. Check your USDA zone for precise timing!
Can I plant Roma tomato seeds directly in the garden instead of starting indoors?
Yes! If your climate has a long, warm growing season (zones 8–10), you can direct-sow seeds after the last frost when soil is warm. For cooler zones, indoor starts give seedlings a head start. Warning: Direct-sown seeds may take longer to mature and are more vulnerable to pests.
Why aren’t my Roma tomato seeds sprouting? Troubleshooting tips.
Seeds may fail to sprout due to cold soil, dry conditions, or old seeds (viability drops after 2 years). Try these fixes:
- Warmth: Use a heat mat or place seeds near a sunny window.
- Moisture: Mist soil daily or cover with plastic wrap.
- Depth: Plant seeds ¼ inch deep—too deep = slower germination.
- Fresh seeds: Test viability by soaking seeds in water (floaters = dead).
How do I tell if my Roma tomato seedlings are healthy vs. struggling?
Healthy seedlings have deep green leaves, sturdy stems, and no yellowing. Struggling plants may show:
- Leggy stems: Needs more light (move under grow lights).
- Yellow leaves: Overwatering or nutrient deficiency (use diluted fertilizer).
- Wilting: Check soil moisture—Roma tomatoes hate soggy roots!
Wrapping up and next steps
Growing Roma tomato seeds is a rewarding journey that leads to juicy, flavorful harvests—and you’ve got all the tricks to succeed! 🌱 By following the right soil prep, germination techniques, and care tips, you’ll be well on your way to bushy plants loaded with sweet, meaty tomatoes.
Remember, patience and consistency are key, but the payoff is absolutely worth it.
Now that you’re armed with knowledge, take the next step: grab those seeds, prep your garden (or pots!), and start planting! Before you know it, you’ll be savoring homegrown Roma tomatoes in salads, sauces, or straight from the vine. Happy growing! 🍅✨