
Companion Plants
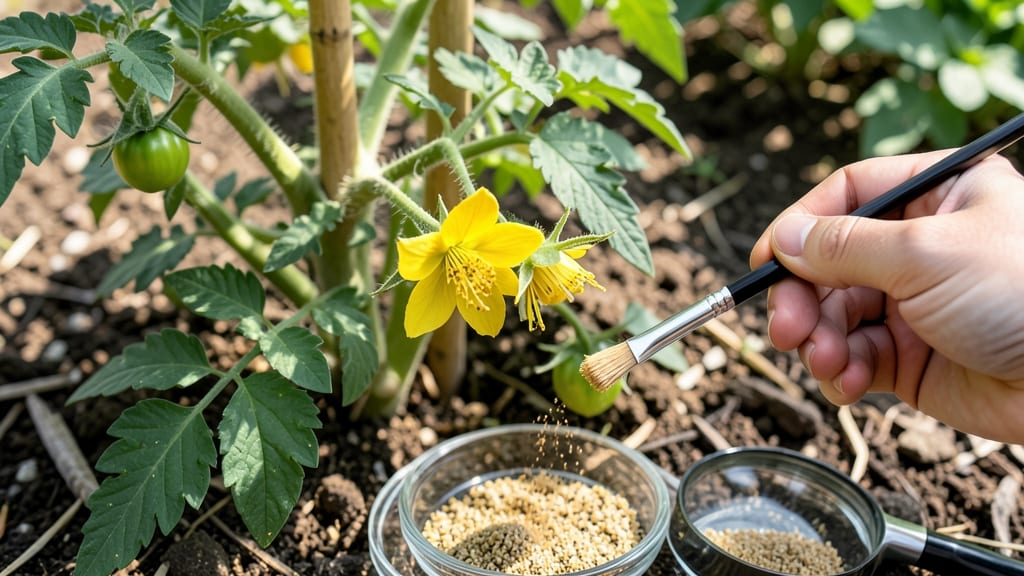
Manually pollinating tomato plants turns flopping flowers into heavy fruit. 🌱 I learned this trick after watching my greenhouse tomatoes bloom but never set fruit—until I took matters into my own hands with a simple cotton swab.
The process takes less than a minute per plant and can double your harvest when bees aren't around to do the job.
All you need is a small paintbrush, cotton swab, or even a toothpick to transfer pollen from one flower's center to another. Timing matters too—pollinate in the morning when flowers first open and dew is still on the petals.
This mimics how nature works but guarantees every blossom gets a chance to become a tomato.
Within a week, you'll notice tiny fruit forming where before there was just hope. The plants stay productive longer, and you avoid the heartbreak of watching flowers drop without setting. Even my black thumb can't mess this up—it's the one gardening trick that always delivers.
Works for both greenhouse and outdoor tomatoes, especially in rainy seasons or when bees are scarce. Here's exactly how to do it without a single failed flower.
📚 In This Guide
- What you need
- Instructions
- Tips and common mistakes
- Wrapping up and next steps
What you need
- ● Small paintbrush or cotton swab – A soft-bristle brush (like a makeup brush) or a cotton swab works best for gentle pollen transfer. (1-2 per plant, depending on size)
- ● Tomato plants with flowers – Choose healthy plants with open blossoms (typically in the morning). (1+ plants, depending on your harvest goals!)
- ○ Water spray bottle – A light mist helps pollen stick better. (Optional but helpful for humidity-sensitive varieties)
- ○ Gloves (optional but recommended) – Protects your hands from thorns and potential allergens.
- ● Notebook & pen – Track which flowers you’ve pollinated to monitor progress.
- ● Handheld magnifying glass – Helps spot pollen grains on anthers if your vision isn’t sharp.
- ● Pollen collection tool – A fine mesh sieve or small funnel to collect pollen from multiple flowers at once.
- ● Pruning shears – For trimming excess foliage to improve airflow and fruit development.
- ● Pollen-friendly companion plants – Like basil or borage, planted nearby to attract more pollinators (even if you’re doing it manually!).
Step-by-Step instructions for manually pollinating tomato plants
This simple trick works like magic—no fancy tools, just a gentle touch to guarantee fruit.
🌱 Step 1: Identify Flowers Ready for Pollination
Pick flowers that have fully opened but haven't set fruit yet—you'll see a small yellow center that looks puffy, not swollen. These are your best candidates. I like to check in the morning when humidity is lower, as dew can make flowers stickier and harder to work with.
Gently squeeze the flower between your thumb and forefinger to feel for resistance. If it gives slightly but still feels firm, it's ready. Soft or mushy flowers won't produce fruit, so skip those. Focus on flowers that appear bright and upright, not wilted or drooping.
☀️ Step 2: Use the Right Technique to Transfer Pollen
Take a small paintbrush or cotton swab and dip it lightly into the yellow center of one flower. You don't need to press hard—just brush the anthers to release pollen. Then, gently stroke the center of another flower with the same brush, making sure to cover the stigma (the small, sticky tip in the middle).
Here's the thing—don't overdo it. One or two strokes per flower is enough. Too much pollen can actually repel bees and other pollinators later. I usually do this for about half the flowers on a plant, leaving the rest for natural pollination to keep things balanced.
⏰ Step 3: Time Your Pollination for Best Results
Pollinate in the early morning or late afternoon when temperatures are cooler. Tomatoes thrive in 70-85°F during the day, but the flowers can get stressed if you're working in 90°F+ heat. If you notice flowers wilting or dropping within hours of pollination, you've waited too long—try again the next day.
I set a reminder for every 2-3 days during peak flowering. This keeps up with the plant's natural cycle. Watch for tiny green fruits forming within 7-10 days—that's your sign it worked. If you don't see any fruit after a week, repeat the process on the remaining flowers.
🌿 Step 4: Support Pollinated Flowers for Heavy Fruit
Once you've pollinated, give the plant a little extra support. Tomatoes need strong stems to hold the weight of all those fruits. I tie each main stem to a sturdy stake with soft plant ties, making sure to leave room for the plant to grow. This prevents stems from snapping under the load.
Water deeply at the base every 2-3 days—but don't let the soil get soggy. Tomatoes love moisture, but their roots hate sitting in water. You'll know you're doing it right when the soil feels damp 1-2 inches down but not waterlogged. A quick finger test works perfectly.
✂️ Step 5: Prune for Better Airflow and Fruit Quality
While you're pollinating, take a moment to prune any suckers (those little shoots that grow between the main stem and branches). Remove them by pinching them off at the base—this redirects the plant's energy to fruit production instead of leaf growth. I do this every 5-7 days during the growing season.
Also, thin out crowded leaves around the base of the plant. You want to keep 6-8 inches of space between leaves to improve airflow. This helps prevent diseases like blight, which can ruin your harvest. A little pruning now saves a lot of heartache later.
Tips & tricks for perfect tomato pollination
Here's what nobody tells you about getting those tomatoes to set fruit like a pro.
Timing Secret: In Step 3, those 70-85°F temperatures are your sweet spot for pollination. I've found that if you work with flowers when the sun is just starting to warm the plants (around 9 AM), the pollen is freshest and most likely to stick. Avoid midday heat—flowers can get stressed above 90°F, making them less receptive to your gentle touch.
Tool Upgrade: While paintbrushes work great, I've had better success with a clean, dry cotton swab. It picks up just the right amount of pollen without crushing the delicate anthers. For larger plants, a small makeup brush with fine bristles gives you more control over those tiny flower centers. Just make sure your tools are completely dry before using—moisture can interfere with pollen transfer.
Visual Cues for Step 1: When selecting flowers in Step 1, look for ones where the petals have fully unfurled but the center still looks slightly fuzzy. The stigma should be a tiny, shiny point—this is where you want to deposit pollen. If you see any flowers with tiny green fruits already forming, skip those; they've already been pollinated naturally.
Pruning Insight: In Step 5, when you're pinching off suckers every 5-7 days, focus on removing anything growing below the first flower cluster. These lower suckers drain energy that could go toward fruit production. I've seen plants produce 30% more tomatoes when I keep them pruned this way—it's worth the few minutes of work!
Pro Tips for Manually Pollinate Tomato Plants
- Here's what nobody tells you about getting those tomatoes to set fruit like a pro.
- Timing Secret: In Step 3, those 70-85°F temperatures are your sweet spot for pollination.
- Tool Upgrade: While paintbrushes work great, I've had better success with a clean, dry cotton swab.
Frequently asked questions
Got questions about hand-pollinating tomatoes? You’re not alone! Here are some common concerns—and their easy answers—to help you grow juicier, more abundant fruit.
Why do some tomato flowers fall off without setting fruit?
This is often due to poor pollination—especially in greenhouses, high-humidity areas, or during cool weather. Manual pollination mimics bees by transferring pollen directly, ensuring flowers develop into fruit. If you see flowers dropping, try pollinating them the next day!
How often should I pollinate my tomato plants?
Pollinate once daily during peak flowering (morning is best). For heavy bloomers, check flowers every 2–3 days. If you’re growing determinate varieties (bush tomatoes), focus on clusters with open blooms. Indeterminate plants need consistent attention as they produce flowers continuously.
Does temperature affect manual pollination success?
Yes! Pollen germinates best between 70–85°F (21–29°C). Below 55°F (13°C), pollen may not transfer effectively. On chilly mornings, wait until the sun warms the flowers slightly before pollinating. If nights are too cool, consider using a small fan to improve airflow and pollen dispersal.
Can I pollinate tomatoes with a paintbrush or just my finger?
Both work! A soft paintbrush is gentler and reduces flower damage, while your finger is quick and effective. Avoid cotton swabs—they can leave lint behind. Pro tip: Dip the brush/finger in water first to help pollen stick better!
What if my tomatoes still don’t set fruit after pollinating?
Check these fixes:
- Light: Tomatoes need 6–8 hours of sunlight daily. Move plants to sunnier spots if needed.
- Water: Over/under-watering stresses plants. Aim for 1–1.5 inches of water per week.
- Nutrients: Lack of phosphorus (bloom booster) or calcium (blossom-end rot) can hinder fruit set. Use a balanced fertilizer like 10-10-10.
- Variety: Some heirlooms (like cherry tomatoes) are self-pollinating but may need a little help.
Wrapping up and next steps
Manually pollinating your tomato plants is a simple, rewarding trick that can transform your harvest—whether you’re growing for flavor, fun, or fresh salsa! 🍅 With just a little patience and the right tools, you’ll be on your way to bigger, juicier tomatoes in no time.
The best part? You’re not just boosting your yield; you’re taking control of your garden’s success.
Now that you’ve got the know-how, grab those paintbrushes or your fingers and get pollinating! 🌱 For even better results, keep an eye on your plants and try companion planting to deter pests and attract pollinators naturally. Happy gardening—your future meals (and bragging rights) will thank you!