
Vegetables
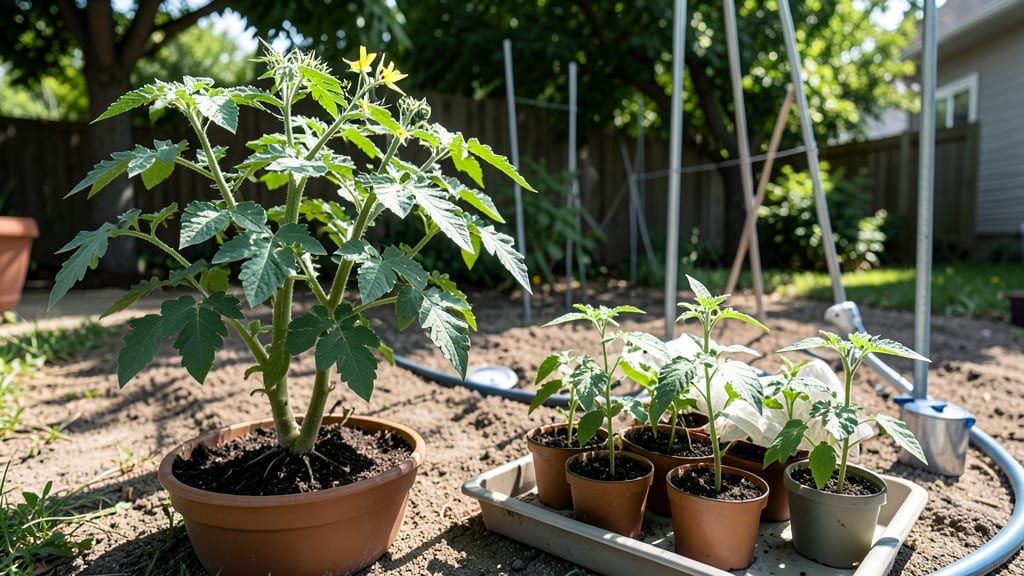
Hardening off tomato plants saves you from weak, floppy transplants that struggle in the garden. 🌱 I've watched seedlings collapse after just one day outside—until I learned this gradual process that builds resilience in their stems and roots.
Start 7-10 days before your last frost date by moving plants outside for just 1-2 hours on mild days. Protect them from direct sun and wind with shade cloth or a temporary shelter. Each day, increase their time outdoors until they're spending full days in the garden.
You'll know they're ready when leaves look vibrant and plants stand tall without wilting. The roots will be stronger, the stems thicker, and the transition to permanent planting spots seamless. No more sad, leggy plants that give up after a week!
Works for seedlings in flats, pots, or even individual containers. Here's how to do it right—no more transplant shock or failed starts.
📚 In This Guide
- What you need
- Instructions
- Tips and common mistakes
- Wrapping up and next steps
What you need
- ● Tomato seedlings or young plants: Healthy, well-established plants (4-6 weeks old) with at least 2-3 sets of true leaves.
- ● Hardening-off location: A sheltered outdoor spot (e.g., porch, patio, or garden bed with partial shade).
- ● OR a cold frame, greenhouse, or unheated garage with natural light.
- ● Watering can or hose with a gentle spray nozzle: For consistent moisture without damaging tender leaves.
- ● Lightweight row covers or frost cloth: 3–4 ft. wide x 5–10 ft. long (depending on plant quantity) to protect from wind and harsh sun.
- ○ Stakes or cages (optional but helpful): 1–2 per plant (5–6 ft. tall) to support growth as they harden.
- ● Garden twine or soft ties: For securing plants to stakes if needed.
- ● pH-balanced liquid fertilizer (5-5-5 or 10-10-10): Diluted to half-strength for a gentle nutrient boost.
- ● Shade cloth (30–50% coverage): To gradually filter sunlight in the first few days.
- ● Thermometer: To monitor outdoor temps (ideal hardening range: 50–75°F).
- ● Plant tags or labels: To track progress and note adjustments.
- ● Mulch (straw or shredded leaves): To retain soil moisture and regulate temperature.
- ● Portable shade structure (e.g., pop-up tent): For extreme heat or unpredictable weather.
Step-by-Step guide to hardening off tomato plants
Here's the foolproof method I use to prepare tomato seedlings for outdoor life—no more shocked, wilted plants.
🌱 Step 1: Start Indoors 2 Weeks Before Last Frost
Move your tomato seedlings outside to a sheltered spot—like a covered porch or under a patio awning—where they can experience natural conditions without direct sun. I like to begin this process when nighttime temperatures consistently stay above 45°F, as cooler temps slow their adjustment. Place them in their growing containers or pots to avoid disturbing roots.
Watch for first signs of stress—like slightly curled leaves—as your signal that they're ready for more sun exposure. If you see yellowing, it's a sign they're getting too much light too soon, so move them back to shade for another day.
☀️ Step 2: Gradually Increase Sun Exposure Over 10 Days
On day one, leave them outside for just 1-2 hours in the morning when temperatures are cooler. This gradual approach prevents sunburn and helps them build resilience. Each day, add 1 extra hour of exposure, moving them to slightly sunnier spots as they tolerate more light. By day five, they should handle 4-5 hours of filtered sunlight.
Here's where it gets fun—you'll notice their stems thickening and leaves darkening to a deeper green. This is your confirmation they're adapting. If a leaf yellows, don't panic—it usually just needs more time. The key is consistency; skipping days throws off their progress.
⏰ Step 3: Introduce Wind and Full Sun Over 7 Days
After the first week, let them experience full sun for 2-3 hours daily, gradually increasing to 6+ hours by day 14. I like to place them in their final garden spot during the day and bring them back inside at night if temperatures drop below 50°F. This mimics real outdoor conditions while protecting tender roots.
By now, your seedlings should look like mini outdoor plants—sturdy stems, glossy leaves, and no signs of wilting. If they still look leggy, they need more light. The goal is to make them tough enough to handle full sun, wind, and temperature swings without shock.
💧 Step 4: Water and Fertilize Like Outdoor Plants
Switch to watering them only when the top inch of soil feels dry—just like you would in the garden. Overwatering now can drown their roots as they adjust. I use a balanced fertilizer (like 10-10-10) at half strength to give them a gentle nutrient boost without overwhelming them. This mimics what they'll get in the soil later.
Pay attention to how they drink water—healthy plants will perk up after watering, while stressed ones may stay wilted. If you see wilting, move them back to shade and water deeply. By this stage, they should be ready to transplant into the ground or larger containers within 24-48 hours of their final hardening session.
Tips & tricks for perfect tomato plant hardening
Avoid these common pitfalls—and give your seedlings the best possible start in their new outdoor home.
Timing Secret: Start the hardening process when nighttime temperatures consistently stay above 45°F—this is when your seedlings can begin adapting without shock. I've learned this the hard way: beginning too early when temps dip below this threshold can actually set them back. Use a weather app to track nightly lows for the next few days before starting.
Sun Exposure Strategy: The 1-2 hour daily exposure in Step 2 is your safety net—this gradual increase prevents sunburn while building resilience. If you notice leaves curling or yellowing during this phase, move them back to shade immediately. I like to place a small fan nearby during these sessions to introduce gentle wind, which helps strengthen stems naturally.
Visual Cues for Progress: Pay attention to these subtle signs your seedlings are adapting: stems will thicken noticeably, leaves will darken to a deeper green, and new growth will appear more upright. These changes confirm they're ready for the next phase. If your seedlings still look leggy after 10 days, they need more light—try moving them to a brighter indoor spot for a few hours each day until they're stronger.
Fertilizer Wisdom: When you begin using that half-strength balanced fertilizer in Step 4, apply it in the morning so plants have time to absorb nutrients before evening. Never fertilize stressed plants—wait until they've recovered from any wilting episodes. I've found that a light sprinkle of compost tea works wonders for seedlings transitioning outdoors, though it's not required.
Pro Tips for Harden Off Tomato Plants
- Avoid these common pitfalls—and give your seedlings the best possible start in their new outdoor home.
- Timing Secret: Start the hardening process when nighttime temperatures consistently stay above 45°F—this is when your...
- Sun Exposure Strategy: The 1-2 hour daily exposure in Step 2 is your safety net—this gradual increase prevents sunbur...
Frequently asked questions
Got questions about hardening off your tomato plants? You’re not alone! Here are some of the most common concerns—and straightforward answers to help you grow stronger, sun-ready plants.
How long does it take to harden off tomato plants?
Most gardeners harden off tomato plants over 7 to 14 days, gradually increasing exposure. Start with 1–2 hours of sunlight on day 1, then add 30–60 minutes daily until they’re ready for full sun. Rush it, and you risk shock or sunburn! Adjust based on your climate—cooler areas may need a longer transition.
What if I forgot to harden off my tomato plants?
Don’t panic! If your seedlings are still in pots, move them to a shady, sheltered spot for a few days before transplanting. Water well and monitor for wilting. Transplant on a cloudy day to reduce stress. If they’re already in the ground, mulch heavily and water deeply to help recovery.
Can I harden off tomato plants in partial shade?
Yes, but avoid full shade—tomatoes need some sunlight to build resilience. Use a 50% shade cloth or dappled shade (like under a tree) for the first few days, then gradually increase sun exposure. Goal: Mimic outdoor conditions without overwhelming tender leaves.
What’s the best temperature for hardening off tomato plants?
Ideal hardening-off temps are 50–75°F (10–24°C). Avoid frost or extreme heat during this process. If nights dip below 50°F (10°C), use row covers or cold frames to protect young plants. Heatwaves? Harden off in the morning or evening to prevent stress.
Why are my tomato plants wilting after hardening off?
Wilting can mean overwatering, underwatering, or transplant shock. Check soil moisture—it should be damp but not soggy. If leaves feel crispy, they’re sunburned (reduce exposure). For shock, trim wilted leaves and water at the base (not overhead) to encourage recovery.
Pro tip: Keep a hardening-off journal! Note daily sun exposure, temps, and plant reactions to tweak your approach for next time.
Wrapping up and next steps
Harden off your tomato plants with confidence—your efforts will pay off in stronger, more resilient plants ready to thrive in the garden! 🌱 By gradually exposing them to sun, wind, and temperature shifts, you’re giving them the best start for a bountiful harvest.
Now that you’re equipped with the know-how, it’s time to plant your hardened-off seedlings and watch them flourish.
Ready to take the next step? Check out our guide on transplanting tomatoes for expert tips on planting and caring for your new garden stars!