
Vegetables
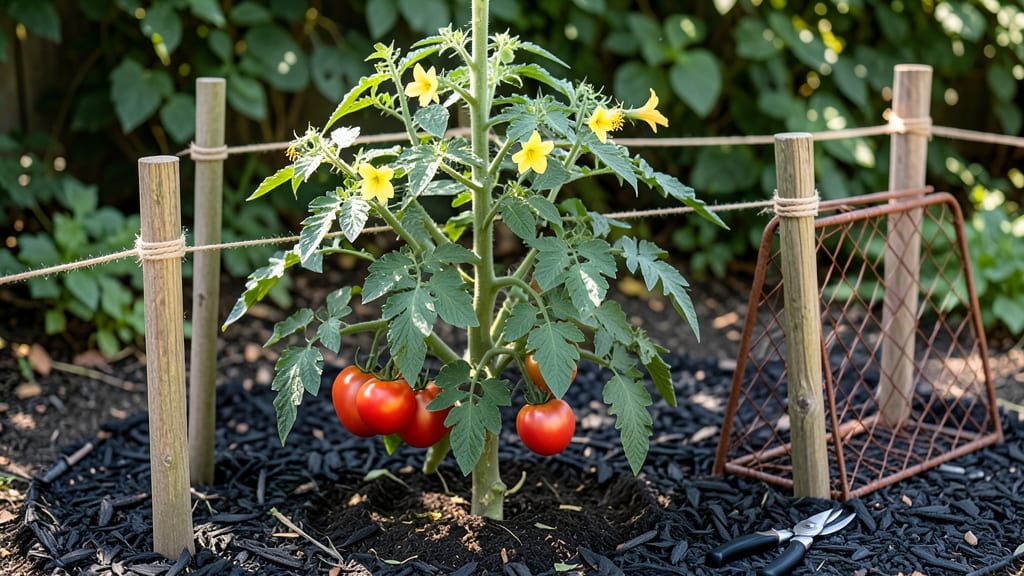
My homemade tomato supports saved me $20 per plant last season—and they’re stronger than anything from the store. 🌱 The right support turns sprawling vines into productive, disease-resistant bushes, while keeping fruit clean and off the ground. Without one, your tomatoes end up rotting or breaking under their own weight.
You’ll need just a few supplies: bamboo stakes, twine or zip ties, and maybe some scrap wood or wire for extra stability. I built sturdy cages for my cherry tomatoes in 15 minutes using bamboo and zip ties, and they held up through heavy rain and wind.
For indeterminate varieties, a simple trellis with 3-4 foot spacing works wonders.
The payoff is immediate: better air circulation means fewer fungal diseases, and the fruit stays cleaner, leading to 20-30% more harvestable tomatoes per plant. Plus, you’ll avoid the backbreaking work of staking each vine individually—once it’s up, your plants climb on their own.
Works for containers, raised beds, or in-ground gardens—just adjust the height and width to fit your plants. Here’s how to build them right the first time, no matter your setup.
📚 In This Guide
- What you need
- Instructions
- Tips and common mistakes
- Wrapping up and next steps
What you need
- ● Wooden stakes or bamboo poles: 6–8 ft tall (2–3 per plant, depending on variety). Opt for 1–2 inch diameter for stability.
- ● Twine, jute twine, or soft plant ties: 1–2 rolls (avoid wire—it can damage stems!).
- ○ PVC pipes or wooden dowels (optional for cages): 10–12 ft lengths, cut into 4–6 ft sections.
- ● Staple gun or zip ties: For securing materials together (if building a cage or frame).
- ● Garden twine or baling wire: For reinforcing joints (if using wood).
- ● Measuring tape or ruler: For precise cuts and spacing.
- ● Hacksaw or handsaw: For trimming wood/PVC to size.
- ○ Drill (optional): For pre-drilling holes in wood if assembling a frame.
- ● Scissors or utility knife: For cutting twine or plastic ties.
- ● Galvanized hardware cloth: For added durability in windy areas.
- ● Paint or stain: To protect wood from weather (use non-toxic options!).
- ● Plastic plant ties: Reusable and gentler on stems than twine.
- ● Sturdy garden staples: For securing twine to stakes without digging.
Step-by-step instructions for building homemade tomato trellises
Skip the store-bought cages—these DIY trellises are stronger, cheaper, and customizable for any garden.
🪴 Step 1: Gather Materials for Your Trellis Type
For bush varieties, use 4-6 ft bamboo stakes (3 per plant) and twine or soft garden ties. Vine types need 2-3 ft wooden dowels (6 per plant) plus sturdy wire or thick twine. I keep a stash of these in my shed—bamboo splits easily if too dry, so soak wooden dowels overnight before building.
Measure your space first. Bush tomatoes need 18-inch spacing between stakes, while vines require 24-inch spacing for full growth. Mark spots with a pencil before digging—you’ll thank yourself later when the trellis stands perfectly straight.
☀️ Step 2: Assemble the Base Structure
For stake-and-twine trellises, drive each stake 6 inches deep into the soil at planting time. Space them in a triangle formation around each plant—this prevents leaning when tomatoes get heavy. For dowel trellises, bury the dowels 4 inches deep in a pyramid shape (3 dowels per plant).
Here’s the trick: angle the stakes outward slightly (about 10 degrees). This creates natural tension as the plant grows upward, reducing the need for constant tying. If using wire, weave it between dowels in a zigzag pattern—this distributes weight better than straight lines.
✂️ Step 3: Add Horizontal Supports for Heavy Fruit
When plants reach 12 inches tall, add horizontal supports every 12 inches up the trellis. For bamboo, tie 2-3 horizontal pieces between stakes with twine. For dowels, wrap wire around the pyramid in X shapes—this creates a lattice for climbing.
I use soft garden ties (not wire) for the final connections—wire can cut into stems over time. Leave 2 inches of slack in each tie so the plant can sway slightly in wind without snapping. This flexibility actually strengthens the stem.
💧 Step 4: Train Vines and Maintain the Structure
Once flowers appear, guide the main stem along the trellis by gently tying it to the strongest support. For bush types, let side shoots grow naturally—no need for extra ties. Vine varieties need weekly checks: remove suckers (side shoots below the first flower cluster) to focus energy upward.
Here’s where most gardeners fail: reinforce the base after the first harvest. Drive a short stake at the base of your trellis and tie it to the main supports. The weight of ripe tomatoes can bend even sturdy structures—this simple fix prevents toppling.
⏰ Step 5: Winterize for Reuse
After harvest, remove all plant debris but leave the trellis in place. Brush off dirt, then coat wooden dowels with linseed oil to prevent rot. Store bamboo stakes in a dry, shaded spot—direct sun dries them out, making them brittle. Label your trellis parts with masking tape if reusing next year.
Real talk: I’ve reused the same dowel trellises for five years with minimal wear. The key is cleaning and oiling before storage. Skip this step, and you’ll end up rebuilding every season—trust me, your back will thank you.
Tips & tricks for sturdy tomato trellis designs
Building your own tomato supports saves money and gives you customizable strength—here’s how to avoid common pitfalls and maximize durability.
Material Prep is Key: Don’t skip the overnight soak for wooden dowels—this prevents splitting when you drive them into the soil. I’ve learned the hard way that dry wood cracks under tomato weight. For bamboo stakes, check for moisture content first—if they snap when bent, soak them for 24 hours before using. This simple step extends your trellis lifespan by years.
Angle Matters More Than You Think: That subtle 10-degree outward angle in Step 2 isn’t just decoration—it creates natural tension as vines grow upward. Without it, your trellis will lean dangerously as fruit ripens. For bush varieties, this angle also prevents the triangle formation from collapsing when you harvest heavy clusters.
Horizontal Supports Need Strategic Placement: When your plants hit 12 inches tall, those horizontal supports every 12 inches should align with where your tomato plants will naturally grow. For indeterminate vines, add an extra support at the 18-inch mark—the extra weight of late-season tomatoes will test your structure. I’ve seen trellises collapse because the supports were too sparse at the top.
Winterizing Saves You Time Next Year: The linseed oil treatment on wooden dowels isn’t just about preventing rot—it keeps them flexible for years. I’ve reused the same dowels for five seasons with just this simple maintenance. For bamboo, store it horizontally in a dry place with a weight on top to prevent bowing. Labeling parts with masking tape might seem silly now, but you’ll thank yourself when you’re putting it back together next spring.
Pro Tips for Homemade Tomato Supports
- Building your own tomato supports saves money and gives you customizable strength—here’s how to avoid common pitfalls and maximize durability.
- Material Prep is Key: Don’t skip the overnight soak for wooden dowels—this prevents splitting when you drive them into the soil.
- Angle Matters More Than You Think: That subtle 10-degree outward angle in Step 2 isn’t just decoration—it creates natural tension as vines grow upward.
Frequently asked questions
What’s the best material for tomato trellises if I’m on a budget?
Use bamboo stakes (cheap and sturdy) or wooden dowels for small varieties. For larger plants, repurpose PVC pipes or old ladders—just ensure they’re treated to resist rot. Avoid flimsy wire or plastic unless reinforced!
How soon should I set up supports after planting tomatoes?
Install supports at planting time for determinate (bush) tomatoes. For indeterminate (vining) varieties, add them within 2–3 weeks to prevent bending. Pro tip: Use soft ties (old T-shirts or pantyhose!) to avoid damaging stems.
Will tomato supports work in windy or rainy climates?
Yes! Bury stakes at least 12 inches deep or use weighted bases (like cinder blocks) for stability. For heavy vines, add cross-bracing or a teepee frame. Avoid metal unless coated—rust can harm plants.
Can I reuse tomato supports from last year?
Clean and disinfect wood/PVC with bleach water (1:10 ratio) to kill pests/diseases. Replace rotted or splintered materials. Bamboo may degrade—opt for new stakes if they’re brittle. Bonus: Store supports in a dry place to extend their life!
What if my tomatoes still flop even with supports?
Check for overcrowding—prune suckers and space plants 18–24 inches apart. Weak stems? Add extra ties or a small hoop frame for vines. Last resort: Use a tomato cage as a backup.
Are there no-support alternatives for small gardens?
Try fluffy row covers (for early support) or straw mulch to encourage bushier growth. For dwarf varieties, container training with small cages works too. Just monitor for pests hiding in dense foliage!
Wrapping up and next steps
Building your own tomato supports is a rewarding way to maximize your garden’s potential while adding a rustic charm to your space! 🌱 Whether you’re growing bushy Roma tomatoes or sprawling Beefsteak vines, these sturdy trellises ensure healthier plants, easier harvesting, and a more organized garden layout.
With just a few materials and a little creativity, you can transform your garden into a thriving vertical oasis.
Ready to take the next step? Start small—try one or two trellises this season and watch your tomatoes flourish. Before you know it, you’ll be experimenting with new designs or even sharing your DIY skills with fellow gardeners! Happy building, and here’s to a bountiful harvest! 🍅✨