
Pests and Diseases
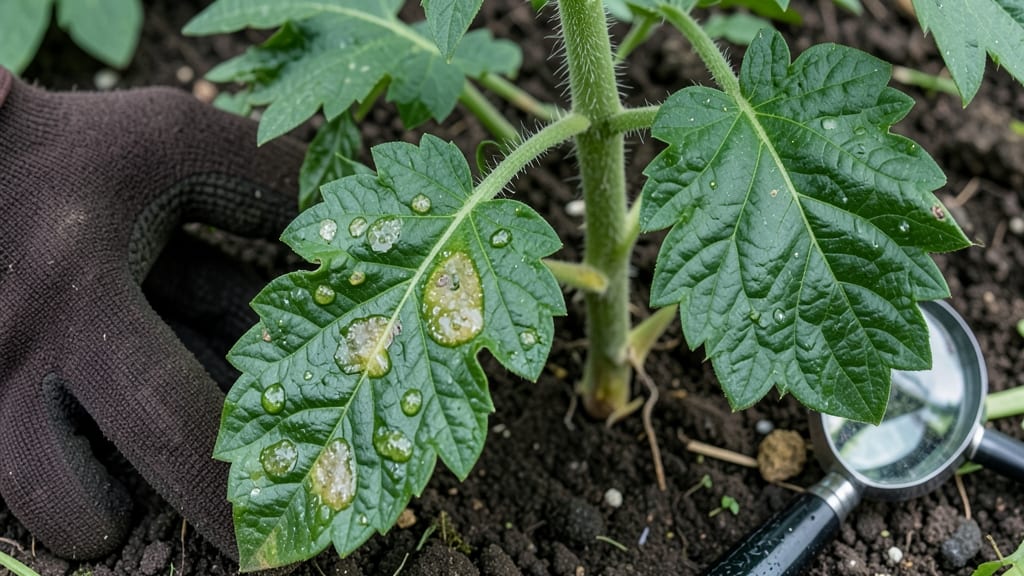
Clear spots on tomato leaves mean your plants are fighting a fungal battle before your eyes. 🌱 I’ve seen those telltale rings of death spread from leaf to leaf, and the key to stopping them is acting fast—neem oil is your secret weapon against early blight and bacterial spot.
These spots start small but multiply when humidity hangs thick in the air or water splashes up from below.
The moment you spot them, prune infected leaves immediately, then spray a neem oil mix (1 tablespoon per quart of water) every 7-10 days—it disrupts fungal growth without harming your plants. Adjust watering too: deep, infrequent soaks keep roots happy and leaves dry faster.
📚 In This Guide
- What you need
- Instructions
- Tips and common mistakes
- Wrapping up and next steps
What you need
- ● Neem oil (100% pure, cold-pressed): 1–2 tablespoons (for a standard 1-gallon spray mixture). Look for Azadirachta indica as the active ingredient.
- ● Water: 1 gallon (3.8 liters) of room-temperature or slightly warm water to help the oil emulsify.
- ● Dish soap or liquid castile soap: ½ teaspoon (for emulsification and surface tension reduction). Avoid harsh detergents!
- ● Spray bottle or garden sprayer: Small spray bottle (8–16 oz): For targeted applications (e.g., indoor pots or small plants).
- ● Backpack or pump sprayer (1–3 gallons): Ideal for larger gardens or outdoor tomato patches.
- ● Protective gear: Nitrile or rubber gloves (to avoid skin irritation from neem oil).
- ● Long sleeves and pants (for sensitive skin or windy conditions).
- ○ Safety goggles (optional but recommended if spraying near eyes).
- ● Pruning shears: Sterilized with rubbing alcohol (to remove infected leaves without spreading spores).
- ● Disposable towels or rags: For cleaning tools and wiping residue.
- ● Baking soda: 1 teaspoon (can be added to the spray for extra antifungal properties).
- ● Horticultural oil or garlic spray: Mix with neem oil for a double-duty fungal defense.
- ● Fungicide (organic or synthetic): For stubborn cases (e.g., copper fungicide or potassium bicarbonate).
- ● Fan or dehumidifier: To reduce humidity around plants (prevents fungal recurrence).
- ● Label or marker: To tag treated plants and track progress.
How to treat clear spots on tomato leaves using neem oil
Neem oil stops fungal spread before it ruins your harvest—here's how to use it safely and effectively.
🌿 Step 1: Identify the Problem and Remove Affected Leaves
Clear spots on tomato leaves are often early signs of fungal diseases like early blight or septoria leaf spot. Before spraying, inspect your plants closely—look for yellow halos around clear spots or tiny black specks on the undersides of leaves. These are your first clues.
Use clean, sharp pruning shears to snip off any leaves with clear spots and at least 1 inch of healthy tissue below them. Drop the infected leaves into a sealed plastic bag immediately—never compost them. This prevents spores from spreading to other plants. I always wear gloves for this step to avoid transferring spores to my hands.
💧 Step 2: Prepare the Neem Oil Solution
Mix 1 teaspoon of neem oil with 1 teaspoon of mild liquid soap (like Castile soap) in a spray bottle. Add 1 quart of warm water and shake vigorously until fully combined. The soap helps the neem oil stick to the leaf surfaces where fungi thrive. I like to prepare this solution in the evening when temperatures are cooler—it reduces the risk of leaf burn.
Shake the bottle again right before use. Neem oil separates from water, so you'll need to agitate it thoroughly each time. If you're treating multiple plants, divide the solution into two spray bottles to cover both the tops and undersides of leaves. The undersides are where fungal spores often hide and multiply.
✂️ Step 3: Apply the Spray Evenly to All Leaf Surfaces
Start spraying in the early morning or late afternoon when the sun isn't intense. Hold the bottle 12-18 inches away from the plant and apply until the leaves are glistening but not dripping. Focus on the undersides of leaves first—this is where fungal spores love to hide. I like to work in sections, moving from the bottom of the plant upward to ensure full coverage.
Pay special attention to the stem ends and leaf joints, as these are common entry points for fungal infections. Avoid spraying when the leaves are wet or when rain is forecast within 24 hours. The neem oil needs time to work, and rain will wash it away before it can protect your plants.
☀️ Step 4: Prevent Future Outbreaks with Proper Care
After treating, improve airflow around your tomato plants by pruning crowded branches and staking plants properly. Wet foliage fuels fungal growth, so water at the base of the plant in the morning to allow leaves to dry quickly. I also avoid overhead watering—it's a surefire way to spread spores.
Apply the neem oil spray every 7-10 days or after heavy rain to maintain protection. For extra defense, sprinkle 1 inch of organic mulch around the base of your plants to prevent soil-borne spores from splashing onto leaves. This combination of removal, treatment, and prevention gives your tomatoes the best chance to stay healthy.
⏰ Step 5: Monitor and Retreat if Needed
Check your plants daily for new clear spots or yellowing leaves. If you see more than 2-3 new spots per week, repeat the neem oil treatment immediately. Fungal diseases spread quickly, so don't wait until the problem looks severe—early intervention is key.
If the spots don't improve after two treatments, the issue might be something other than a fungal infection. In that case, collect a few infected leaves and take them to your local extension office for testing. Sometimes, pests or environmental stress can mimic fungal symptoms, and addressing the root cause makes all the difference.
Tips & tricks for effective neem oil application
Fungal diseases can turn your tomato harvest from thriving to tragic in no time. Here's how to make every step of this neem oil treatment count.
Identification is Key: In Step 1, don't just look for clear spots—flip leaves over to check for those tiny black specks. Early blight often starts on undersides, so this is where you'll catch it first. I've seen cases where gardeners missed the undersides and the disease spread uncontrollably. Use a magnifying glass if you're unsure—it's worth the investment for your tomato plants.
Timing Matters: The 24-hour window after spraying is critical. Don't water your plants or expect rain within that timeframe, or you'll wash away the protective layer before it can work. I've learned this the hard way—after treating my plants only to have a sudden rainstorm wash everything away. Plan your spraying schedule around your local forecast to maximize effectiveness.
Solution Stability: When preparing your neem oil mix in Step 2, use warm water—not hot. Hot water can break down the neem oil's active compounds, making it less effective. Also, shake that bottle vigorously right before each use. Neem oil separates quickly, and I've seen people skip this step only to wonder why their spray wasn't working properly. A good shake ensures you're getting the full strength of the solution every time.
Equipment Upgrade: Consider investing in a small handheld sprayer with a fine mist nozzle. The 12-18 inch distance mentioned in Step 3 works well, but a proper sprayer gives you more control and even coverage. I use one with an adjustable nozzle—it lets me focus the spray exactly where I need it, especially on those hard-to-reach undersides and leaf joints where fungal spores love to hide.
Pro Tips for Clear Spots On Tomato Leaves
- Fungal diseases can turn your tomato harvest from thriving to tragic in no time.
- Identification is Key: In Step 1, don't just look for clear spots—flip leaves over to check for those tiny black specks.
- Timing Matters: The 24-hour window after spraying is critical.
Frequently asked questions
about clear spots on tomato leaves—and how to tackle them with neem oil—can save your garden! Here are answers to the most common concerns:What causes clear spots on tomato leaves?
Clear spots are often caused by Alternaria or early blight, fungal diseases that thrive in warm, humid conditions. These spots start as tiny, water-soaked areas and expand, creating a "bullseye" pattern. Poor air circulation or overhead watering can worsen the issue.
How quickly will neem oil stop the spread?
Neem oil works best as a preventive measure, but you’ll see results within 5–7 days of consistent application. For existing spots, spray every 7–10 days until new growth appears. Combine it with pruning infected leaves to speed up recovery.
Can I use neem oil if my plants are already wilting?
Neem oil won’t revive severely wilted plants, but it can help prevent further damage. Focus on improving airflow, removing diseased foliage, and watering at the base (not overhead). If wilting persists, check for root rot or bacterial infections.
Are there natural alternatives to neem oil?
Yes! Try these DIY fungicides:
- Baking soda spray: Mix 1 tsp baking soda + 1 tbsp oil + 1 tsp soap in 1 quart water. Spray weekly.
- Copper fungicide: Use organic copper-based sprays (follow label rates).
- Milk spray: Dilute 1 part milk to 9 parts water—spray on leaves for a mild antifungal effect.
Why are my spots turning brown after spraying neem oil?
Brown edges on spots are normal—they’re drying out as the fungus weakens. However, if spots expand rapidly or plants yellow, you may need a stronger fungicide (like copper soap) or a repeat neem application. Avoid spraying in direct sunlight to prevent leaf burn.
| Quick Fix? | Action |
|---|---|
| Mild spots | Neem oil + prune leaves |
| Spreading fast | Copper fungicide + improve airflow |
| Hot/humid weather | Morning watering + mulch |
Wrapping up and next steps
Clear spots on tomato leaves don’t have to spell disaster—with the right knowledge and a neem oil spray, you can turn the tide! 🌱 By identifying the issue early, gathering the right supplies, and following a consistent treatment plan, you’ll protect your plants and boost their health.
Remember, prevention is key, so stay vigilant and keep those fungal spores at bay.
Now that you’re armed with solutions, take action today! Start with a quick inspection of your tomato plants, then whip up your spray mix and apply it before the problem spreads. Your garden—and your future harvests—will thank you! 🍅✨