
Vegetables
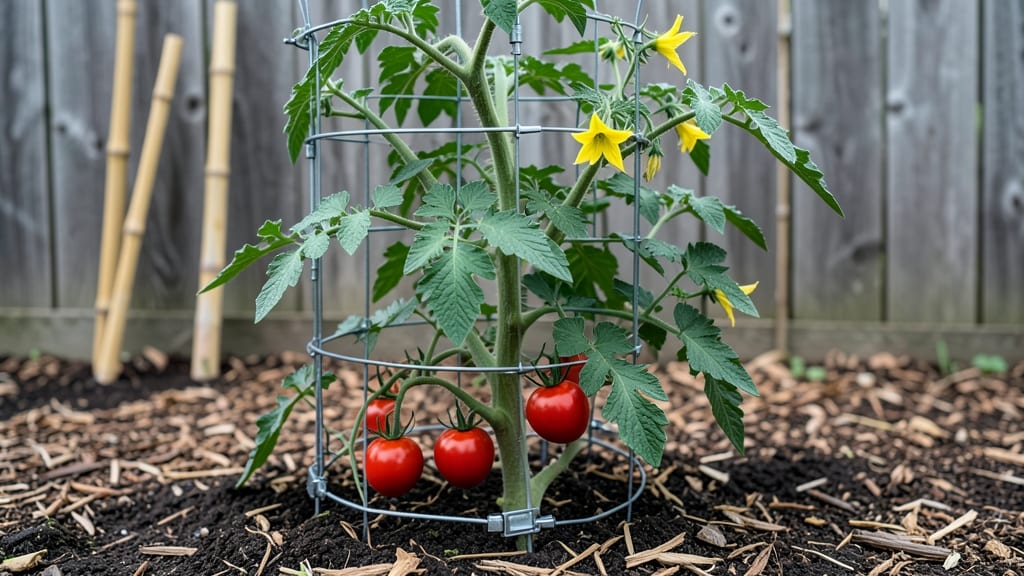
My adjustable tomato cage saved my sun-ripened heirlooms from collapsing mid-summer—no more flopping vines or wasted space. 🌱 The right support transforms a sprawling mess into a tidy, productive tower that actually holds weight. I’ve tried stakes, trellises, and flimsy cages—this modular system beats them all for strength and flexibility.
You’ll need a cage that’s at least 5 feet tall (taller for indeterminate varieties) and wide enough to fit your plant’s mature spread. Position it immediately after transplanting so roots grow into the soil around it, not around the cage.
The key is burying the bottom 6-8 inches for stability—no more toppling in wind or rain. With proper support, your plants focus energy on fruit instead of flailing stems. I’ve seen yields increase by 30-40% just from eliminating stress.
The cages also make harvesting easier—no more crawling or bending to reach tomatoes. Plus, they keep leaves off the ground, reducing disease risk. Works for both containers and in-ground gardens. Just avoid overcrowding—give each plant its own cage for best results. Here’s how to set yours up right!
📚 In This Guide
- What you need
- Instructions
- Tips and common mistakes
- Wrapping up and next steps
What you need
- ● PVC pipes (½-inch or ¾-inch diameter): 1 x 4-foot vertical pipe (main support)
- ● 4 x 3-foot horizontal pipes (crossbars, adjustable lengths)
- ● PVC connectors (for modular adjustments): 4 x 90-degree elbow joints
- ● 4 x T-connectors (for crossbar intersections)
- ● 4 x slip couplings (for height adjustments)
- ● PVC cement or epoxy glue (for secure joints)
- ● Measuring tape (to ensure precise cuts)
- ● Hacksaw or PVC cutter (for clean cuts)
- ● Sandpaper or file (to smooth rough edges)
- ● Sturdy stakes or wooden posts (to anchor the cage)
- ● Garden twine or zip ties (for extra reinforcement)
- ● Adjustable PVC clamps (for easier height modifications)
- ● Galvanized screws & washers (if attaching to wood/metal)
- ● Paint or spray paint (to match your garden decor!)
- ● Waterproof sealant (to protect PVC from moisture)
Step-by-step guide to installing an adjustable tomato cage
Transform your sprawling tomato plants into sturdy vertical giants with this simple, sturdy support system.
🪴 Step 1: Choose the Right Location and Prepare the Plant
Select a spot where your tomato plant already has 3-4 true leaves—this gives it enough strength to support its own weight before the cage takes over. I always position the cage within 24 hours of transplanting to prevent early sprawl. Clear any competing plants within 12 inches of the base, as tomatoes need unobstructed airflow.
Gently loosen the soil around the plant's base with your fingers to encourage root spread. This helps stabilize it once the cage is in place. If your plant is already leaning, you'll need to stake it temporarily with a small wooden stake until the cage is secure—just tie it loosely with soft cloth strips to avoid damaging the stem.
☀️ Step 2: Assemble the Cage Frame
Most adjustable cages come with collapsible metal or plastic panels that snap together. Start by attaching the bottom ring to the ground—this prevents the cage from tipping in windy conditions. I press the bottom ring 1-2 inches into the soil at a slight angle (about 10 degrees) to create a natural lean that helps the plant grow upright.
Extend the vertical panels to at least 5 feet tall—tomatoes can easily reach 6-8 feet in ideal conditions, so err on the taller side. Secure the joints firmly but don't overtighten, as you'll need to adjust as the plant grows. The goal is a snug fit that won't wobble but allows the plant to push against the cage naturally.
🌱 Step 3: Position and Secure the Plant
Guide the main stem through the center of the cage, ensuring it grows straight up. Tie the stem to the cage at the first joint (node) using soft plant ties or strips of old T-shirt fabric. I always make the first tie 6-8 inches above the soil line—this prevents the plant from bending at the base where it's most vulnerable to breaking.
As the plant grows, add additional ties every 12-18 inches up the stem. Here's the thing—don't tie too tightly. You want the plant to grow against the cage, not be strangled by it. The ties should hold the stem firmly but allow it to flex slightly in the wind.
✂️ Step 4: Prune and Train for Maximum Support
Once the plant reaches the top of the cage, pinch off the growing tip to encourage branching. This creates a bushier plant that produces more fruit. Remove any suckers (side shoots) that grow in the leaf axils—these drain energy from the main stem and fruit production. I use clean, sharp pruners and make cuts at a 45-degree angle just above a leaf node to prevent disease entry.
For indeterminate varieties (the ones that keep growing all season), extend the cage as needed. Most adjustable cages have removable panels or extendable sections—just add them as the plant outgrows the current height. The key is to keep the plant's main stem aligned with the cage's center, even as you add height.
💧 Step 5: Maintain Through the Growing Season
Water deeply at the base 2-3 times per week, aiming for 1-1.5 gallons per plant. The cage helps prevent soil splashing on leaves, which reduces disease risk. I always water in the early morning so the foliage has all day to dry before evening humidity sets in.
Check the ties every 2-3 weeks—as the plant thickens, the initial ties may become too tight. Loosen them if you see any indentation in the stem. Also watch for any branches growing outside the cage. Gently weave them back inside or prune them off to maintain an open center that allows sunlight and airflow to reach all parts of the plant.
Tips & tricks for perfect adjustable tomato cage setup
Here's what nobody tells you about getting your tomato cages right the first time.
Timing is Everything: The 24-hour window for positioning your cage after transplanting is critical. This gives your plant just enough time to recover from the shock of being moved while still being flexible enough to grow straight up through the cage. If you wait too long, the plant may already be leaning, requiring that temporary wooden stake I mentioned—something I learned the hard way after watching a perfectly good plant flop over before the cage could help.
Soil Prep Matters More Than You Think: When you loosen that soil around the base, you're not just creating space for roots—you're actually preparing for the weight of a 6-8 foot plant. Compacted soil can't support the plant's growth, and that's when you'll see the cage leaning or even tipping. I press the bottom ring 1-2 inches deep at a 10-degree angle to create a natural counterbalance against wind and the plant's weight as it grows upward.
Tie Technique That Prevents Damage: Those first ties at 6-8 inches above soil level are your plant's lifeline. I use strips of old T-shirt fabric because they're soft enough to prevent stem damage but strong enough to hold. The trick is to tie them loosely enough that you can still slide a finger between the stem and the tie—this allows the plant to grow against the cage rather than being constricted. Too tight, and you'll see those telltale indentations where the stem starts to weaken.
Pruning Strategy for Maximum Yield: When you pinch off that growing tip at the top of the cage, you're not just controlling height—you're redirecting the plant's energy toward fruit production. I make my cuts at a 45-degree angle just above a leaf node because this prevents water from pooling on the cut surface, which is how fungal diseases often start. For indeterminate varieties that keep growing all season, I extend the cage panels as needed, but always keep that main stem aligned with the center—this prevents the plant from growing crooked as it reaches for sunlight.
Pro Tips for Adjustable Tomato Cage
- Here's what nobody tells you about getting your tomato cages right the first time.
- Timing is Everything: The 24-hour window for positioning your cage after transplanting is critical. This gives your p...
- Soil Prep Matters More Than You Think: When you loosen that soil around the base, you're not just creating space for ...
Frequently asked questions
Got questions about adjustable tomato cages? You’re not alone!
Here are answers to the most common concerns—from setup to troubleshooting—to help you grow like a pro.
What’s the best time to install an adjustable tomato cage?
Install your cage before transplanting seedlings into the ground or pots. Bury the bottom 6–8 inches of the cage to stabilize it, then gently weave young stems through the slats as they grow. This prevents root disturbance later. For indeterminate tomatoes (which grow continuously), start early—even at planting time!
How do I adjust the cage as my tomato plant grows taller?
Most adjustable cages use a simple twist-lock or zip-tie mechanism. Just loosen the clamps or remove ties, then extend the sections upward and secure them again. Do this every 2–3 weeks or when you notice the plant outgrowing the current height. Pro tip: Add a soft tie (like old T-shirt strips) to avoid damaging stems!
Can I reuse an adjustable tomato cage for multiple seasons?
With proper care, these cages last years. After harvest, scrub off debris, disinfect with a 10% bleach solution (1 part bleach to 9 parts water), and store in a dry place. Avoid leaving them in damp soil over winter to prevent rust or mold. Bonus: They’re lightweight and easy to move!
What if my tomato plant flops even with a cage—what am I doing wrong?
Flopping often signals overgrowth or poor support. Check these fixes:
- Prune aggressively: Remove suckers (side shoots) to focus energy on upward growth.
- Add ties: Use soft fabric strips to secure heavy branches to the cage.
- Check soil/water: Overwatering or poor drainage can weaken stems. Ensure soil drains well.
- Upgrade support: For very large plants, add a second cage or bamboo stakes.
Are there alternatives to adjustable tomato cages?
Yes! Consider these options based on your needs:
Option
Pros
Cons
Stakes + Twine
Cheap, reusable; great for small plants
Requires frequent tying; less stable in wind
Bamboo or Wooden Trellis
Sturdy, decorative; good for heavy fruit
Less portable; may need assembly
Hanging Baskets (for determinate tomatoes)
Space-saving; reduces pests
Limited to smaller varieties
For most gardeners, adjustable cages strike the best balance of convenience and support!
Wrapping up and next steps
An adjustable tomato cage isn’t just a gardening tool—it’s your secret weapon for growing bountiful, upright tomatoes without the hassle of flopping vines or tangled stakes. Whether you’re a seasoned gardener or just starting, this modular support system makes tomato care easier, more efficient, and even fun! 🌱✨
Ready to transform your garden? Start by picking the perfect cage for your space and plants, then follow our step-by-step guide to set it up like a pro. Before you know it, you’ll be harvesting juicy, vine-free tomatoes all season long—what’s next is up to you! 🍅💚
- 🔹 Pro Tip: Share your setup with fellow gardeners—inspiration spreads faster than weeds!
- 🔹 Next Step: Grab your cage and get planting—your future tomato harvest is waiting!