
Companion Plants
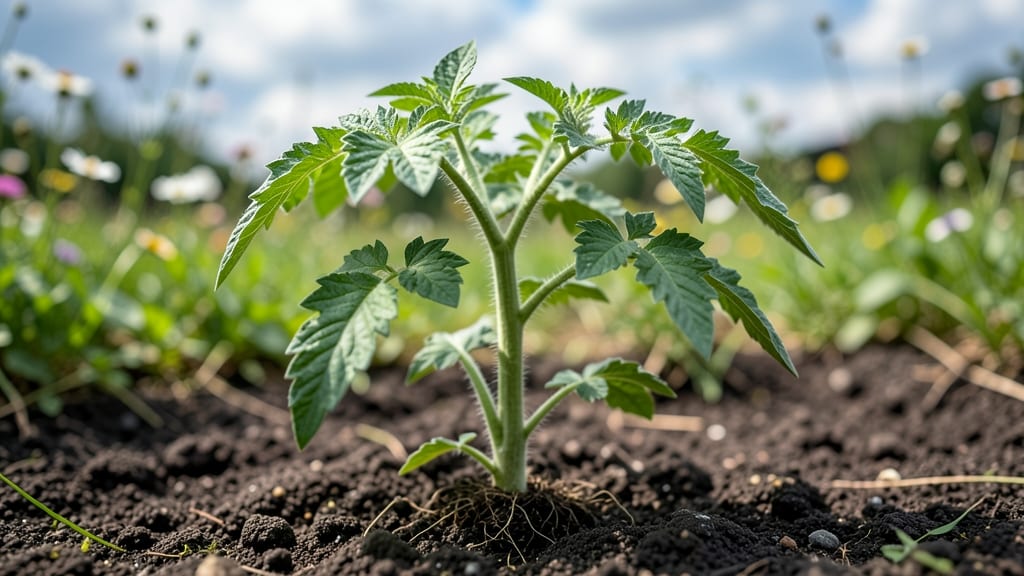
Your 6-week-old tomato plants are about to transform from delicate seedlings into sturdy, vine-climbing giants—if you act now. 🌱 Honestly, I’ve watched these little guys go from struggling sprouts to producing bushels of fruit by summer, and the secret lies in pruning and staking at this critical stage.
Skip it, and you’ll end up with leggy plants fighting for support. Do it right, and you’ll have a 6-foot-tall powerhouse that outpaces every neighbor’s garden. The first step is staking early—before those vines get too heavy.
Use sturdy bamboo stakes or cages, and tie the main stem loosely with soft plant ties (no wire!). Pruning comes next: snip off the lower leaves below the first flower cluster to improve airflow and prevent disease. This isn’t about cutting back—it’s about redirecting energy upward for stronger growth.
I’ve seen plants double in height in just two weeks after this simple tweak. By the time you’re pinching suckers (those little shoots in the leaf axils), your plants will be thriving, not just surviving.
The key is consistency: water at the base (not the leaves), fertilize lightly with a balanced feed, and keep an eye out for early pests like aphids. Trust me, the effort now means bigger harvests later—and fewer broken stems when the fruit gets heavy.
This works for determinate (bush) and indeterminate (vining) varieties, though the pruning intensity differs. Whether you’re in a raised bed or in-ground plot, these steps keep your tomatoes productive and healthy through the season. Let’s get those plants growing like they’ve got nowhere to be!
📚 In This Guide
- What you need
- Instructions
- Tips and common mistakes
- Wrapping up and next steps
What you need
- ● Tomato plants: 6-week-old seedlings (healthy, sturdy, and disease-free).
- ● Stakes or cages: 3–4 ft tall bamboo stakes (1 per plant) OR
- ● 5–6 ft tall tomato cages (1 per plant).
- ● Pruning shears: Sharp, clean, bypass pruners (sterilize with rubbing alcohol between uses!).
- ● Garden twine: 10–15 ft of biodegradable twine (¼-inch width).
- ● Support ties: Soft velcro plant ties or rubber bands (to avoid damaging stems).
- ● Gloves: Durable gardening gloves (to protect from thorns and dirt).
- ● Plant markers: Labels to track varieties (e.g., heirloom vs. cherry).
- ● Mulch: Straw or shredded leaves to retain moisture.
- ● Fertilizer: Balanced 10-10-10 or compost tea for post-pruning boost.
- ● Spray bottle: For misting plants after pruning (reduces stress!).
Step-by-step guide to pruning and staking 6-Week-old tomato plants
Here’s how I transform spindly seedlings into sturdy, productive tomato towers—no guesswork involved.
✂️ Step 1: Assess Plant Health and Remove Damaged Growth
Start by inspecting each plant closely. Look for any yellowing leaves, brown spots, or stems that feel mushy when touched—these are signs of disease or pest damage. Use clean, sharp pruning shears to snip away anything unhealthy at the base of the stem. I always sanitize my tools with rubbing alcohol first to prevent spreading pathogens.
Next, check for any suckers—those little shoots growing in the leaf axils (where the leaf meets the stem). At this stage, you can leave the first few small suckers if they’re under 1 inch long, but remove any larger ones. This ensures the plant focuses energy on its main stem and roots rather than branching out too early.
🪴 Step 2: Install Sturdy Stakes or Cages Early
Before your plants get too top-heavy, drive a 5-6 foot tall stake or insert a tomato cage (at least 4 feet in diameter) into the soil next to each plant. Bury it 1/3 of the way—this gives stability without smothering the roots. For stakes, I tie the main stem loosely to the stake with soft plant ties or old fabric strips, leaving room for the stem to thicken as it grows.
Don’t wait until the plants are lanky to stake them. The goal is to support their upward growth before they start leaning or snapping under their own weight. If you’re using cages, gently weave the stems through the wires as they grow—this prevents the plant from getting tangled later.
☀️ Step 3: Prune for Airflow and Light Penetration
Step back and look at the plant as a whole. Your goal is to create an open, airy structure that lets sunlight reach the lower leaves. Remove any leaves that are touching the soil—these can rot and attract pests. Also, trim any leaves that are shading the fruit clusters, especially on the lower 1/3 of the plant.
For indeterminate varieties (the ones that keep growing), focus on keeping the main stem strong by removing suckers that grow larger than 2 inches. For determinate varieties (bush tomatoes), you can prune more aggressively to encourage bushier growth. Always make cuts just above a leaf node or branch to encourage new growth in the right place.
💧 Step 4: Water Deeply After Pruning
After you’ve done your pruning, give the plants a deep watering—enough so that the soil is moist 6 inches down. This helps the plant recover from the stress of pruning and encourages strong root growth. Water at the base of the plant, not overhead, to avoid wetting the leaves, which can lead to fungal diseases like early blight.
I like to water in the early morning so the leaves have time to dry before evening. Avoid letting the soil dry out completely between waterings, especially in hot weather. You’ll know the moisture level is right when the top 1-2 inches of soil feel dry to the touch but the deeper soil stays damp.
⏰ Step 5: Monitor and Adjust as Plants Grow
Check your plants weekly for new suckers or signs of stress. Indeterminate tomatoes will keep producing suckers all season, so stay on top of pruning to maintain that open, airy structure. Adjust your ties or cage supports as the plants grow taller—you don’t want the stems rubbing against anything that could cause damage.
If you notice the leaves curling or yellowing, it could be a sign of overwatering, underwatering, or even nutrient deficiency. At this stage, a balanced tomato fertilizer (low in nitrogen) can give them a boost. Keep an eye out for pests like aphids or hornworms, and address them immediately to avoid long-term damage.
Tips & tricks for perfectly pruned tomato plants
Here's what nobody tells you about transforming those 6-week-old tomato seedlings into sturdy, high-yielding plants.
Tool Sanitation: I can't stress this enough—sanitize your pruning shears with rubbing alcohol between every plant. The last thing you want is spreading fungal spores or bacterial infections from one plant to another. I keep a small bottle of 70% isopropyl alcohol in my gardening toolkit for quick cleanups.
Sucker Size Matters: At this 6-week stage, you can leave suckers under 1 inch long to give your plants a slight head start, but remove anything larger. I've learned this the hard way—ignoring that 1.5-inch sucker led to a bushy plant that produced fewer tomatoes. Think of it like training a puppy: you want to guide growth, not let it run wild.
Staking Strategy: Bury your stakes or cages 1/3 of the way into the soil for stability, but don't bury them too deep. I like to use bamboo stakes because they're lightweight and biodegradable. For cages, choose ones with at least 4 feet in diameter—they give your plants room to grow without getting tangled. The key is to support growth before it becomes top-heavy.
Pruning Technique: When removing leaves, always make clean cuts just above a leaf node or branch. This encourages new growth in the right place. I use a slight downward angle when cutting to create a natural water runoff path, which helps prevent fungal infections. Think of it like making a proper haircut—clean lines prevent split ends (or in this case, split stems).
Pro Tips for 6 Week Old Tomato Plants
- Here's what nobody tells you about transforming those 6-week-old tomato seedlings into sturdy, high-yielding plants.
- Tool Sanitation: I can't stress this enough—sanitize your pruning shears with rubbing alcohol between every plant. Th...
- Sucker Size Matters: At this 6-week stage, you can leave suckers under 1 inch long to give your plants a slight head ...
Frequently asked questions
When should I start pruning my 6-week-old tomato plants?
Hold off on heavy pruning until your plants are at least 8–10 inches tall with 3–4 true leaves. At 6 weeks, focus on removing only the lower leaves (up to the first flower cluster) to encourage airflow and prevent disease. This gives your plant time to establish a strong root system first!
Do I need to stake or cage my tomato plants now, or can I wait?
You can wait until they’re taller (around 12–18 inches), but if your variety is determinate (bush-type) or your plants are top-heavy, light staking now prevents flopping. Use soft ties or small cages to avoid damaging stems. Pro tip: Wait until soil is warm (60°F+) to avoid stressing roots!
Why are my tomato plant leaves turning yellow at 6 weeks?
Yellowing leaves (chlorosis) usually mean overwatering, nutrient deficiency (like nitrogen), or poor drainage. Check soil moisture—it should be damp, not soggy. Amend soil with compost or a balanced fertilizer (10-10-10) and ensure pots/containers have drainage holes. Yellow lower leaves are normal as the plant grows!
Can I transplant my 6-week-old tomato plants outside yet?
Not yet! Wait until nighttime temps stay above 50°F (10°C) and after the last frost date in your zone. Hardening off (acclimating to outdoor conditions) takes 7–10 days. Transplant in the late afternoon to reduce shock, and water deeply afterward. Slow and steady wins the race!
What if my 6-week-old tomato plant looks leggy or weak?
Leggy plants often need more light (12–16 hours/day) or less fertilizer (too much nitrogen = floppy growth). Move to a sunniest spot (6+ hours of direct sun) and switch to a low-nitrogen, high-phosphorus fertilizer (like 5-10-10) to boost root and flower development. No stress—fix it now, and your plant will bounce back!
Still stumped? Drop your question in the comments—we’ve got you covered!
Wrapping up and next steps
Your 6-week-old tomato plants are ready to thrive with the right care—pruning and staking are your secret weapons for a bountiful harvest! 🌱 By following these steps, you’ll guide them toward stronger stems, better airflow, and explosive growth.
Now’s the time to act: grab your tools, roll up your sleeves, and watch your plants reach new heights!
Next up? Monitor progress weekly and adjust as needed—your green thumbs are about to get even greener! 🌟