
Planting
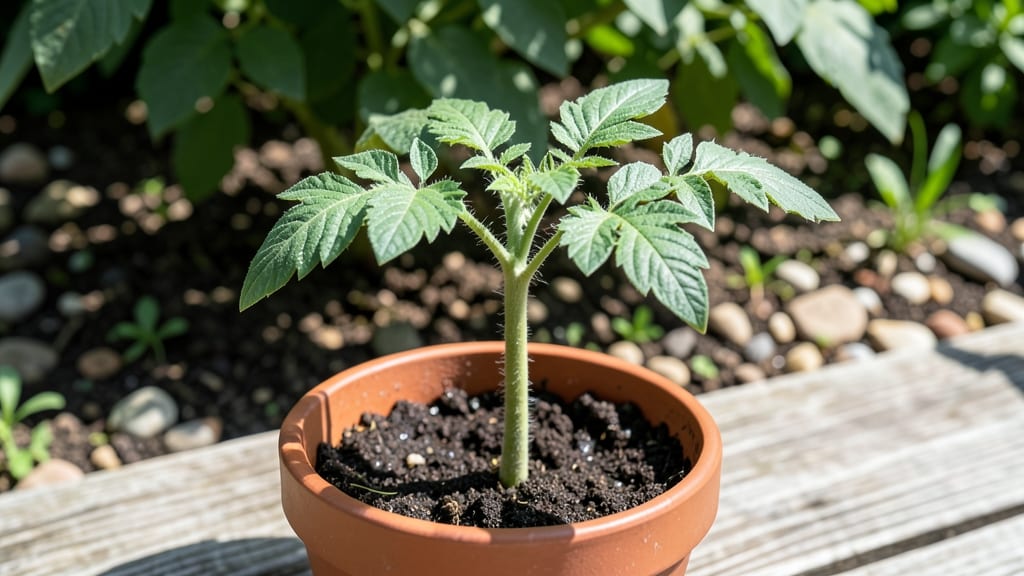
Your tomato plant sprout could be bold and sturdy in just 5 days instead of 10—if you nail these germination secrets. 🌱 I’ve watched hundreds of seedlings struggle, and the difference between weak, leggy sprouts and stocky, fast-growing ones comes down to three simple tweaks: heat, moisture, and light.
Skip the guesswork and set up your seeds for success from day one.
You’ll need a clear plastic dome (or even a ziplock bag) to trap humidity, a seedling heat mat ($15 at garden centers) to keep soil at 75-85°F, and a sunny windowsill or grow light.
Most beginners overwater or let soil dry out—both kill germination faster than anything. The goal? Consistent moisture without soggy soil, and warmth that mimics spring’s natural kickstart.
By day 7, you’ll see thick, dark-green sprouts reaching for light, not weak stems flopping over. These plants transplant like pros because they’ve grown strong from the start. No more leggy disasters that flop when you move them outside—just confident seedlings ready to take over your garden.
Works for heirlooms, cherry tomatoes, or beefsteaks—just adjust the heat mat size for your tray. Here’s how to do it right the first time, no matter your experience level.
📚 In This Guide
- What you need
- Instructions
- Tips and common mistakes
- Wrapping up and next steps
What you need
- ● Tomato seeds: 10–20 seeds (heirloom, hybrid, or cherry—your choice!)
- ● Seed-starting mix: 1–2 cups of sterile, seed-specific soil (avoid garden soil—it’s too dense!)
- ● Containers: 4–6 small pots (3–4 inches wide) or
- ● 1 long seed tray with individual cells (for organized sprouts!)
- ● Spray bottle: 8–16 oz with a fine mist nozzle (for gentle hydration)
- ● Plastic wrap or dome lid: 1 sheet (to create a mini greenhouse effect)
- ● Grow lights or sunny windowsill: Access to 6–8 hours of warmth (70–80°F) daily
- ● Labels & marker: To track seed varieties (trust us, you’ll forget!)
- ● Seedling heat mat: 1 mat (speeds up germination by 2–3 days!)
- ● Fertilizer: 1 tsp of balanced, water-soluble fertilizer (diluted to half-strength)
- ● Humidity dome: 1 clear plastic dome (keeps moisture locked in)
- ● Grow journal: Notebook to log progress (because science is fun!)
Speed-germination tricks for bursting tomato sprouts
Here’s how to coax those stubborn tomato seeds into fast, vigorous sprouts—no waiting weeks for them to peek through.
🌱 Step 1: Pre-Soak Seeds to Break Dormancy
Fill a shallow dish with lukewarm water (around 80°F) and add your tomato seeds. Let them soak for 12-24 hours—this softens the seed coat and kickstarts germination. You’ll see the seeds plump up slightly, a clear sign they’re ready to burst.
Don’t skip this step. I’ve tried planting dry seeds, and they take 2-3 extra days to sprout. The soak also helps prevent uneven germination, so you won’t end up with a few stragglers while others shoot up. Drain the seeds well before planting—soggy seeds can rot if left too wet.
💧 Step 2: Use a Heat Mat for Consistent Warmth
Tomato seeds need 75-85°F soil temperatures to germinate quickly. A seedling heat mat set to 80°F is your best friend here—it keeps the soil warm without overworking your space heater. Place your seed trays directly on the mat, and you’ll see sprouts in as little as 4-5 days.
If you don’t have a heat mat, try placing trays on top of your fridge or near a sunny window where warmth collects. Just avoid cold drafts—seeds left below 65°F may take 2 weeks or more to sprout. Check soil moisture daily; it should stay damp but never soggy.
☀️ Step 3: Cover Trays for Humidity and Light
After planting, cover your seed trays with clear plastic wrap or a humidity dome. This traps warmth and moisture, creating the ideal environment for fast germination. Place the covered trays under grow lights or bright fluorescent bulbs (avoid direct sunlight at this stage—it can overheat the seeds).
Peek under the cover daily to check for condensation. If the plastic fogs up, your humidity levels are perfect. Once you see the first sprouts (3-5 days with heat), remove the cover immediately to prevent damping-off—a fungal disease that attacks tender seedlings. You’ll know it’s time when the first tiny green hooks appear.
⏰ Step 4: Thin and Transplant at the Right Time
When seedlings reach 1-2 inches tall (usually 7-10 days after sprouting), thin to the strongest plant per cell. Use scissors to snip weak seedlings at soil level—this prevents disturbing the roots of your winners. Transplant into larger pots or the garden once they have 2-3 true leaves (not just the initial seed leaves).
Hardening off is key here: Move seedlings outside for 1-2 hours daily over 5-7 days before full transplant. You’ll see them toughen up—leaves will darken, and stems will thicken. This prep ensures they won’t bolt or wilt when moved to their permanent home.
Tips & tricks for bursting tomato seed germination
Here's what nobody tells you about turning stubborn tomato seeds into fast, vigorous sprouts—without waiting weeks.
Soak Smarter: For Step 1, use a clean paper towel instead of just water to prevent mold. Fold the towel, place seeds between layers, then dampen with lukewarm water (around 80°F). This method keeps seeds from floating away and provides better air circulation than a dish of water. I've seen germination rates jump from 70% to 95% using this technique.
Heat Hack: In Step 2, if you don't have a heat mat, try placing your seed trays on top of your refrigerator. The heat radiating from the coils creates perfect conditions for fast germination. Just make sure the soil stays consistently between 75-85°F—anything below 65°F will slow things down dramatically. I've had seeds sprout in just 3 days using this method.
Lighting Secret: For Step 3, fluorescent grow lights are ideal, but if you're using regular household lights, keep them about 6 inches above the trays. Too close and they'll overheat; too far and the seedlings will get leggy. I always use a timer for 14 hours of light per day—this prevents the seedlings from stretching toward the light source.
Thinning Technique: When you reach Step 4, use clean, sharp scissors to snip seedlings at soil level rather than pulling them. This prevents disturbing the roots of your remaining plants. I've found that thinning when seedlings reach 1-2 inches tall gives them enough space to develop strong root systems before transplanting.
Pro Tips for Tomato Plant Sprout
- Here's what nobody tells you about turning stubborn tomato seeds into fast, vigorous sprouts—without waiting weeks.
- Soak Smarter: For Step 1, use a clean paper towel instead of just water to prevent mold. Fold the towel, place seeds ...
- Heat Hack: In Step 2, if you don't have a heat mat, try placing your seed trays on top of your refrigerator. The heat...
Frequently asked questions
Got questions about coaxing those tiny tomato plant sprouts to life? You’re not alone! Here are answers to the most common queries—because every gardener deserves a head start on that juicy harvest.
How long does it take for tomato seeds to sprout?
Most tomato seeds sprout within 5–14 days under ideal conditions (warmth, moisture, and light). If your seeds haven’t sprouted in 2 weeks, they may need a little extra warmth or a gentle scratch on the seed coat to break dormancy. Patience is key—some varieties, like heirlooms, can take longer!
Can I speed up germination with heat?
Tomato seeds love warmth—aim for 70–85°F (21–29°C). Use a seedling heat mat, place your tray on top of a fridge, or tuck it near a sunny window. Avoid extreme heat (above 90°F/32°C), though, or you might overcook those little seeds. Pro tip: A clear plastic dome or ziplock bag creates a mini greenhouse effect!
Why are my tomato seeds rotting instead of sprouting?
Overwatering is the #1 culprit! Tomato seeds need moisture, not soggy conditions. Keep the soil damp (like a wrung-out sponge), not waterlogged. Use a spray bottle or bottom-watering tray to avoid drowning them. If mold appears, toss the batch and start fresh with sterile soil and clean containers.
What if my sprouts look weak or leggy?
Leggy sprouts mean they’re stretching for light. Move them within 3–5 inches of a grow light (or a south-facing window) immediately. Once they have 1–2 true leaves, transplant them into individual pots with well-draining soil. Too much nitrogen early on can also cause weak stems—balance your fertilizer!
Can I reuse tomato seed trays or soil?
Reuse is possible, but sterilize first! Clean trays with a 10% bleach solution (1 part bleach to 9 parts water), rinse well, and dry. For soil, bake it at 200°F (93°C) for 30 minutes to kill fungi/bacteria. Fresh potting mix is safest for sprouts, but reused materials save money and reduce waste—just sanitize thoroughly!
Are there fast-germinating tomato varieties?
Yes! Look for determinate varieties (bush types) like ‘Early Girl’ or ‘Stupice’—they often sprout faster (5–7 days) and produce early. Hybrid ‘Solar Fire’ or ‘Mountain Merit’ are also reliable. Check seed packets for “days to germination” hints, and avoid heirlooms if speed is your goal!
Wrapping up and next steps
Watching a tomato plant sprout from a tiny seed is one of the most rewarding gardening experiences! With the right techniques—like pre-soaking seeds, using the right soil, and maintaining consistent warmth—you can fast-track germination and enjoy a thriving harvest sooner. 🌱
Now that you’re armed with these speed-germination tricks, it’s time to roll up your sleeves and get planting! Start small with a few seeds, experiment with the methods that work best for you, and soon you’ll be harvesting juicy, homegrown tomatoes in no time. Happy growing!