
Planting
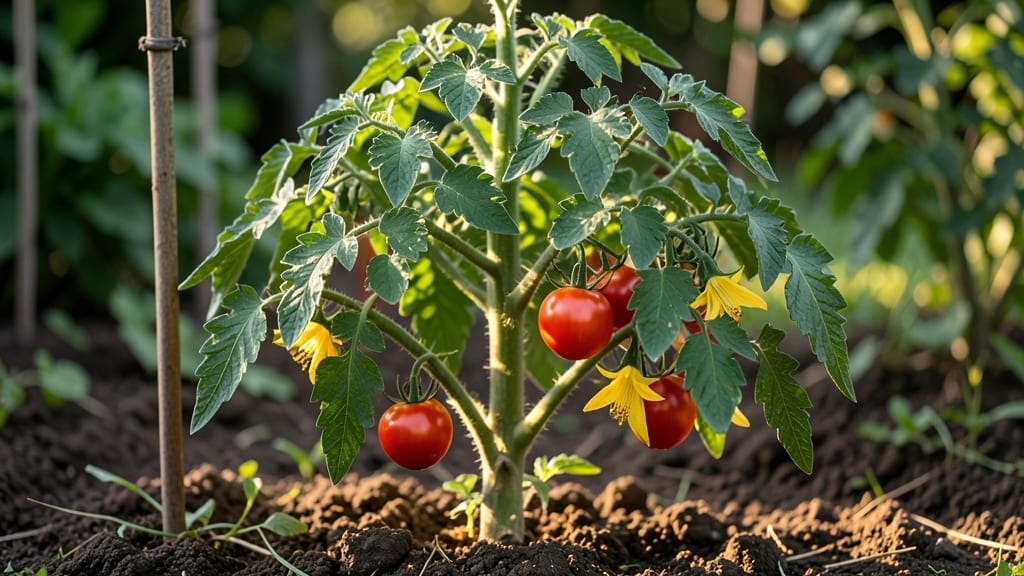
Your tomato plant's dirt isn't just dirt—it's the foundation for 50-pound tomatoes that taste like summer. 🌱 Most gardeners make the mistake of assuming regular yard soil will work, but tomatoes need loose, nutrient-rich soil that drains fast and holds moisture without suffocating roots.
The right mix keeps plants strong, prevents blossom-end rot, and ensures steady fruit production all season long.
Start with a 50/50 blend of high-quality potting mix and compost, then add a handful of perlite or coarse sand for drainage. Tomatoes thrive in slightly acidic soil (pH 6.2–6.8), so test your soil first—amend with lime if it's too acidic or sulfur if it's too alkaline.
A slow-release fertilizer or worm castings mixed in provides the steady nutrients tomatoes crave without burning roots.
You'll see the difference immediately: plants grow taller, produce more flowers, and fruit sets faster. The secret isn't just the nutrients—it's the aeration that prevents root rot and encourages strong root systems. Even in containers, this mix works, giving you control over drainage and fertility in small spaces.
For poor soil? Don't dig in place—raise beds instead. Fill them with your custom mix to avoid compaction and ensure every plant gets the perfect growing medium. The upfront work pays off in heavier harvests and fewer problems down the line. Ready to transform your soil?
📚 In This Guide
- What you need
- Instructions
- Tips and common mistakes
- Wrapping up and next steps
What you need
- ● Potting soil or garden soil: 50% of your mix (use high-quality, well-draining soil like Miracle-Gro Potting Mix or FoxFarm Ocean Forest)
- ● Compost: 25% (homemade or store-bought, like Espoma Garden-Tone)
- ● Perlite or vermiculite: 10% (for aeration—1 part perlite to 1 part vermiculite works well)
- ● Worm castings: 10% (boosts nutrients—Worm Power Worm Castings is a great pick)
- ● Balanced fertilizer (10-10-10 or 5-10-10): 1 tbsp per 5 gallons of mix (e.g., Jack’s Classic Blend)
- ○ Lime (optional but helpful): ½ cup per 5 gallons (to adjust pH if soil is acidic)
- ● 5-gallon bucket or wheelbarrow (for mixing)
- ● Garden trowel or shovel
- ● Gloves (to keep hands clean!)
- ○ pH testing kit (optional but recommended—aim for 6.0–6.8)
- ● Containers or raised beds (if not planting in-ground)
How to create the perfect soil mix for tomato plants
Here's my go-to blend for tomatoes—it's the secret behind my heavy-producing plants every season.
🌱 Step 1: Start With a Base of Quality Potting Soil
Begin with 4 gallons of premium potting mix—never garden soil, which compacts and suffocates roots. I swear by a mix labeled "tomato and vegetable" for its balanced nutrients. Fill a clean wheelbarrow or large container with this base, then give it a gentle fluff with a garden fork. You want it loose enough that a handful crumbles easily between your fingers.
This isn't just about drainage—it's about creating air pockets that roots need to breathe. If you press the soil too firmly, you'll see roots struggle later, leading to stunted plants. Think "light as a cloud" when you handle it.
🌿 Step 2: Add Organic Matter for Nutrient Density
Tomatoes are heavy feeders, so I blend in 2 gallons of well-aged compost—the rich, dark kind that smells earthy, not sour. Spread it evenly over the potting mix and mix thoroughly with your hands or fork. You'll notice the texture becomes even looser and darker. This is where the magic happens for fruit development.
Here's the thing—don't use fresh manure or compost that still has chunks. You want something fully decomposed that won't burn delicate roots. If your compost has visible undecomposed bits, sift it first. The goal is a uniform, crumbly texture that holds moisture without becoming soggy.
💧 Step 3: Incorporate Perlite for Ideal Drainage
Measure out 1 gallon of perlite—this is non-negotiable for tomatoes. Sprinkle it evenly over the mix and work it in with your hands until every shovelful contains visible white flecks. You're aiming for about 20-25% perlite in the final blend. This prevents waterlogging while keeping moisture available.
I like to give the mix a final fluff after adding perlite. Run your fingers through it—it should feel like damp sandpaper, not compacted clay. If it feels too dense, add a little more perlite. The right mix will drain quickly when watered but still hold moisture when squeezed.
✂️ Step 4: Finish With a Slow-Release Fertilizer Boost
Stir in 1 cup of 10-10-10 slow-release fertilizer (or equivalent organic granules) until completely distributed. This gives tomatoes a steady nutrient supply without risking burn from concentrated doses. I like to mix it in last so it's evenly dispersed throughout the final blend.
Here's where it gets fun—watch how the mix darkens slightly and takes on a slightly granular texture. This is your visual cue that nutrients are now accessible to roots. Give the mix one final fluff to ensure no fertilizer pockets remain. The perfect blend should look like rich, dark chocolate cake batter—moist but not wet, crumbly but not powdery.
☀️ Step 5: Test and Adjust Moisture Before Use
Fill a small container with your mix and water it thoroughly until moisture runs from the bottom. Let it sit for 10 minutes, then squeeze a handful. It should hold together when compressed but not drip water. If it's too wet, add more perlite. If it's too dry, add a bit more compost.
This final check is crucial. Tomatoes hate soggy roots but also won't thrive in dry, crumbly soil. You want a mix that feels like a well-wrung sponge—moist enough to support root growth but with enough air space to prevent rot. Once you've got this balance, you're ready to fill your tomato beds or containers.
Tips & tricks for perfect tomato plant soil
This blend isn't just dirt—it's the foundation for your tomato's future bounty. Here's how to elevate it from good to spectacular.
Texture Matters: When you reach Step 1 and fluff the 4 gallons of potting mix, resist the urge to pack it down. Pressing creates dense pockets that suffocate roots. Instead, think "light as a cloud"—if you squeeze a handful and it holds together but crumbles easily, you're golden. This airy structure is what allows roots to breathe and spread properly, setting the stage for vigorous growth.
Compost Quality Check: In Step 2, that 2 gallons of compost should smell earthy, not ammonia-like. If it has visible undecomposed bits, sift it first—those chunks can create hot spots that burn delicate tomato roots. I like to test compost by pressing it in my palm: it should feel like damp, dark soil, not gritty or fibrous. This is your quality control moment before blending.
Perlite Precision: The 1 gallon of perlite in Step 3 isn't just filler—it's your moisture regulator. After mixing, run your fingers through the blend: it should feel like damp sandpaper, not compacted clay. If it feels too dense, add another ½ cup of perlite. This 20-25% perlite ratio is critical—it prevents waterlogging while keeping moisture available, which is especially important during those hot summer months when tomatoes need consistent hydration.
Fertilizer Distribution: When you stir in that 1 cup of 10-10-10 fertilizer in Step 4, don't just sprinkle it on top. Work it in thoroughly until every shovelful has visible granules. I like to do this last so I can see the final blend's texture—it should look like rich chocolate cake batter, not patchy. This even distribution ensures your tomatoes get steady nutrients without risking burn from concentrated doses.
Pro Tips for Tomato Plant Dirt
- This blend isn't just dirt—it's the foundation for your tomato's future bounty.
- Texture Matters: When you reach Step 1 and fluff the 4 gallons of potting mix, resist the urge to pack it down.
- Compost Quality Check: In Step 2, that 2 gallons of compost should smell earthy, not ammonia-like.
Frequently asked questions
What’s the ideal soil pH for tomato plants?
Tomatoes thrive in slightly acidic to neutral soil with a pH of 6.0–6.8. Test your dirt with a pH kit—if it’s too high (alkaline), amend with sulfur or peat moss. Too low (acidic)? Add lime. Balanced pH = happier roots and bigger yields!
Can I reuse last year’s tomato plant dirt?
Reusing soil can work, but it risks disease buildup (like blight) and nutrient depletion. Refresh it by mixing in 25% fresh compost or topsoil. Avoid reusing soil from diseased plants—sterilize with heat or replace entirely.
How often should I fertilize tomato plants?
Feed tomatoes every 2–4 weeks once flowers appear, using a balanced fertilizer (10-10-10) or tomato-specific mix. Overdoing it burns roots—stick to the label! For organic growers, try fish emulsion or worm castings mid-season.
What’s the best dirt mix for container-grown tomatoes?
Containers need well-draining, nutrient-rich soil. Mix:
- 60% high-quality potting mix
- 20% compost
- 10% perlite or vermiculite (for aeration)
- 10% slow-release fertilizer (like bone meal)
Add a 5-gallon bucket per tomato plant—smaller pots = stunted growth.
Why are my tomato leaves yellowing, even with good dirt?
Yellow leaves (chlorosis) often signal nutrient deficiencies or overwatering. Check for:
- Nitrogen deficiency (lower leaves yellow? Add compost or fish emulsion).
- Iron deficiency (new leaves pale? Use chelated iron or acidic amendments).
- Root rot (mushy stems? Improve drainage and reduce watering).
Prune affected leaves to redirect energy to healthy growth.
Do I need to add mulch to tomato plant dirt?
Absolutely! Mulch (straw, grass clippings, or wood chips) locks in moisture, regulates soil temp, and suppresses weeds. Apply a 2–3 inch layer around plants, keeping it 2 inches away from stems to avoid rot.
Wrapping up and next steps
Growing tomatoes is a rewarding journey, and the perfect dirt mix is your secret weapon for a thriving garden! 🌱 By blending organic matter, nutrients, and proper drainage, you’ve set the stage for a bountiful, flavorful harvest.
Whether you’re a seasoned gardener or just starting, remember: healthy soil equals happy plants—and that means juicy, sun-ripened tomatoes for you to enjoy.
Ready to roll up your sleeves? Grab your gloves, pick your favorite tomato variety, and start planting! 🌿 Need a refresher on planting tips? Check out our guide for step-by-step success—your garden (and taste buds) will thank you!