
Vegetables
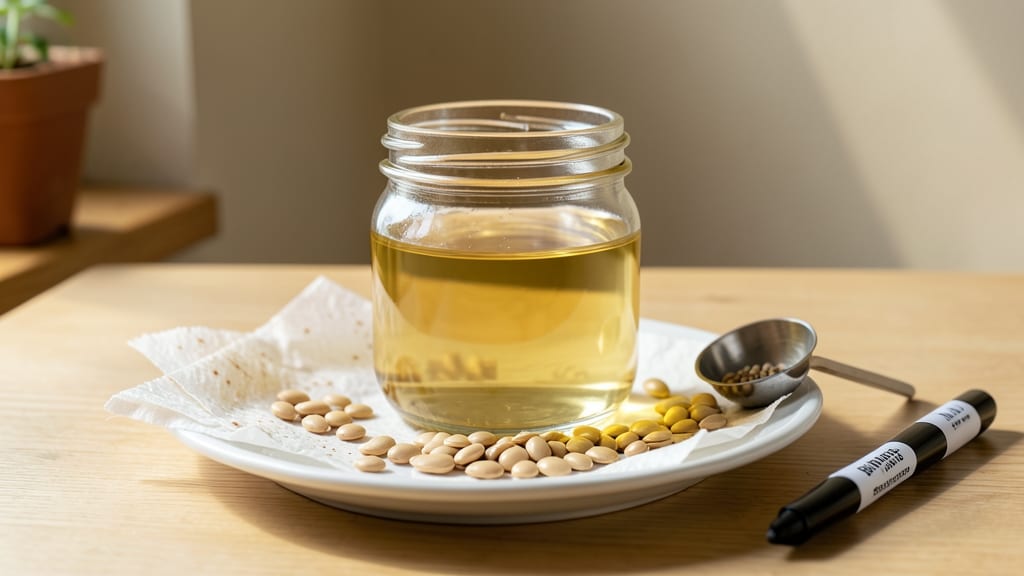
Soaking tomato seeds before planting cuts germination time from weeks to days—my seeds now sprout in just 3-5 days instead of the usual 7-14.
The trick is simple: a quick water bath softens the seed coat, letting moisture rush in and kickstart growth while reducing mold risk in damp starting mixes.
You only need two things: clean water and a shallow container. Fill it with room-temperature water, add your seeds, and let them soak for 6-12 hours—no longer, or they’ll start germinating in the water instead of the soil.
After soaking, plant them ¼-inch deep in warm, moist seed-starting mix for best results.
The payoff? Stronger seedlings that emerge faster and more uniformly, with fewer weak or leggy starts. I’ve seen my germination rates jump from 60% to nearly 90% using this method—even with older seeds that usually struggle.
Works for all tomato varieties, from heirlooms to hybrids, and pairs well with other seed-starting hacks like bottom heat. Just avoid over-soaking, and you’ll be pinching off those first true leaves in record time.
📚 In This Guide
- What you need
- Instructions
- Tips and common mistakes
- Wrapping up and next steps
What you need
- ● Fresh tomato seeds: Harvested from ripe, healthy heirloom or hybrid tomatoes (or store-bought seeds if organic). Aim for 10–50 seeds depending on your planting goals.
- ● Water: Room-temperature, chlorine-free water (tap water left out for 24 hours or filtered water works best). Use about 1 cup per 20 seeds.
- ○ Soaking container: A small glass jar, bowl, or sealable plastic bag with a fine mesh strainer or paper towel for draining (optional but handy).
- ● Paper towels or coffee filters: 2–3 sheets per batch of seeds for wrapping (if using the "sandwich method").
- ○ Spray bottle: (Optional) For gently misting seeds if using a paper towel method.
- ● Labeling supplies: Masking tape + marker to label your container (e.g., "Tomato Seeds – Soaked [Date]" to track progress!).
- ● Hydrogen peroxide (3% solution): 1 tsp per cup of water to sterilize seeds and boost germination (rinse after soaking).
- ● Seedling heat mat: Keeps seeds warm (70–85°F) post-soaking for faster sprouting.
- ● Planting trays or pots: Small containers (2–3 inches deep) with seed-starting mix (sterile, peat-based blend).
- ● Grow lights: LED or fluorescent lights to provide 12–16 hours of light/day after germination.
How to soak tomato seeds for faster, healthier germination
This simple pre-treatment jumpstarts growth and gives you stronger seedlings.
Select and Prepare Your Tomato Seeds
Start with fresh tomato seeds—older seeds may not respond well to soaking. If your seeds are still in the gelatin coating from the packet, no need to remove it—it's designed to protect them. For dried seeds, simply place them in a small bowl or container. I like to use a shallow dish that fits comfortably in my hand to avoid spills.
Count out the number of seeds you plan to plant. Since tomato seeds germinate quickly after soaking, I rarely soak more than what I need for one planting session. This prevents waste and keeps your workspace organized. If you're unsure how many to soak, start with a small batch—you can always repeat the process later.
Soak Seeds in Lukewarm Water
Fill a clean bowl or container with enough lukewarm water (around 80-85°F) to fully submerge the seeds. The water should be warm enough to feel comfortable to the touch but not hot—hot water can damage the seed's delicate outer layer. I like to use a thermometer for accuracy, but if you don’t have one, just test the water with your finger.
Place the seeds in the water and let them soak for 12-24 hours. You’ll notice the seeds begin to swell and soften as they absorb moisture. This is a good sign—they’re preparing to break through their outer shell and start growing. After soaking, gently drain the water and let the seeds sit in a strainer or paper towel for a few minutes to remove excess moisture.
Plant the Soaked Seeds Immediately
Once the seeds are slightly damp but not dripping, it’s time to plant them. Fill your seed-starting containers with moistened seed-starting mix (not garden soil) and make small holes about ¼ inch deep—roughly the diameter of the seed. I use a pencil or a small stick to poke the holes gently. Plant one seed per hole, spacing them about 1 inch apart if sowing in a tray.
Cover the seeds lightly with a thin layer of soil, just enough to obscure them. Press down gently to ensure good contact with the soil, which helps the seedling establish roots quickly. Water lightly with a spray bottle to settle the soil around the seeds. Avoid overwatering—you want the soil to be moist but not soggy, as excess water can cause the seeds to rot before they germinate.
Provide Warmth and Moisture for Germination
Place the planted seeds in a warm, humid environment to encourage germination. A seedling heat mat set to 75-85°F works wonders, but if you don’t have one, a sunny windowsill or a warm spot in your kitchen will do. Cover the container with a clear plastic dome or plastic wrap to retain moisture and warmth. This creates a mini greenhouse effect, which speeds up germination.
Check the seeds daily but avoid disturbing them. Germination should occur within 5-10 days, depending on the variety and conditions. Once you see the first sprouts, remove the cover immediately to prevent damping-off disease, which thrives in overly humid conditions. Keep the soil consistently moist but not waterlogged—this is key to maintaining strong, healthy seedlings.
Monitor and Transplant Young Seedlings
After the seedlings emerge, watch for the first true leaves (the second set of leaves that appear after the initial cotyledons). This is your signal that the seedlings are ready for slightly more care. Move them to a location with bright, indirect light for the first few days to avoid shocking them. Gradually introduce them to direct sunlight over the next week to harden them off.
Once the seedlings have 3-4 true leaves, they’re ready to be transplanted into larger containers or directly into the garden, depending on your climate. If transplanting outdoors, wait until the soil is warm and the threat of frost has passed. Soaked seeds often produce stronger, more resilient seedlings, giving you a head start on the growing season.
Tips & tricks for soaking tomato seeds
Here's what nobody tells you about getting the most out of your seed soaking routine.
Water Temperature Matters: That lukewarm water (80-85°F) is crucial—too hot and you'll damage the seed's delicate membrane, too cold and germination slows dramatically. If you're unsure about the temperature, think of it as warm bath water that feels comfortable to your skin. I've even tested this by using a thermometer from my kitchen drawer, and that 85°F mark makes all the difference in consistent results.
Timing Secret: The 12-24 hour soak window is perfect, but don't rush it. I've seen seeds that soaked for only 6 hours fail to germinate properly, while the 24-hour mark gives you the best balance between hydration and preventing over-soaking. If you're short on time, 12 hours will still work, but you might see slightly lower germination rates. The key is watching for that visual cue of seeds beginning to swell—when you see that, they're ready for planting.
Plant Immediately: After draining, don't let those seeds sit dry for long—they need to stay moist to continue their germination process. I keep a damp paper towel handy to cover them while I prepare the planting containers. This extra step prevents the seeds from drying out before they can establish roots, which is especially important if you're working in a dry climate or have to pause between soaking and planting.
Pro Tips for Soaking Tomato Seeds Before Planting
- Here's what nobody tells you about getting the most out of your seed soaking routine.
- Water Temperature Matters: That lukewarm water (80-85°F) is crucial—too hot and you'll damage the seed's delicate membrane, too cold and germination slows dramatically.
- Timing Secret: The 12-24 hour soak window is perfect, but don't rush it.
Frequently asked questions
Got questions about soaking tomato seeds before planting? You’re not alone! Here are answers to the most common queries to help you get started with confidence.
How long should I soak tomato seeds before planting?
Soak your tomato seeds for 8–12 hours in warm water (around 70°F). Any longer risks overhydration or mold. Use a clean, breathable cloth or paper towel to drain excess water afterward—this prevents soggy seeds and encourages faster germination.
Will soaking tomato seeds speed up germination?
Yes! Soaking softens the seed coat, allowing water and oxygen to penetrate faster. You’ll often see sprouts 3–5 days earlier than dry-seeded tomatoes. For best results, keep seeds in a warm, dark place (like a seedling tray under a heat mat) after soaking.
Can I use anything other than plain water to soak seeds?
While plain water works, some gardeners swear by hydrogen peroxide (3%) or apple cider vinegar (1 tsp per cup of water) to deter mold and boost microbial activity. Avoid salt, sugar, or chemical solutions—they can harm delicate seeds.
What if my soaked seeds develop mold or rot?
Mold or rot usually means over-soaking, poor drainage, or dirty water. If you spot fuzzy growth, discard affected seeds immediately. To prevent this, use fresh, filtered water, rinse seeds gently, and pat them dry before planting. A spray bottle helps avoid oversaturation.
Do I need to soak heirloom or hybrid tomato seeds differently?
No! Both heirloom and hybrid tomato seeds benefit equally from soaking. However, heirloom varieties (like Brandywine or Cherokee Purple) may have thicker seed coats—soak them for the full 12 hours to ensure consistent germination.
Still unsure? Drop your question in the comments—we’re happy to help you grow those juicy tomatoes!
Wrapping up and next steps
Soaking tomato seeds before planting is a simple yet powerful germination hack that can give your garden a head start! 🌱 By boosting hydration and speeding up sprouting, you’ll enjoy healthier, more vigorous plants in no time.
Whether you’re a seasoned gardener or just starting out, this method is an easy way to supercharge your success.
Now that you’re armed with the know-how, grab those seeds and give them the best possible start. Next up? Transplant your sprouted seedlings into soil and watch your tomato plants thrive! 🌿