
Vegetables
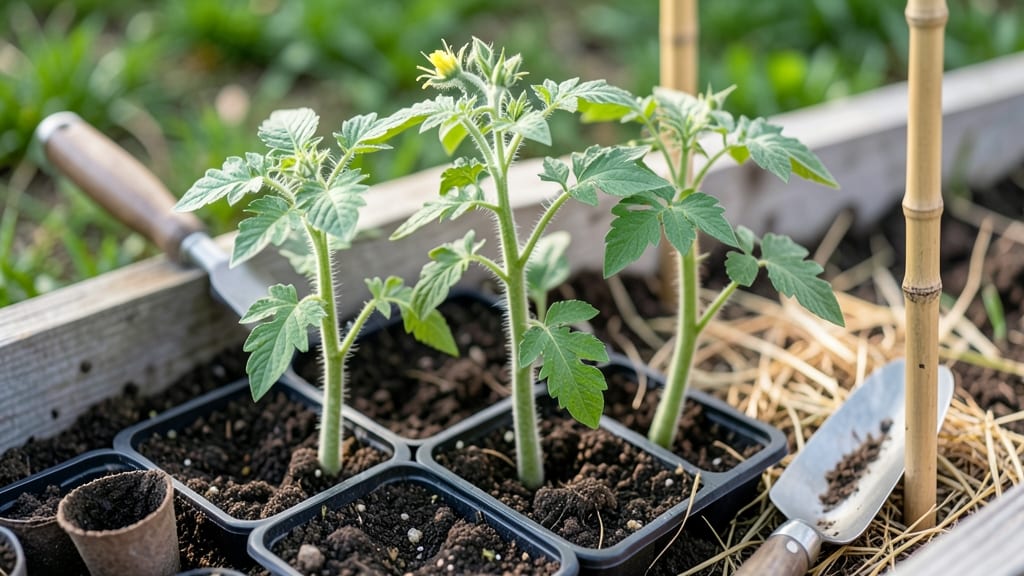
Planting tomato seedlings at the right time means the difference between a bountiful harvest and sad, stunted vines. 🌱 I’ve learned that waiting too long or rushing the process can leave you with leggy, weak plants that struggle to catch up—especially in cooler zones where the growing season feels too short.
The key is matching your seedlings’ readiness with your local frost dates and soil temperatures. Most gardeners aim for after the last frost when nighttime temps stay above 50°F, but zones 3-5 need extra patience—those seedlings might need a black plastic mulch or cold frame to warm up.
Meanwhile, zones 6-10 can often plant earlier, as long as the soil isn’t still icy.
Once you’ve got the timing right, the rest is about giving those roots room to stretch and a sturdy start. Plant deep enough that two-thirds of the stem is buried, and space them 18-24 inches apart for in-ground or 12-16 inches for containers.
The payoff? Stronger stems, more flowers, and tomatoes that ripen before the first frost hits.
Containers need extra care—drainage holes are non-negotiable, and you’ll want to stake or cage them early to avoid flopping. And here’s the secret: water deeply at planting, then let the soil dry slightly between waterings.
Too much love too soon, and you’ll drown those roots before they even take hold.
📚 In This Guide
- What you need
- Instructions
- Tips and common mistakes
- Wrapping up and next steps
What you need
- ● Tomato seedlings: 3–6 healthy, disease-free plants (choose varieties suited to your hardiness zone, like Early Girl for cooler zones or Celebrity for heat).
- ● Well-draining potting mix: 10–20 lbs (for containers) or enough to amend garden beds (aim for a blend with perlite or compost).
- ● Containers or garden bed: Containers: 5-gallon pots or larger (1 plant per container).
- ● Garden beds: Loose, fertile soil with a pH of 6.0–6.8 (test kit recommended).
- ● Fertilizer: Balanced organic fertilizer (10-10-10 or compost) or slow-release tomato-specific granules.
- ● Watering can or hose with a gentle nozzle: For even moisture without disturbing seedlings.
- ● Stakes or cages: 6–8 ft tall (1 per plant to support vines).
- ● Mulch: Straw or shredded leaves (2–3 inches) to retain moisture and suppress weeds.
- ● Grow lights: If starting indoors or in low-light zones (12–16 hours/day).
- ● Soil thermometer: To ensure soil is at least 60°F (15°C) before planting.
- ● Plant markers: Labels or sticks to track varieties.
- ● Epsom salt: 1 tbsp per plant (dissolved in water) for magnesium boost.
- ● Row covers: Lightweight fabric to protect seedlings from pests or late frosts.
Step-by-Step guide for planting tomato seedlings
Here's how to get your tomato seedlings off to a strong start—no matter your growing zone.
🌱 Step 1: Time Your Planting by Last Frost Date
Tomatoes thrive in warm soil and air, so timing is everything. Calculate your last frost date (find it using the USDA zone map) and plant seedlings 2-3 weeks after that date—this gives soil time to warm to 60°F+. In cooler zones (3-5), wait until mid-May or later; in warmer zones (7-10), you can plant as early as March or April.
I always check soil temperature with a probe—cool soil slows root growth and invites disease. If your zone has unpredictable spring weather, use row covers or cold frames to protect seedlings until nighttime temperatures stay above 50°F. This extra warmth makes all the difference for root establishment.
🪴 Step 2: Prepare the Planting Site
Choose a location with 6-8 hours of full sun daily—tomatoes need intense light to produce fruit. Work 2-3 inches of compost into the top 6 inches of soil to improve drainage and fertility. If your soil is heavy clay, mix in 1 part sand or perlite per 3 parts soil to prevent waterlogging, which tomatoes hate.
Dig holes just deep enough to accommodate the seedling's root ball without bending the stem. Space seedlings 18-24 inches apart in rows 3 feet apart—this gives plants room to sprawl and improves airflow, reducing disease risk. I like to mark planting spots with sticks or a garden hose laid out in advance to maintain even spacing.
☀️ Step 3: Transplant Seedlings Carefully
Gently remove the seedling from its container, holding the leaves—not the stem—to avoid damage. Loosen the roots if they're circling the pot (this prevents girdling as the plant grows). Place the seedling in the hole so the top of the root ball sits 1 inch below soil level—this encourages strong root growth and prevents the stem from rotting.
Fill the hole with soil and press lightly around the base to eliminate air pockets. Water deeply until moisture reaches 6 inches down, then let the soil settle for 24 hours before watering again. Avoid wetting the leaves—water at the base to prevent fungal diseases like early blight. You'll know you've done it right when the soil looks evenly moist and the seedling stands upright without leaning.
🌿 Step 4: Support and Mulch for Long-Term Success
Install a 6-foot tall stake or cage at the time of planting to support the vine as it grows. Tie the main stem loosely to the stake with soft plant ties—you'll adjust as the plant grows. I use biodegradable fabric ties because they won't cut into the stem as plastic can.
Spread 2-3 inches of organic mulch around the base, keeping it 2 inches away from the stem to prevent rot. Mulch retains moisture, suppresses weeds, and keeps soil temperatures stable. Water lightly after mulching to help it settle. Within a week, you'll see new growth—this is your signal that the transplanting stress is over and the plant is thriving.
⏰ Step 5: Monitor and Adjust for Zone-Specific Needs
After planting, check soil moisture daily for the first week—tomatoes need 1-2 inches of water per week, but more during fruit set. In hot zones (7-10), water in the morning to reduce evaporation; in cooler zones (3-5), water in the evening to retain heat. You'll know your watering is right when the soil feels damp 2 inches down but not soggy.
Fertilize lightly with a balanced organic fertilizer (like 5-5-5) 2 weeks after transplanting to encourage leaf growth, then switch to a high-phosphorus formula (like 3-6-3) when flowers appear to boost fruit production. Watch for pests like hornworms or aphids—remove them by hand or use neem oil if needed. With consistent care, your tomatoes will reward you with robust vines and abundant harvests by mid-summer.
Tips & tricks for thriving tomato seedlings
These zone-specific strategies will help your tomato seedlings establish roots and grow into productive vines—no matter where you garden.
Soil Temperature Secret: The 60°F soil temperature threshold in Step 1 is non-negotiable for root growth. I've learned this the hard way—cool soil slows metabolism and invites fungal diseases. Use a soil thermometer to verify before planting. In cooler zones, consider black plastic mulch laid down a week before transplanting to warm the soil faster. This simple trick can shave weeks off your growing season in marginal climates.
Root Ball Technique: When transplanting in Step 3, gently tease apart any circling roots you find. I use my fingers to loosen them without damaging the delicate root tips. This prevents girdling as the plant matures. For container-grown seedlings, make a vertical slice down the root ball with a knife if roots are densely packed—this encourages outward growth immediately after planting.
Watering Wisdom: That 24-hour settling period after initial watering in Step 3 is crucial for soil compaction. I've seen seedlings topple over when watered too soon because the soil hasn't stabilized. Water deeply again only after you can press your finger 2 inches down and feel moisture without resistance. This ensures proper root-to-soil contact from day one.
Zone-Specific Mulching: In hot zones (7-10), use reflective mulch like straw or grass clippings to prevent soil temperatures from exceeding 90°F, which stresses roots. In cooler zones (3-5), opt for dark mulches like black plastic or compost to absorb and retain heat. The 2-3 inch layer recommendation works for both, but the type makes all the difference in extreme climates.
Pro Tips for Planting Tomato Seedlings
- These zone-specific strategies will help your tomato seedlings establish roots and grow into productive vines—no matt...
- Soil Temperature Secret: The 60°F soil temperature threshold in Step 1 is non-negotiable for root growth. I've learne...
- Root Ball Technique: When transplanting in Step 3, gently tease apart any circling roots you find. I use my fingers t...
Frequently asked questions
Got questions about planting tomato seedlings? You’re not alone! Here are some of the most common concerns—plus quick, actionable answers to help you grow like a pro.
What’s the best time to plant tomato seedlings in my zone?
Timing depends on your USDA hardiness zone and last frost date. For most zones (5-10), wait until after the last frost when soil temps hit 60°F+. Use this zone-specific guide to pinpoint your ideal window—typically 2-4 weeks after frost for warm zones, or 4-6 weeks for cooler ones.
Can I plant tomato seedlings too deep?
Nope! Burying seedlings too deep can suffocate them, but up to ⅔ of the stem is ideal. This encourages stronger root growth. Just avoid covering the foliage—it needs light to photosynthesize. Pro tip: If your seedlings are leggy, burying deeper helps stabilize them while promoting roots.
How long does it take for tomato seedlings to establish after transplanting?
Seedlings usually take 1-2 weeks to recover and start growing vigorously after transplanting. Watch for new leaves and firm stems—signs they’re thriving! Avoid overwatering during this phase; soil should stay moist but not soggy. Patience pays off—healthy roots mean bigger yields later!
What if my tomato seedlings wilt right after planting?
Don’t panic! Wilting can happen due to transplant shock, underwatering, or root damage. First, water deeply (1 inch of water) and keep soil consistently moist. If wilting persists, check for overheating (shade cloth helps) or pests. Most seedlings bounce back in 24-48 hours if conditions improve.
Can I use potted tomato seedlings instead of bare-root ones?
Potted seedlings (with root balls) often transplant better because their roots stay intact. Just water them well before planting and loosen the pot if roots are circling. For bare-root seedlings, trim any damaged roots and soak in water for 10-15 minutes before planting to reduce shock. Both methods work—choose what fits your garden style!
Wrapping up and next steps
Planting tomato seedlings successfully boils down to timing, preparation, and a little love—and you’ve got all the tools to make it happen! Whether you’re in a warm Zone 3 or a balmy Zone 10, following the right schedule ensures robust vines and a bountiful harvest. 🌱
Now that you’re ready, take the next step: mark your calendar, gather your supplies, and get those seedlings in the ground (or pots!) before the window closes. Happy planting—your future salads, sauces, and sandwiches are waiting! 🍅✨