
Planting
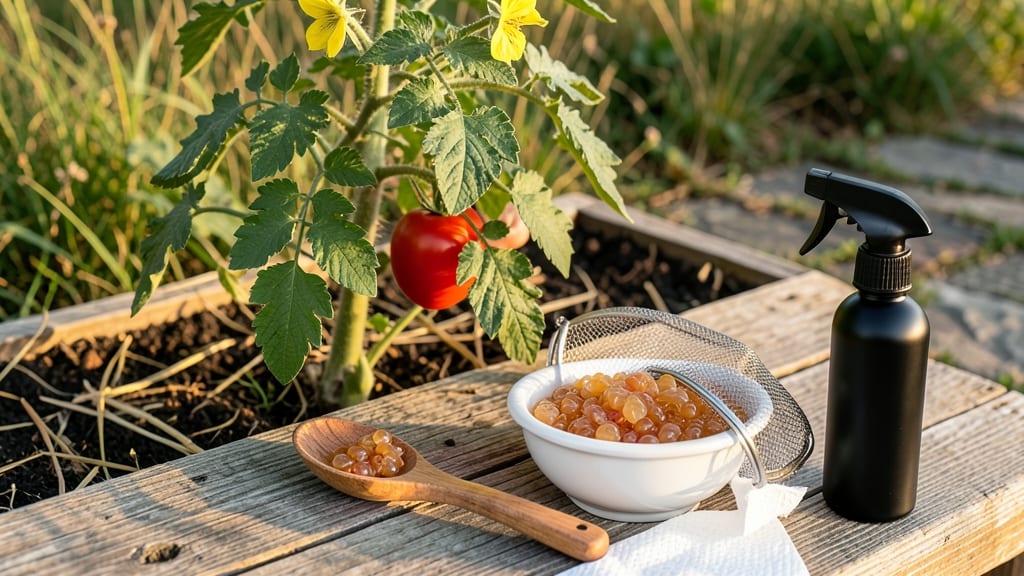
Saving tomato seeds from your harvest ensures next year’s plants will thrive with the same flavor and vigor. 🌱 I’ve saved seeds for five seasons now, and the fermentation method is the simplest way to ensure high germination rates—no fancy equipment needed, just ripe tomatoes and patience.
The process starts with selecting heirloom varieties, since hybrid tomatoes won’t produce true-to-type seeds. After scooping out the gel-like pulp and fermenting it in a jar for 3-5 days, you’ll rinse away the moldy debris and scoop out the clean, viable seeds.
This method works even in small batches, making it perfect for beginners or those with limited space.
Once dried on a paper towel, your seeds will be ready for storage in an airtight container. By spring, you’ll have a stash of seeds that promise plants just like the ones you grew this year—bold flavor, strong stems, and disease resistance—without the cost of store-bought varieties.
Troubleshooting is easy: if seeds mold during fermentation, simply rinse and repeat. For best results, label your containers with the variety and harvest date. This method saves money, preserves genetics, and connects you to the garden’s cycle in a tangible way.
📚 In This Guide
- What you need
- Instructions
- Tips and common mistakes
- Wrapping up and next steps
What you need
- ● Ripe tomato – Choose a fully mature, healthy tomato (the riper, the better!)
- ● Small bowl or jar – A clean container (8 oz or larger) to hold the seed mixture
- ● Spoon or butter knife – For scooping out seeds and pulp
- ● Water – Enough to cover the seeds (room temperature or slightly warm)
- ● Fine-mesh strainer or coffee filter – For rinsing seeds (a kitchen strainer works great!)
- ● Paper towel or clean cloth – To dry seeds before storage
- ● Small envelope or seed packet – To store dried seeds (label with the tomato variety!)
- ● Pencil or marker – For labeling your seeds
- ● Fermentation jar with lid – If you prefer a sealed container for fermentation (32 oz or larger)
- ● Labeling tape or sticky notes – For easy identification of seed varieties
- ● Desiccant packet – To keep seeds extra dry during storage
- ● Notebook – To log tomato varieties, harvest dates, and growing notes
Step-by-Step instructions for saving tomato seeds
Here’s my go-to method for saving seeds from your best tomatoes—no fancy tools, just a little patience.
🌱 Step 1: Select and Extract the Seeds
Pick a ripe tomato with the best flavor and disease resistance from your garden. Cut it open and scoop out the gel-filled seeds into a small bowl. The gel contains enzymes that help seeds germinate, so don’t rinse it off yet. I like to use a spoon to scrape out every last seed—this ensures you capture all the genetic potential.
Let the mixture sit for 2-3 days in a warm spot. You’ll see the gel break down and the seeds sink to the bottom while the pulp ferments on top. This fermentation process removes the chemical that prevents seeds from germinating prematurely. If you notice mold or a foul smell, toss it and start fresh—this means the mixture is too old.
💧 Step 2: Rinse and Dry the Seeds
After 2-3 days, pour the mixture through a fine-mesh strainer or cheesecloth to separate the seeds from the fermented pulp. Rinse the seeds under cool water until the water runs clear—this removes any remaining gel and debris. Spread them on a paper towel or clean screen in a single layer. I like to use a baking sheet for even airflow.
Let them dry for 3-5 days in a warm, dry place away from direct sunlight. The seeds are ready when they’re hard and dark—no moisture left at all. If they stick together, spread them out again. Properly dried seeds will last 3-5 years in a cool, dark place like a sealed envelope in your freezer.
⏰ Step 3: Store Seeds for Next Year
Once completely dry, transfer the seeds to a small envelope or airtight container. Label it with the tomato variety and the year—trust me, you’ll forget by spring! Store them in a cool, dark place like a pantry or freezer. If you’re using a freezer, place the envelope in a ziplock bag first to prevent moisture buildup.
Here’s the thing—seeds stored in the freezer can last decades, but room-temperature storage is fine for 3-5 years. Just avoid humidity, which can cause mold. I keep mine in a labeled jar with silica gel packets to absorb any moisture that might sneak in.
☀️ Step 4: Test Germination Before Planting
Before you commit to planting, do a quick germination test. Moisten a paper towel, place 10 seeds in the center, and fold it over. Keep it in a warm spot (around 70-75°F) and check daily. You should see sprouts in 5-7 days. If fewer than 80% sprout, your seeds may need more drying time or storage adjustments.
This test gives you confidence that your saved seeds are viable. If germination is poor, try storing them in the freezer next time—cold temperatures slow aging and preserve viability longer. Once you confirm good germination, you’re ready to plant just like store-bought seeds!
Tips & tricks for perfect tomato seed saving
These simple tricks will help you maximize your seed-saving success and avoid common pitfalls.
Fermentation Time is Critical: The 2-3 days of fermentation in Step 1 is where the magic happens. Place your bowl in a spot that stays consistently warm—like on top of your fridge—rather than near drafts. You'll know it's ready when the seeds sink and the pulp smells tangy (not rotten). I've ruined batches by leaving them too long, so check daily after day 2.
Drying Secrets for Long-Term Viability: When drying seeds in Step 2, avoid direct sunlight—it can overheat and crack the seeds. Instead, use a warm, dry spot like a windowsill with sheer curtains. I like to prop open a cabinet door with a small fan blowing gently across them. Properly dried seeds should feel hard as pebbles and make a rattling sound when shaken in their container.
Storage Wisdom for Next Year: For the longest shelf life, store your seeds in the freezer after the 3-5 day drying period. I use small glass jars with silica gel packets to absorb any moisture. Label each jar with the tomato variety AND year—next spring, you'll be so glad you did! Room temperature storage works too, but check seeds every 2 years for viability.
Pro Tips for Save Tomato Seeds To Plant
- These simple tricks will help you maximize your seed-saving success and avoid common pitfalls.
- Fermentation Time is Critical: The 2-3 days of fermentation in Step 1 is where the magic happens. Place your bowl in ...
- Drying Secrets for Long-Term Viability: When drying seeds in Step 2, avoid direct sunlight—it can overheat and crack ...
Frequently asked questions
Got questions about saving tomato seeds? You’re not alone! Here are answers to the most common concerns—plus a few pro tips to ensure your seeds stay viable and ready for next year’s garden.
Can I save seeds from hybrid tomatoes?
Unfortunately, most hybrid tomatoes (like those labeled "F1") won’t produce true-to-type seeds. The resulting plants may not match the parent’s flavor, size, or disease resistance. Stick to heirloom or open-pollinated varieties for reliable seeds. Check the seed packet or ask your local nursery!
How long do saved tomato seeds last?
Under ideal conditions (cool, dry, dark), tomato seeds can stay viable for 4–6 years. However, germination rates drop after 2–3 years. For best results, label and date your seed packets, then test a few seeds annually to check viability.
What if my seeds mold or smell bad during fermentation?
Mold or a strong, foul odor means fermentation went too far—usually from leaving the mixture too long or in warm conditions. Discard the batch and start fresh. For safety, ferment for 2–3 days max at room temperature (60–70°F).
Do I need to dry seeds in the sun, or is shade better?
Sun drying speeds up the process and kills some pathogens, but shade works too—just expect it to take 3–5 days longer. Avoid humidity; opt for a well-ventilated spot (like a mesh screen or paper towel). Pro tip: Stir seeds daily to prevent clumping!
How should I store seeds long-term?
Store seeds in a cool (50–60°F), dry place (like a fridge or airtight container with silica gel). Label with the variety name and date. For extra protection, seal in paper envelopes (not plastic) to prevent moisture buildup. Test a few seeds yearly to confirm viability!
Can I save seeds from store-bought tomatoes?
Yes, but only if they’re heirloom varieties—store-bought hybrids (like Roma or Cherry) rarely yield true seeds. Ask the store or check labels for "open-pollinated" or "heirloom." If unsure, try fermenting a few seeds anyway—you might get lucky with a surprise heirloom!
Wrapping up and next steps
Saving tomato seeds is a rewarding way to ensure heirloom quality and cut costs for next year’s garden! With just a few simple steps—fermentation, drying, and storing—you’ll have fresh, viable seeds ready to grow into thriving plants. 🌱
Now that you’re equipped with the know-how, there’s no better time to start! Grab a ripe tomato, follow the foolproof method, and soon you’ll be harvesting seeds like a pro. Happy gardening—and may your future harvests be bountiful!