
Vegetables
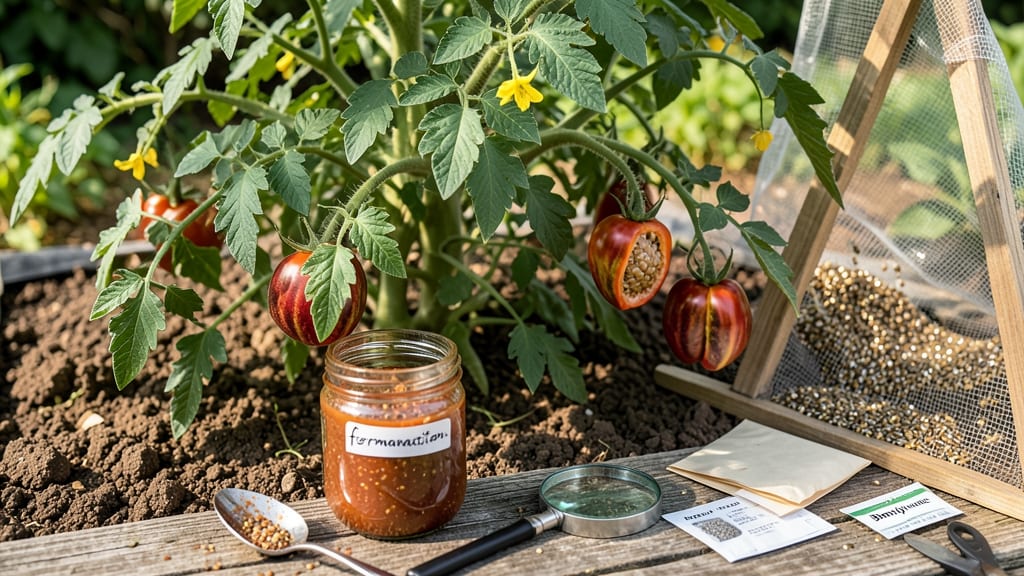
Saving heirloom tomato seeds isn't just a skill—it's a way to preserve the flavors and traits of your favorite varieties for next year. 🌱 I've saved seeds from my prized Cherokee Purple and Brandywine tomatoes for years, and the fermentation trick ensures you get the highest germination rates possible.
This method separates viable seeds from the pulp, giving you clean, dry seeds ready for storage.
The process starts with ripe, healthy tomatoes—none of that green or overripe fruit. You'll scoop out the gel and seeds, ferment them in water for a few days, then rinse away the scum that rises to the top.
What's left are seeds that dry quickly and store well for years. It's a simple method that professional seed savers swear by, and it works just as well in your kitchen as it does in a lab.
By the end of the week, you'll have a jar of seeds that could grow into plants identical to the ones you loved this season. The payoff? A garden filled with tomatoes that taste exactly like the ones you've been dreaming about, year after year.
Plus, you'll be contributing to the preservation of heirloom biodiversity—one seed at a time.
Whether you're saving seeds from a single plant or a whole garden, this method scales easily. The key is patience and attention to detail, but the results make it worth every minute. Ready to learn the step-by-step process that turns your harvest into next year's plants?
📚 In This Guide
- What you need
- Instructions
- Tips and common mistakes
- Wrapping up and next steps
What you need
- ● Ripe heirloom tomatoes: Choose fully mature, disease-free tomatoes (3–5 should suffice for a good seed yield).
- ● Sharp knife or scissors: For slicing open the tomatoes cleanly.
- ● Non-metallic bowl or fermentation jar: A glass or ceramic container (8–16 oz) to hold the tomato pulp and seeds. Never use aluminum or copper!
- ● Water: Distilled or dechlorinated (let tap water sit out for 24 hours to off-gas chlorine).
- ● Fine-mesh strainer or cheesecloth: For rinsing seeds gently.
- ● Paper towels or coffee filters: Unbleached and seed-free for drying.
- ● Small paper envelopes or seed packets: Label them clearly for storage!
- ● Plastic spoon or spatula: For scooping pulp without scratching your bowl.
- ● Rubber band or string: To secure cheesecloth over the strainer.
- ● Funnel: For transferring seeds into envelopes neatly.
- ● Notebook or seed-saving log: To track varieties, harvest dates, and germination notes.
- ● Desiccant packet: For long-term seed storage (place in envelopes to absorb moisture).
Step-by-step instructions for saving heirloom tomato seeds
Here's how to preserve your favorite heirloom varieties using the simple fermentation method.
🌱 Step 1: Select and Extract Ripe Seeds
Pick fully ripe tomatoes that are soft to the touch and have deep color—these yield the best seeds. Slice them open and scoop out the gel-like pulp containing seeds into a clean bowl. Avoid cracked or bruised tomatoes, as they may carry disease.
Mash the pulp gently with your fingers until it releases the seeds. You'll see a cloudy liquid with seeds suspended in it. Let this mixture sit at room temperature for 2-3 days. Watch for mold—if you see fuzzy spots, discard the batch and start fresh with new tomatoes.
💧 Step 2: Ferment the Seeds for Clean Separation
After 48 hours, the good seeds will sink to the bottom while the fermented pulp and bad seeds float. Pour off the cloudy liquid carefully, leaving only the settled seeds and a thin layer of liquid. You'll notice the seeds are now clean and white.
Add fresh water to the bowl and swirl gently. Let the seeds settle again for 30 minutes, then pour off the water. Repeat this rinsing process 3-4 times until the water runs clear. This removes the last traces of gel that can inhibit germination.
☀️ Step 3: Dry the Seeds Thoroughly
Spread the cleaned seeds on a clean, dry paper towel or seed-saving screen. Place them in a warm, dry spot with good airflow—70-75°F works best. Keep them out of direct sunlight to prevent overheating, which can crack the seeds.
Stir the seeds gently every 24 hours to ensure even drying. They're ready when completely dry and brittle to the touch—this usually takes 5-7 days. Store them in a sealed envelope or airtight container in a cool, dark place for up to 5 years.
⏰ Step 4: Test Germination Before Storing
Before final storage, test a small sample of seeds by placing 10 seeds on a damp paper towel in a sealed plastic bag. Keep them in a warm spot and check daily. You should see sprouts within 5-10 days—if fewer than 80% germinate, your seeds may need additional drying time.
If germination is poor, repeat the drying process with fresh seeds. Once you confirm viability, label your seed packets with the variety name and harvest date. This simple test ensures you'll have healthy plants when you're ready to grow next season.
Tips & tricks for perfect heirloom tomato seed preservation
Here's what nobody tells you about keeping heirloom tomato seeds viable—these tricks make all the difference between seeds that sprout and seeds that disappoint.
The Fermentation Factor: That 48-hour fermentation in Step 2 isn't just waiting—it's actively cleaning your seeds. The good seeds sink while moldy or bad seeds float. Here's the thing: if your kitchen is cooler than 70°F, extend this to 72 hours. Watch for bubbles forming on the surface—this means fermentation is working!
Mold Prevention: I learned this the hard way after ruining three batches. If you see fuzzy spots during the 2-3 day fermentation, don't panic—just toss the whole batch and start fresh. The key is using ripe, disease-free tomatoes from the start. A small bowl of apple cider vinegar (1 tablespoon per cup of water) can help prevent mold if you're worried about contamination.
Drying Strategy: Those 5-7 days of drying are critical, but don't let seeds sit in direct sunlight—it'll bake them into useless husks. I use a mesh screen over a cardboard box with a fan blowing gently underneath. This creates perfect airflow at 70-75°F without overheating. Stirring every 24 hours prevents clumping and ensures even drying throughout.
Germination Test: The 10-seed test in Step 4 is your quality control. If fewer than 80% sprout within 10 days, your seeds need more drying time. Here's what I do: place the damp paper towel in a sealed bag with a few drops of water—this creates a humid environment that mimics spring conditions, giving your seeds the best chance to sprout.
Pro Tips for Save Heirloom Tomato Seeds
- Here's what nobody tells you about keeping heirloom tomato seeds viable—these tricks make all the difference between ...
- The Fermentation Factor: That 48-hour fermentation in Step 2 isn't just waiting—it's actively cleaning your seeds. Th...
- Mold Prevention: I learned this the hard way after ruining three batches. If you see fuzzy spots during the 2-3 day f...
Frequently asked questions
Got questions about saving heirloom tomato seeds? You’re not alone—many gardeners do too! Here are answers to the most common ones to help you succeed:
Can I save seeds from hybrid tomatoes?
No, you cannot reliably save seeds from hybrid tomatoes (marked "F1" or "hybrid"). Hybrid seeds produce offspring that won’t match the parent plant’s traits. Stick to heirloom varieties for true-to-type seeds!
How long do tomato seeds need to ferment?
Fermentation typically takes 2–4 days at room temperature (70–75°F). Stir the mixture daily to speed up the process. If mold appears (fuzzy spots), discard it immediately—fermentation is done when the liquid smells rotten (not pleasant, but normal!).
What’s the best way to dry tomato seeds?
Spread seeds on a paper towel or parchment paper in a single layer. Let them dry in a warm, dark, well-ventilated spot (like a seed tray) for 7–10 days. Avoid direct sunlight—it can bake them too fast. Test dryness by trying to snap a seed in half; if it cracks, it’s ready!
When is the best time to harvest seeds from tomatoes?
Wait until tomatoes are fully ripe (or overripe) and soft to squeeze out seeds easily. Avoid green or firm tomatoes—they won’t yield viable seeds. The best time is late in the season when most fruit is mature.
What if my seeds don’t germinate?
Several factors could be at play: old seeds (save fresh ones!), improper drying (too moist or moldy), or poor storage (keep seeds in a cool, dry place). Try stratifying (chilling) or soaking seeds overnight in water to boost germination. If all else fails, check for pest damage during drying.
Wrapping up and next steps
Saving heirloom tomato seeds is a rewarding way to preserve genetic diversity and ensure a bountiful harvest year after year! By mastering the fermentation trick, you’ve unlocked a simple, natural method to separate viable seeds from their gel—no fancy tools required. 🌱
Now that you’re equipped with the know-how, why not take the next step? Try saving seeds from your favorite heirloom varieties this season and share the joy with fellow gardeners. Your future plants—and their flavors—will thank you!