
Vegetables
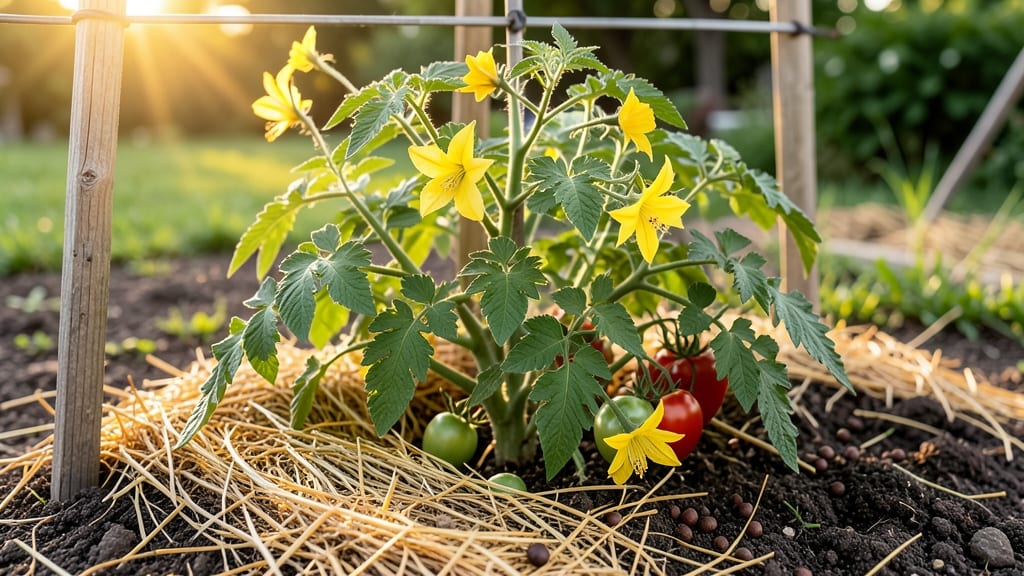
Promoting tomato growth starts with soil that feels like a five-star hotel for roots. 🌱 The secret isn't just throwing in fertilizer—it's creating the perfect balance of nutrients, moisture, and aeration that makes vines reach for the sky.
My first tomato plants struggled until I learned this: healthy soil equals explosive growth, and the science behind it is simpler than you think.
You'll need just a few key ingredients: well-draining soil mix (not compacted garden dirt), a steady watering routine that keeps roots happy but not soggy, and a balanced fertilizer that feeds both leaves and fruit.
The magic happens when you combine these with smart pruning and companion planting—like basil next to tomatoes—to boost flavor and productivity. I went from 10 pounds of tomatoes to over 50 in just two seasons using these same techniques.
What you'll end up with is vines that grow with aggressive energy, producing clusters of tomatoes that outpace anything you've grown before. The leaves stay dark green, the stems thicken, and you'll see fruit set within weeks—not months.
The best part? You'll solve common problems like blossom drop and stunted growth before they even start.
This works for both backyard gardens and container setups, whether you're growing heirlooms or hybrids. Let's get those tomatoes thriving—here's exactly how to make it happen.
📚 In This Guide
- What you need
- Instructions
- Tips and common mistakes
- Wrapping up and next steps
What you need
- ● Tomato seeds or seedlings: Choose disease-resistant varieties (e.g., Early Girl, Beefsteak, or Cherry Roma). Start with 3–6 plants for a small garden or 10+ plants for a bountiful harvest.
- ● High-quality potting mix or garden soil: Use a sterilized, well-draining mix (e.g., 50% compost, 30% peat moss or coco coir, 20% perlite or vermiculite). Avoid garden soil with high clay content.
- ● Fertilizer: Balanced organic fertilizer (10-10-10 or 5-5-5): 1–2 lbs per 100 sq ft (applied at planting and mid-season).
- ○ Slow-release granular fertilizer (e.g., Osmoote or Alfalfa meal): 1 cup per plant (optional but great for long-term growth).
- ● Calcium source (e.g., crushed eggshells, lime, or gypsum): 1 tbsp per plant to prevent blossom-end rot.
- ● Mulch: 2–3 inches of straw, wood chips, or grass clippings to retain moisture and suppress weeds.
- ● Support structures: Cages (5–6 ft tall) or stakes (6+ ft long) for indeterminate varieties.
- ○ Trellis or tomato towers for vertical growth (optional but space-saving!).
- ● Garden trowel or transplanting spade (for digging holes 12–18 inches deep).
- ● Watering can or hose with a gentle spray nozzle (avoid overhead watering to prevent disease).
- ● Pruning shears (for removing suckers and dead leaves).
- ● pH testing kit (ideal soil pH: 6.0–6.8).
- ● Sunlight access: 6–8+ hours of direct sunlight daily (tomatoes are sun-worshippers!).
- ○ Optional but helpful: Drip irrigation system for consistent moisture.
- ● Epsom salt (1 tbsp per gallon of water) for magnesium boosts.
- ● Compost tea or mycorrhizal fungi to enhance root health.
Step-by-step soil strategies to supercharge tomato vines
Here’s how I turn average tomato plants into vigorous, fruit-heavy vines—no fancy fertilizers needed.
🌱 Step 1: Test and Amend Soil for Nutrient Density
Start by checking your soil’s pH and nutrient levels with a simple test kit. Tomatoes thrive in slightly acidic soil with a pH of 6.2–6.8. If your soil tests higher (alkaline), mix in 2–3 pounds of elemental sulfur per 100 square feet to lower the pH gradually. I’ve found that adding 1–2 inches of compost before planting boosts organic matter and microbial activity, which tomatoes love—they’ll send out roots faster and stronger.
For existing beds, work in aged manure or worm castings (about 1–2 gallons per plant) to add nitrogen and phosphorus. Avoid fresh manure—it burns roots and can introduce pathogens. If your soil feels compacted, loosen it to 12 inches deep to encourage deep root growth. You’ll see healthier stems and better water uptake within weeks.
💧 Step 2: Water Deeply and Consistently
Tomatoes hate moisture stress, so water deeply 1–2 times per week (depending on rainfall) to encourage roots to grow downward. Aim for 1–1.5 inches of water per week, delivered at the base of the plant—not overhead. I use a soaker hose or drip irrigation to keep leaves dry, which prevents fungal diseases like early blight. You’ll know you’re doing it right when the top 2–3 inches of soil feel dry to the touch before watering again.
Avoid letting the soil dry out completely—this causes blossom-end rot and stunted growth. Mulch with 2–3 inches of straw or shredded leaves to retain moisture and regulate soil temperature. Mulched plants stay healthier and produce more consistently, especially in hot climates.
☀️ Step 3: Provide Balanced Fertilization
Feed tomatoes with a balanced fertilizer (like 10-10-10) at planting, then switch to a low-nitrogen, high-phosphorus formula (like 5-10-10) when flowers appear. I mix 1 tablespoon of fertilizer per gallon of water and apply it every 2–3 weeks during the growing season. Too much nitrogen leads to leafy growth at the expense of fruit—watch for lush foliage but few tomatoes, and cut back on nitrogen.
For organic growers, use compost tea or fish emulsion (about 1 tablespoon per gallon of water) every 4–6 weeks to boost microbial activity. You’ll notice stronger stems, darker green leaves, and more robust flowering within 2–3 weeks of consistent feeding. Always water plants before fertilizing to prevent root burn.
✂️ Step 4: Prune and Support for Optimal Growth
Prune suckers (the small shoots that grow between the main stem and branches) regularly to redirect energy to fruit production. Remove all suckers larger than 6 inches—they compete with your tomatoes for nutrients. I also prune lower leaves to improve airflow and reduce disease risk. Leave 3–4 main stems on indeterminate varieties for maximum yield.
Use stakes or cages to support vines as they grow. This prevents breakage and makes harvesting easier. You’ll see stronger, straighter stems and fewer broken branches when vines are properly supported. For heavy producers, tie stems to stakes with soft plant ties every 12–18 inches to prevent snapping in wind or rain.
🌿 Step 5: Monitor and Adjust for Pests/Diseases
Inspect plants weekly for signs of pests (like aphids or hornworms) or diseases (like powdery mildew). Remove affected leaves immediately and dispose of them in the trash—not the compost. I spray plants with neem oil or insecticidal soap at the first sign of trouble—it’s organic, effective, and won’t harm beneficial insects if used correctly.
Rotate crops annually to prevent soil-borne diseases from building up. If you notice yellowing leaves, it could signal nitrogen deficiency or overwatering. Adjust your watering or fertilization routine accordingly. Healthy tomatoes should have deep green leaves, strong stems, and abundant flowers—if you see anything less, troubleshoot quickly.
Tips & tricks for science-backed tomato growth
These practical strategies will help you maximize your tomato plants' potential without overcomplicating things.
Soil pH Precision: When adjusting pH with elemental sulfur, work it into the top 6 inches of soil at least 2 weeks before planting. This gives it time to react fully—rushing it can leave pockets of overly acidic soil that harm roots. I test again after 2 weeks to confirm the pH is in that perfect 6.2-6.8 range before planting. The difference in root development is dramatic when you get this right.
Watering Consistency Check: The "top 2-3 inches dry" test works best in the morning when soil moisture hasn't been affected by dew or overnight watering. For container-grown tomatoes, check soil moisture every 2-3 days since they dry out faster. I've found that adding a moisture meter (around $15) eliminates guesswork—it shows exactly when to water without overdoing it.
Fertilizer Timing Strategy: The switch from balanced fertilizer to low-nitrogen formula at flowering is crucial—this is when your plants need phosphorus most for root and fruit development. I make a habit of applying the low-nitrogen fertilizer right after I see the first flower clusters appear. You'll notice flowers lasting longer and setting fruit more consistently when you time this properly.
Pruning Visual Cues: When pruning suckers, look for the "V" shape where the sucker grows between the main stem and branch—this is where you want to pinch them off. For indeterminate varieties, I leave the top 3-4 main stems and prune everything else, which creates better airflow and prevents disease. The key is to prune regularly—don't let suckers grow beyond 6 inches or they'll start competing with your fruit production.
Pro Tips for Promote Tomato Growth
- These practical strategies will help you maximize your tomato plants' potential without overcomplicating things.
- Soil pH Precision: When adjusting pH with elemental sulfur, work it into the top 6 inches of soil at least 2 weeks be...
- Watering Consistency Check: The "top 2-3 inches dry" test works best in the morning when soil moisture hasn't been af...
Frequently asked questions
Got questions about growing juicy, productive tomatoes? You’re not alone! Here are answers to the most common concerns—from timing to troubleshooting—so you can cultivate a thriving tomato garden with confidence.
When is the best time to plant tomatoes for maximum growth?
Plant tomatoes after the last frost when soil temperatures reach at least 60°F (15°C). In most regions, this means late spring (April–June). For cooler climates, start seeds indoors 6–8 weeks before transplanting. Pro tip: Use row covers if night temps dip below 50°F (10°C) to extend the season!
How long does it take for tomatoes to grow from seed to harvest?
Count on 60–90 days from transplanting to harvest, depending on the variety (cherry tomatoes ripen faster; heirlooms take longer). Seed-to-table can stretch to 10–12 weeks if started indoors. Key factor: Warmth and consistent watering speed up fruiting!
Why are my tomato leaves turning yellow, and what can I fix?
Yellow leaves often signal overwatering, nutrient deficiency (like nitrogen), or fungal issues. Check soil moisture—tomatoes prefer 1–1.5 inches of water weekly. Amend soil with compost or use a balanced fertilizer (10-10-10). Prevent blight: Space plants for airflow and avoid wetting foliage.
Can I grow tomatoes in containers, and what’s the best setup?
Use 5-gallon containers or larger with drainage holes, filled with well-draining potting mix. Dwarf varieties (like ‘Tiny Tim’) thrive in pots, while larger types need at least 18 inches of depth. Add tomato cages or stakes early to support vines.
What’s the fastest way to boost tomato production on existing plants?
Prune suckers (shoots between stems) to redirect energy to fruit. Feed with:
- Fish emulsion (for nitrogen)
- Calcium (prevents blossom-end rot)
- Epsom salt (magnesium for green leaves)
Got a question not listed here?
Drop it in the comments—we’re happy to help! Whether it’s pest control, soil prep, or variety choices, your tomato-growing journey is our priority.
Wrapping up and next steps
Growing thriving tomato plants is all about understanding their needs—from soil health to sunlight and nutrients. By following these science-backed soil secrets, you’ll unlock the potential for bursting vines and bountiful harvests.
Whether you’re a beginner or a seasoned gardener, small tweaks like proper mulching, companion planting, and consistent care can make a huge difference!
Ready to see your tomatoes flourish? Start with one tip—like testing your soil or adding compost—and build from there. Your garden (and taste buds!) will thank you. 🌱✨