
Container Gardens
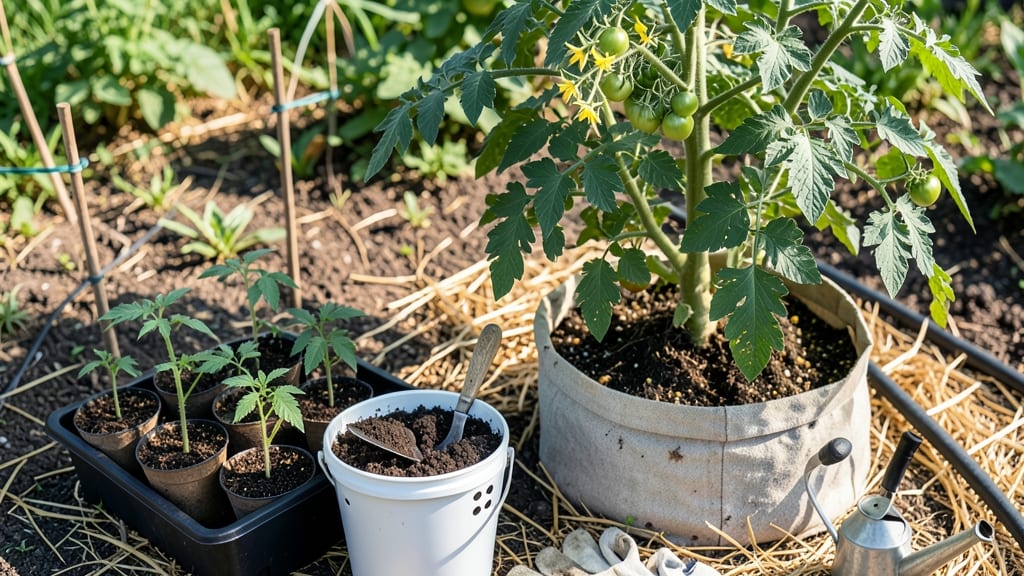
Planting tomato seeds in containers saves space while giving you control over soil, drainage, and sunlight—something my city balcony garden proved last summer. 🌱 The key is starting with the right container size (at least 5 gallons for determinate varieties, 10+ gallons for indeterminate) and a lightweight potting mix that drains well but holds moisture.
You’ll need seeds, containers with drainage holes, seed-starting mix, and a sunny spot (or grow light). The process takes about 6-8 weeks before transplanting, but the payoff is worth it: compact vines that produce just as many tomatoes as in-ground plants, with fewer pests and no weeding.
I’ve grown cherry tomatoes in 3-gallon pots and beefsteaks in 15-gallon fabric grow bags—both thrived with the same care. Once planted ¼ inch deep, keep the soil consistently moist (not soggy) and provide 6-8 hours of sunlight daily.
Thin seedlings to the strongest one per container, and watch for the first true leaves—signs your tomatoes are off to a strong start. The biggest mistake? Overwatering or using regular garden soil, which compacts and suffocates roots.
By midseason, your containers will be bursting with vibrant green foliage and the sweetest tomatoes you’ve ever tasted. The best part? No bending over all summer—just reach up and pick from your elevated garden. Ready to grow?
📚 In This Guide
- What you need
- Instructions
- Tips and common mistakes
- Wrapping up and next steps
What you need
- ● Container(s): At least 5-gallon pots (or larger) with drainage holes—one per tomato plant for dwarf varieties, or 10+ gallons for indeterminate types. Pro tip: Use fabric grow bags or self-watering pots for better root health! 💡
- ● High-quality potting mix: A sterile, well-draining blend (avoid garden soil). Look for labels with peat moss, perlite, or coconut coir—about 2-3 cubic feet per container.
- ● Tomato seeds: Choose determinate (bush) or indeterminate (vining) varieties suited for containers (e.g., 'Tiny Tim,' 'Patio,' or 'Balcony Red'). Start with 2-5 seeds per pot (thin later).
- ● Drainage material: Small rocks, pebbles, or pot shards (1-2 inches) to prevent clogging.
- ● Watering can or spray bottle: A gentle spray nozzle for seedlings to avoid disturbing soil.
- ● Plant labels: Markers or stakes to track varieties and planting dates.
- ● Trowel or small shovel: For transplanting seedlings (a 2-inch blade works well).
- ● Grow lights or sunny windowsill: If starting indoors, provide 12-16 hours of light daily (LED grow lights are ideal).
- ● Fertilizer: A balanced, water-soluble fertilizer (e.g., 10-10-10) or organic options like fish emulsion. Dilute to half-strength for seedlings.
- ● Support system: Cages, stakes, or trellises (for indeterminate varieties). Choose 5-6 feet tall to accommodate growth.
- ● Mulch: Straw or shredded leaves to retain moisture and suppress weeds.
- ● pH test kit: Ensures soil pH is 6.0-6.8 (tomatoes thrive in slightly acidic soil).
Step-by-Step guide to planting tomato seeds in containers
Here’s how to coax sturdy tomato seedlings from seeds using containers—perfect for patios or small spaces.
🌱 Step 1: Prepare Containers and Seed Starting Mix
Use 4-inch deep containers with drainage holes (I recommend biodegradable pots to avoid root disturbance later). Fill each with a sterile seed-starting mix—never garden soil, as it compacts and invites disease. Moisten the mix until it’s damp like a wrung-out sponge, but not soggy. Tap the container gently to settle the soil without compacting it.
Press the mix down lightly with your fingers to create a firm surface. This prevents seeds from sinking too deep, which delays germination. If using a seedling heat mat, place the containers on it now to maintain 75-85°F soil temperatures. Here’s the thing—tomato seeds germinate best in warmth, so don’t skip this if your home runs cooler.
🌱 Step 2: Sow Seeds at the Correct Depth and Spacing
Plant 2 seeds per container, spacing them ¼ inch apart and ¼ inch deep. Sowing too deep forces seedlings to struggle upward, wasting energy. Cover lightly with a thin layer of mix—just enough to obscure the seeds. Mist the surface with water until evenly damp, but avoid oversaturating.
Label each container immediately with the variety and date. I’ve learned the hard way that identical seedlings can look identical until they flower. Place the containers in a warm, dark spot (like a cabinet) until germination, which typically takes 5-10 days. Real talk: If you’re impatient, check daily but resist the urge to water again until you see sprouts.
☀️ Step 3: Provide Light and Prevent Leggy Growth
The moment seedlings emerge, move them to bright light—a south-facing window or grow light positioned 2-4 inches above. Without enough light, seedlings stretch toward the source (called "legginess"), and they’ll never recover. You’ll know light is sufficient when seedlings have thick stems and dark green leaves spaced closely together.
Rotate containers quarter-turn daily so plants grow straight, not lopsided. If using a grow light, raise it as seedlings grow to maintain the 2-4 inch gap. Here’s where it gets fun—watch for first true leaves (the second set after the initial cotyledons). Once these appear, reduce watering slightly to encourage stronger roots.
🪴 Step 4: Thin and Harden Off Seedlings
When seedlings reach 2 inches tall, thin to the strongest one per container by snipping the weaker at the base with scissors. This avoids disturbing roots. Fertilize lightly with a balanced liquid fertilizer (half-strength) to support growth. By 4-6 weeks, seedlings should have 3-4 true leaves and be ready for hardening off.
Start hardening off 2 weeks before last frost by placing containers outside in partial shade for 1-2 hours the first day. Gradually increase exposure over 10-14 days, ending with full sun. You’ll see leaves toughen and stems strengthen—this means they’re ready for the garden or larger pots. Don’t skip this step; unhardened seedlings wilt dramatically when transplanted.
⏰ Step 5: Transplant to Larger Containers or Garden
Transplant seedlings into 5-gallon containers (or larger) with well-draining potting mix. Dig a hole twice the width of the root ball, place the seedling in, and firm soil around it. Water deeply to settle roots. If planting outdoors, choose a spot with 6+ hours of sun and bury stems up to the first true leaves—this encourages stronger root growth.
Mulch with 1-2 inches of organic mulch to retain moisture and suppress weeds. Watch for new growth within a week—that’s your signal everything’s working. Here’s the key: Keep soil consistently moist but not waterlogged, especially during flowering. You’ll harvest your first tomatoes in 60-70 days from transplanting, depending on the variety.
Tips & tricks for planting tomato seeds in containers
Between us, these small details make all the difference when growing container tomatoes from seeds.
Soil Temperature Secret: That 75-85°F range in Step 1 is non-negotiable for germination. If your home stays cooler, invest in a seedling heat mat—it's the only way to guarantee consistent sprouting. I've seen seeds take twice as long to germinate when soil stays below 70°F, and some never make it. Place your containers directly on the heat mat once filled, and keep them there until you see sprouts.
Lighting Strategy: In Step 3, when you're positioning that grow light 2-4 inches above, think of it as a dynamic relationship. As seedlings grow, they'll reach for the light, so you must adjust the height daily. A good rule of thumb: The top of the tallest seedling should be just below the light bulb. This prevents leggy growth while ensuring strong stems. If you notice seedlings stretching toward one side, rotate them quarter-turn daily as instructed—but also consider moving the light to a different position each time to encourage even growth.
Thinning Technique: When thinning in Step 4, I've found that using clean, sharp scissors dipped in rubbing alcohol prevents disease transmission between plants. Snip at the base rather than pulling—this minimizes root disturbance. The key is patience: Wait until seedlings reach 2 inches tall before thinning. Younger seedlings are more fragile, and their roots are more easily damaged during the process.
Hardening Off Hack: For the 2-week hardening process in Step 4, I recommend creating a mini greenhouse effect during the first few days. Place a clear plastic dome or even a cut-off plastic bottle over each container to trap warmth and humidity. This mimics outdoor conditions while protecting tender seedlings. Gradually remove the cover as you increase exposure time, ending with full sun by day 14. This gradual transition gives your plants the best chance of surviving transplant shock.
Pro Tips for Plant Tomato Seeds In Containers
- Between us, these small details make all the difference when growing container tomatoes from seeds.
- Soil Temperature Secret: That 75-85°F range in Step 1 is non-negotiable for germination.
- Lighting Strategy: In Step 3, when you're positioning that grow light 2-4 inches above, think of it as a dynamic relationship.
Frequently asked questions
Got questions about growing tomatoes in containers? You’re not alone! Here are some of the most common queries—plus straightforward answers to help you grow like a pro.
What’s the best container size for tomato seeds?
For seedlings, a 4- to 6-inch pot works well. Once transplanted, opt for containers at least 12–18 inches deep and wide—tomatoes need room for roots and vines. Pro tip: Use self-watering containers to keep soil consistently moist without overwatering!
When is the best time to plant tomato seeds in containers?
Start seeds 6–8 weeks before your last frost date indoors. If direct-sowing, wait until soil is at least 55°F (13°C) and nighttime temps stay above 50°F (10°C). Pro tip: Use a heat mat for faster germination if your space is chilly!
Can I reuse containers from last year’s tomatoes?
Yes, but sterilize first! Scrub with soapy water, then disinfect with a 1:10 bleach-water mix (let dry). Avoid reusing containers with fungal residue or pests. Pro tip: Add fresh potting mix to refresh nutrients—tomatoes are heavy feeders!
Why are my container-grown tomato seedlings leggy or weak?
Leggy seedlings often mean too little light or overcrowding. Move them to a sunny window or grow light (12–16 hours/day) and thin seedlings to 1–2 inches apart. Pro tip: Bury stems deeper when transplanting to encourage root growth!
How often should I fertilize container tomatoes?
Feed every 2–3 weeks with a balanced fertilizer (10-10-10) or tomato-specific mix. Switch to low-nitrogen, high-phosphorus (5-10-10) when flowers appear. Pro tip: Use compost tea for organic nutrients—tomatoes love it!
Wrapping up and next steps
Growing tomatoes in containers is a rewarding way to enjoy fresh, homegrown produce—even with limited space! 🌱 By following these steps, you’ve learned how to nurture healthy seedlings, provide the right care, and troubleshoot common challenges.
Whether you’re a beginner or a seasoned gardener, your container-grown tomatoes are just weeks away from delicious harvests.
Now that you’re ready to plant, take the next step—watch your seedlings sprout and thrive! Start by choosing your favorite tomato variety (cherry, beefsteak, or heirloom?) and mark your calendar for transplanting. Happy gardening, and may your container garden be as bountiful as it is beautiful! 🍅✨