
Tools
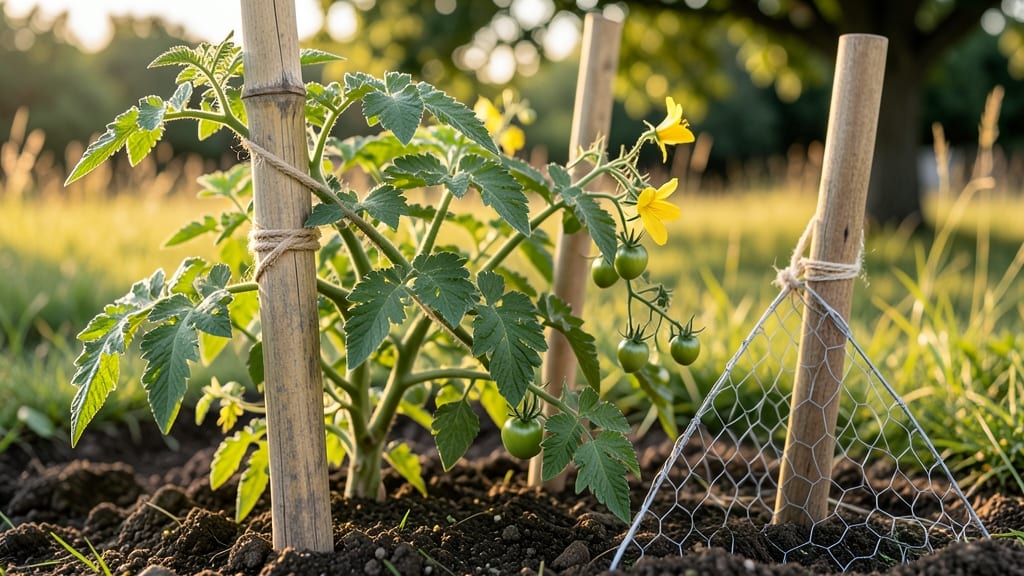
A cheap tomato trellis can transform your garden from a tangled mess to a structured, high-yielding vertical paradise. 🌱 I’ve tested everything from bamboo stakes to repurposed fencing, and these DIY designs work just as well as expensive store-bought ones—without the sticker shock.
The best part? They’re easy enough to build in under an hour, using materials you might already have lying around.
Tomatoes love climbing, but they hate sprawling—especially in small spaces. A sturdy trellis keeps fruit off the ground (fewer rot issues), improves airflow (fewer disease problems), and lets you grow more plants in the same footprint.
My favorite setup uses bamboo stakes and twine, but I’ll show you three other budget-friendly options that actually hold up through heavy harvests.
By the end, you’ll have a trellis that’s stronger than it looks, takes up zero extra garden real estate, and costs a fraction of what you’d pay at the nursery. Plus, the satisfaction of watching your tomatoes grow upward—instead of flopping—is worth every penny saved.
Whether you’re working with a balcony, raised bed, or backyard plot, these designs adapt easily. Let’s get growing!
📚 In This Guide
- What you need
- Instructions
- Tips and common mistakes
- Wrapping up and next steps
What you need
- ● Bamboo stakes or wooden dowels – 4-6 pieces, 3-4 feet long (cheap and biodegradable!)
- ● Twine, jute twine, or thin wire – 10-15 feet (for tying plants and securing stakes)
- ● Staple gun or strong zip ties – 1 pack (to attach twine to stakes if needed)
- ● Scissors or pruning shears – 1 pair (for trimming twine or stakes)
- ○ Optional but helpful: Garden twine dispenser – 1 (if you hate tangled twine!)
- ● Measuring tape or ruler – for precise stake spacing
- ● Hammer or mallet – if driving stakes into the ground
- ○ Gloves (optional) – to protect hands from splinters or rough twine
- ● Existing garden space or container – ensure it’s at least 2-3 feet wide for trellis setup
Step-by-Step instructions for building a $10 tomato trellis
Here's how to create a sturdy, space-saving tomato support using materials you already have.
🪴 Step 1: Gather Materials and Measure Your Space
For a 4-plant trellis, you'll need four 6-foot bamboo stakes (or sturdy wooden dowels) and 100 feet of twine or jute string. Measure your planting area—stakes should stand 18-24 inches apart in a square or rectangular pattern. I like to use bamboo because it's lightweight, affordable, and naturally resists rot better than cheap wooden stakes.
Check your garden's wind exposure—if you're in a breezy area, add a cross brace between the top two stakes for extra stability. You'll see this makes a noticeable difference when the first heavy fruit sets. Mark the planting spots with small flags or sticks so you don't lose your layout while digging.
✂️ Step 2: Assemble the Framework
Drive each stake 6 inches deep into the soil at your marked spots. For heavier tomato varieties like 'Big Beef' or 'Brandywine', I bury them 8 inches deep to prevent toppling. Use a mallet or hammer for even pressure—don't pound too hard or you'll crack the bamboo. Once all stakes are in place, tie them together at the top with your twine, creating a square or rectangular frame about 6 feet tall.
For the cross brace, measure diagonally between opposite stakes and cut your twine to that length, leaving 6 inches extra on each end. Tie it tightly at the midpoint of each stake. This simple addition prevents the trellis from collapsing under the weight of vining tomatoes. Test the structure by gently pushing on each stake—it should feel rock-solid.
🌱 Step 3: Create Vertical Support Strings
Cut four 6-foot lengths of twine for each plant. Tie one end of each string to the top corner of your trellis frame where the stakes meet. Space them evenly—about 12 inches apart for indeterminate varieties that grow vigorously. For determinate tomatoes that stay compact, you can space them 18 inches apart to save twine.
Run each string down the stake, tying it every 12 inches with loose knots. Leave enough slack between ties so the string can stretch slightly as the plant grows. I use a simple square knot for each tie—it's strong enough but easy to adjust later. The goal is to create a ladder-like structure that guides the main stem upward while allowing side shoots to attach naturally.
☀️ Step 4: Train Tomato Vines as They Grow
When your tomato plants reach 12 inches tall, gently tie the main stem to the bottom support string using a soft strip of old cloth or a piece of twine. Avoid using wire or anything that can cut into the stem. As the plant grows, continue tying it to each successive string—never let more than 6 inches of vine hang free between ties. This prevents the stem from snapping under fruit weight.
Watch for side shoots (the small stems that form in the leaf axils). For indeterminate varieties, pinch these off to encourage upward growth. For determinate tomatoes, let 1-2 side shoots develop to create a bushier plant. You'll see the difference in fruit production within weeks—proper pruning means more energy goes to flowers and fruit instead of unnecessary foliage.
💧 Step 5: Maintain and Reinforce Through the Season
Check your trellis weekly for loose ties or sagging strings. Tomatoes produce a lot of weight—a single large fruit can pull a vine down if not properly supported. If you notice a stake leaning, dig a small trench around its base and pack in extra soil to stabilize it. For extra security in windy areas, add a second cross brace halfway up the trellis.
By late summer, you might need to add more support strings if your plants have grown taller than expected. Simply tie new strings to the existing frame and weave them into the plant's growth. The key is to work with the plant's natural growth pattern—never force vines to grow in unnatural positions. With this system, you'll maximize vertical space while keeping your tomatoes off the ground, reducing disease risk and making harvesting a breeze.
Tips & tricks for building a sturdy tomato trellis
These practical insights will help you create a trellis that lasts all season without breaking the bank.
Material Selection: Bamboo stakes are my go-to because they're lightweight yet strong, but if you're using wooden dowels, soak them in water for 30 minutes before planting to prevent splitting when driven into the ground. This simple prep step makes a noticeable difference in durability—especially in heavier soil. For extra stability in windy areas, consider using 2x2-inch wooden stakes instead of bamboo, though they'll cost slightly more.
Framework Stability: When assembling your 6-foot frame in Step 2, don't skip the cross brace—it's the secret to preventing collapse under heavy tomato loads. I've seen trellises without cross braces sag dramatically after just a few large fruit set. For maximum stability, tie the cross brace at two points along each stake (top and midpoint) rather than just one. This creates a triangular support system that's nearly unbreakable.
Tie-Down Technique: The 12-inch spacing between vertical strings in Step 3 is perfect for indeterminate varieties, but for heirloom tomatoes with particularly vigorous growth, reduce this to 10 inches to prevent the main stem from overreaching between supports. Use old T-shirts or fabric strips instead of twine for tying vines—they're gentler on plant stems and won't cut into them as they grow. This small change makes harvesting much easier later in the season.
Season-Long Maintenance: That weekly check in Step 5 is non-negotiable—especially after heavy rains. Wet twine loses about 30% of its tensile strength, so if you notice sagging, retie the strings immediately. For long-term durability, coat your twine with a thin layer of beeswax before using it. This waterproofing trick extends the life of your strings by months and makes them easier to work with when wet.
Pro Tips for Cheap Tomato Trellis
- These practical insights will help you create a trellis that lasts all season without breaking the bank.
- This simple prep step makes a noticeable difference in durability—especially in heavier soil.
- Framework Stability: When assembling your 6-foot frame in Step 2, don't skip the cross brace—it's the secret to preventing collapse under heavy tomato loads.
Frequently asked questions
Got questions about building a cheap tomato trellis? You’re not alone! Here are answers to the most common queries to help you grow like a pro—without breaking the bank.
What’s the best material for a budget-friendly trellis?
Sticks, bamboo stakes, or even repurposed wire fencing are all great options! Avoid treated wood (chemicals can harm plants) and opt for natural, sturdy materials like willow branches or PVC pipes (cut into sections). For extra durability, twist or weave materials together for strength.
When should I install a trellis for tomatoes?
Set up your trellis as soon as seedlings are 6–8 inches tall (or when transplanting). Early support prevents stem damage as vines grow. If using a cage-style trellis, install it at planting time. Pro tip: Bury stakes 6–8 inches deep for stability!
Can I reuse materials from last year?
Clean and disinfect old trellises (soak in a 1:10 bleach-water solution) to kill pests or diseases. Bamboo, sticks, or metal cages can last multiple seasons. Just check for rust, rot, or weak spots before reuse.
What if my tomatoes aren’t climbing?
Try these fixes:
- Prune aggressively: Pinch off suckers (side shoots) to redirect energy upward.
- Tie vines gently: Use soft twine or fabric strips to guide growth (avoid wire—it can cut stems).
- Check sunlight: Tomatoes need 6–8 hours of sun daily. Move the trellis to a sunnier spot if needed.
What’s a quick alternative if I don’t have time to DIY?
No problem! Use:
- Store-bought tomato cages ($5–$10 at garden centers).
- Florist’s oasis foam wrapped around a stake (soak in water to secure vines).
- Hanging window boxes or wall-mounted pockets for vertical growth in small spaces.
Even a simple string between two posts works in a pinch!
Wrapping up and next steps
Building a cheap tomato trellis doesn’t have to break the bank—or your back! With just a few dollars and some creativity, you can transform your garden into a thriving, space-saving paradise. Whether you’re a seasoned gardener or a beginner, this DIY project proves that great results don’t require expensive tools.
Ready to get growing? Grab your materials and start trellising—your tomatoes (and wallet) will thank you! 🌱 For even more garden hacks, check out our guide on maximizing small-space gardening next.