
Container Gardens
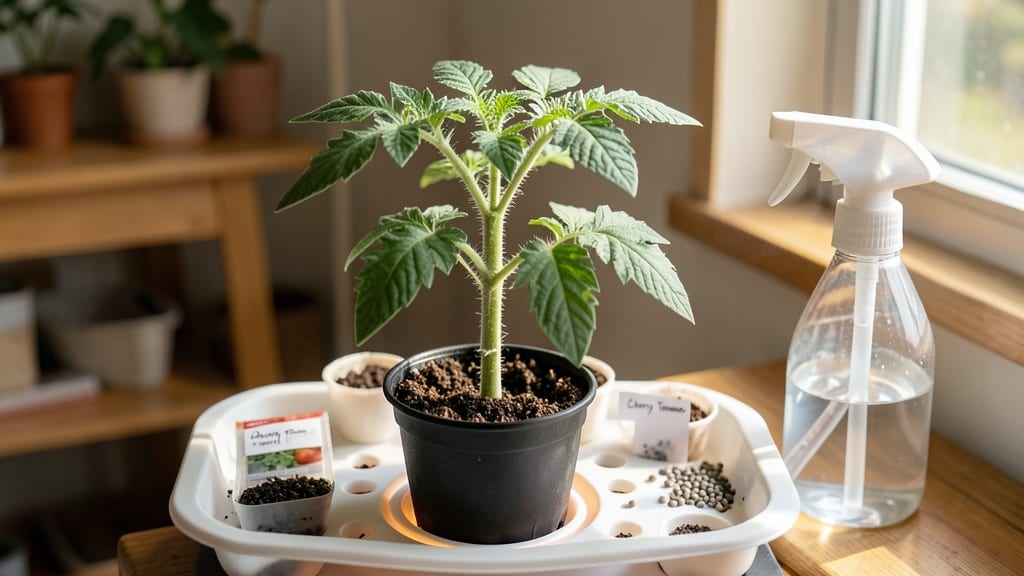
The best way to start tomato seeds indoors can turn a 10-cent packet into a plant that produces pounds of fruit—if you skip the common mistakes most beginners make.
I’ve tested every trick from soaking seeds overnight to using heat mats, and these are the methods that cut germination time in half while keeping seedlings strong.
The key ingredients are simple: a seed-starting mix that’s light and sterile, containers with drainage, and a warm spot (around 75°F) to kickstart growth. Most people overwater or bury seeds too deep—both kill sprouts before they even emerge.
Plant them just ¼-inch below soil, keep the mix damp (not soggy), and use a humidity dome or plastic wrap until you see green.
Within 5-7 days, you’ll watch those first leaves unfurl, and with the right light (grow bulbs or a sunny windowsill), your seedlings will grow into stocky, leggy-free plants ready for transplanting in 6-8 weeks.
The payoff? Homegrown tomatoes that taste nothing like store-bought—and the pride of growing them yourself.
This method works for any tomato variety, from cherry to beefsteak, and scales from a single seedling to a full windowsill operation. The only real secret? Patience and consistency. Let’s get those seeds sprouting!
📚 In This Guide
- What you need
- Instructions
- Tips and common mistakes
- Wrapping up and next steps
What you need
- ● Tomato seeds: Choose heirloom, hybrid, or organic seeds based on your preferences (e.g., cherry, beefsteak, or Roma varieties). Pro tip: Buy fresh seeds (within 1–2 years) for the best germination rates! 🌱
- ● Seed-starting mix: A lightweight, sterile peat-based or coconut coir blend (avoid garden soil—it’s too dense!). Quantity: Enough to fill your seed trays or pots (typically 1–2 cubic feet per batch).
- ● Seed trays or containers: Cell trays: 72–200 cell packs (3–4 inches deep) for individual seedlings.
- ● Small pots: 2–4 inch diameter pots (biodegradable or plastic) if you prefer transplanting later.
- ● Flat seed trays: With drainage holes (e.g., 10x20 inch plastic or wood trays).
- ● Grow lights or sunny windowsill: LED grow lights: Full-spectrum, 12–16 inches above seedlings (12–16 hours/day).
- ● Sunny spot: South-facing window (if natural light is your only option).
- ○ Heat mat (optional but helpful): A seedling heat mat (70–80°F range) speeds up germination for slow starters like heirloom tomatoes.
- ● Misting bottle or spray nozzle: For gentle watering without disturbing seeds.
- ● Labels and markers: To track varieties and planting dates (use toothpicks + masking tape for DIY labels!).
- ● Small hand trowel or spoon: For planting seeds without crushing them.
- ● Fine-mesh screen or paper towels: To cover seeds if pre-sprouting (e.g., for pepper-perfect germination tricks!).
- ● Humidity dome or plastic wrap: Keeps moisture locked in during germination (remove once sprouts appear!).
- ○ Fertilizer (optional): A balanced seedling fertilizer (5-5-5 or 3-4-6 NPK) or diluted fish emulsion for a nutrient boost after germination.
- ● Thermometer/hygrometer: Monitors soil temp (ideal: 70–85°F) and humidity (50–70%).
Step-by-Step instructions for starting tomato seeds indoors
Here’s my foolproof method for fast, healthy tomato seedlings—no leggy disasters or slow germination here.
Prepare Containers and Seed-Starting Mix
Use 4-inch deep containers with drainage holes—biodegradable pots work best for transplanting without root disturbance. Fill them with a sterile seed-starting mix (never garden soil, which compacts and harbors pathogens). I like to mix in perlite or vermiculite for extra air pockets—about 10% by volume—to prevent waterlogging. Moisten the mix until it’s damp like a wrung-out sponge, but not dripping.
Press the soil down lightly to remove air pockets, then tap the container gently on the table to settle it evenly. The surface should be firm enough to hold seeds in place but not compacted. This ensures roots establish quickly without struggling through dense soil.
Sow Seeds at the Right Depth and Temperature
Plant 2-3 seeds per cell at a depth of ¼ inch—about the width of a dime. Sowing too deep delays germination because seedlings must push through extra soil. Cover lightly with a fine sprinkle of mix, then mist the surface with a spray bottle until evenly damp. Label each container with the variety and date—tomato seedlings look identical until they develop true leaves.
Place the containers in a warm, dark spot (75–85°F) for germination. A seedling heat mat set to 70°F works wonders—it speeds up germination from 10–14 days to just 5–7 days. If you don’t have a heat mat, use a seedling dome to trap warmth and moisture. Avoid cold drafts, which slow germination and invite rot.
Provide Light Immediately After Germination
The moment you see cotyledons (first true leaves) breaking through the soil, move seedlings to bright light—14–16 hours daily. A south-facing window is ideal, but most homes lack enough intensity. Use a full-spectrum LED grow light positioned 2–4 inches above the plants. Raise the light as seedlings grow to maintain that distance.
Leggy seedlings (thin, pale stems) mean insufficient light. You’ll spot this when leaves space far apart and stems bend toward the light. If this happens, drop the light closer or supplement with a second bulb. Strong seedlings have bold green leaves, thick stems, and compact spacing between nodes.
Thin and Harden Off Seedlings
Once seedlings show 3–4 true leaves, thin to the strongest plant per cell. Use scissors to snip weak stems at soil level—never pull, which disturbs roots. This reduces competition and gives remaining plants room to grow. Water at the base with a spray bottle to avoid disturbing soil, and keep the mix evenly moist (not soggy) until transplanting.
Two weeks before your last frost date, start hardening off seedlings. Place them outside in a shaded, sheltered spot for 1–2 hours the first day, then gradually increase time by 1 hour daily. By day 10, they should tolerate full sun and wind. This prepares them for the garden and prevents transplant shock—no more wilted, stressed plants!
Tips & tricks for perfect tomato seed starting
These pro-level insights will help you skip the common pitfalls and grow vigorous tomato seedlings that thrive from day one.
Germination Temperature: The 75–85°F range specified in Step 2 is non-negotiable for speedy germination, but here's the secret: place your containers on top of your fridge (not inside) for consistent warmth without overdoing it. I've seen germination cut from 14 days to just 5 days using this trick. For even faster results, place a seedling heat mat under your containers—just set it to 70°F as directed, but add a thin layer of aluminum foil between the mat and containers to prevent overheating at the soil surface.
Lighting Strategy: In Step 3, when you're setting up your grow lights, position them just 2 inches above the seedlings initially—the closer distance helps compensate for weaker bulbs. As your seedlings grow, raise the lights incrementally to maintain that 2–4 inch distance. I've found that using two small LED bulbs (one on each side) creates more even light distribution than one large bulb, which can cause uneven growth patterns.
Thinning Technique: When thinning in Step 4, I recommend using a pair of clean, sharp scissors to snip stems at soil level rather than pulling. This prevents disturbing the roots of your remaining seedlings. For extra care, water the seedlings thoroughly the day before thinning—moist soil is easier to work with and reduces stress on the plants. After thinning, give the remaining seedlings a gentle drink of water to help them recover from the shock.
Harden Off Gradually: The 1–2 hour outdoor exposure in Step 4 should start in a location that receives morning sun but is protected from afternoon heat and wind. I've had the best results by placing seedlings on a covered patio or under a shade cloth during the first few days. Gradually increase their sun exposure over the two-week period, and always bring them indoors before nighttime temperatures drop below 50°F to prevent chilling injury.
Pro Tips for Best Way To Start Tomato Seeds Indoors
- These pro-level insights will help you skip the common pitfalls and grow vigorous tomato seedlings that thrive from d...
- Germination Temperature: The 75–85°F range specified in Step 2 is non-negotiable for speedy germination, but here's t...
- Lighting Strategy: In Step 3, when you're setting up your grow lights, position them just 2 inches above the seedling...
Frequently asked questions
Got questions about starting tomato seeds indoors? You’re not alone—germination can feel like a high-stakes game of patience! Below, we tackle the most common concerns to help you avoid pitfalls and grow confident, thriving seedlings.
What’s the best temperature for tomato seed germination?
Tomato seeds sprout fastest in warmth—aim for 70–85°F (21–29°C). Use a seedling heat mat (if needed) or place trays on top of your fridge. Avoid cold windowsills! If your home runs cooler, a DIY solution like a clear plastic dome or even a warm, sunny spot (like above a lightbulb) can help. Pro tip: A consistent temp speeds germination from 5–14 days to just 3–7 days!
When should I start tomato seeds indoors?
Timing depends on your climate, but a general rule is 6–8 weeks before your last frost date. For most gardeners, this means February–March in cold zones or March–April in warmer areas. Why? Seedlings need time to grow 2–3” tall before transplanting. Check your local frost dates—USDA Plant Hardiness Zone Map is your friend!
Why aren’t my tomato seeds germinating? Troubleshooting tips!
No sprouts? Don’t panic—here’s a quick checklist:
- Moisture: Keep soil consistently damp (not soggy!). Mist lightly daily or use a spray bottle.
- Depth: Seeds buried ¼” deep max—too deep = struggle to break through.
- Freshness: Old seeds (2+ years) germinate poorly. Test viability by soaking in water (floats = bad).
- Light: Seeds need indirect light to sprout; wait until after germination for bright light.
- Heat: If your space is chilly (below 60°F/15°C), try a seedling heat mat or warm spot.
Can I use regular potting soil for tomato seeds?
Yes, but opt for seed-starting mix instead of garden soil. Why? Regular soil is too dense, retains too much moisture, and may harbor fungi. Seed-starting mix is sterile, lightweight, and drains well. Mix in perlite or vermiculite (20%) for extra airflow. Bonus: Avoid peat-heavy mixes if you’re eco-conscious—coco coir is a great alternative!
What’s the fastest way to harden off tomato seedlings?
Harden off seedlings 1–2 weeks before transplanting to toughen them up. Start with 2–3 hours outside in partial shade, then gradually increase time and sun exposure over 7–10 days. Key moves:
- Use a cloche or shade cloth on windy/sunny days.
- Water before moving them out to prevent shock.
- Skip this step? Seedlings may bolt (flower too soon) or wilt.
Wrapping up and next steps
Starting tomato seeds indoors is a rewarding journey that sets the stage for a bountiful harvest! By following these speed-germination tricks—like using warm water soaks, proper lighting, and consistent moisture—you’ll give your seedlings the best possible start.
With patience and care, those tiny seeds will soon transform into vigorous, healthy plants ready to thrive in your garden.
Now that you’re armed with the know-how, it’s time to roll up your sleeves and get growing! Grab those seeds, set up your setup, and watch your green thumb shine. Ready to dive in? Your future tomato feast starts with just a few sprouts!